header image

Blog

Natural Stain Remover’s


There are so many hidden chemicals in today’s products. Chemicals, unbeknownst to us, that can cause eczema, hives, contact dermatitis etc. If you’d like to switch to some natural products, here are a few to try:

White Vinegar

You can use white vinegar for so many things – cleaning, softener for your clothes and as a stain remover. Mixing white vinegar with dish detergent is a great remedy for removing greasy stains.

Boiling Water

Fruit stains, like berries, are particularly hard to get out of clothes. Household Management 101 claims if you pour boiling water directly on the stain it allows it to penetrate the fabric and effectively remove fruit stains.  They also recommend submerging the stain in a bowl of white vinegar for about an hour after you’ve poured the boiling water on the stain.  If parts of the stain remain, they say to use whitening toothpaste on the remaining stain and rinse well.

 Baking Soda

Baking soda is another product that most of us have in the pantry already. It’s an excellent natural stain remover  for many different types of stains.

Sprinkle some of on a wet stain and let it sit for about half an hour before washing. It’s really that simple.

Hydrogen Peroxide

Hydrogen peroxide is a nontoxic chemical that can be used in so many ways and is affordable.

For sweat soaked, dirt stains – soak the stain in water mixed with hydrogen peroxide (50/50) for an hour and then add some hydrogen peroxide to the wash water.  Be sure to test the fabric before washing!

Denatured Alcohol

Denatured alcohol is also a great stain remover. Use a small amount with hot water to remove stains caused by grass or paint.

Read More 6 Ways to Cut Down Energy Costs In The Summer

Laundry Guide: Washing

Sort your clothes by checking the care labels. Washing symbols can be difficult to decipher but you can usually find the correct wash temperature (check out our blog The Mystery of Laundry Symbols). The machine wash symbol often looks like a tub of water, if there’s a cross through it, it can’t be machine washed.

Separate whites and dark’s so colors don’t bleed on to the whites.

If you’re using a Tide Pod, or one of the other “pod” detergents, toss it into the drum first. The detergent will properly dissolve during the wash cycle. For small and medium loads use only one pod, for large loads use two pods. When using liquid detergent pour it into the dosing cap. Fill until line 1 for medium loads, line 3 for large loads, and line 5 for HE full loads. For powder detergent, fill the drum until line 1 for medium loads, line 3 for large loads, and line 5 for HE full loads.

Fill the machine with your clothes. Don’t overload the drum – 3/4 full is about right.

Choose a water temperature that’s right for your laundry load. Select a wash cycle.  Start the machine.

Read More 6 Ways to Cut Down Energy Costs In The Summer

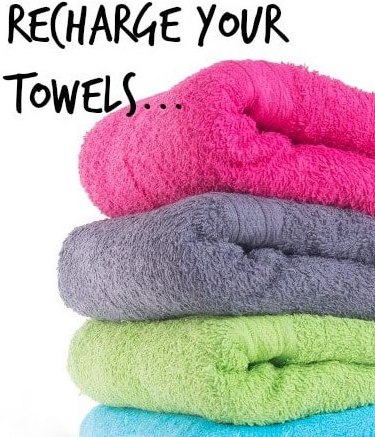
Time To Recharge Your Towels


Every so often you grab a towel out of the linen closet and notice it’s lost its fresh smell and softness.  Let’s face it – no one wants to dry off with a scratchy, musty towel. Here are some steps that will help bring smell good, fluffy towels back.

1) Wash your towels with hot water and 1 cup of white vinegar only.

2) Re-wash a second time with 1/2 a cup of baking soda and hot water only.

3) Dry your towels on the hottest setting until completely dry.

If the odor and scratchiness continues, repeat the steps again only this time use 2 cups of vinegar.  If at all possible let the towels soak in the hot water and vinegar for an hour before continuing.

Vinegar  is known for  removing soap and fabric softener build-up. Fabric softener coats your towels with oils. Vinegar will remove the build-up, while acting as a fabric softener. Baking soda does the same thing as vinegar.

WARNING!

Do not mix vinegar and baking soda together.  Be sure to wash in two separate loads.  They will cause a chemical reaction when mixed together!

Read More 6 Ways to Cut Down Energy Costs In The Summer

Quick and Easy Way to Fold a Fitted Sheet

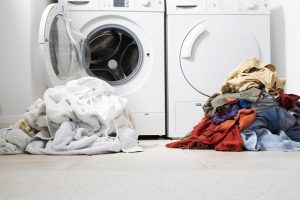
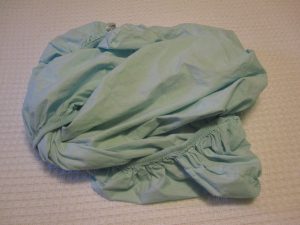
Have you ever heard the joke “If you can fold a fitted sheet, you must be a witch”?  If you’re like me, folding fitted sheets is not your favorite thing to do. I would always start out optimistic, but after a couple of attempts, I was left aggravated and looking at a wrinkled, rolled up mess. BUT!  I found a video tutorial, and after a little practice, I can fold a fitted sheet and be proud to open my linen closet! They no longer look like this…..

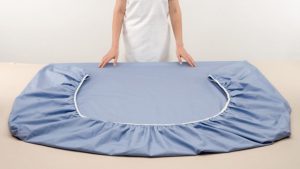
Here are the steps and video to follow:

Step 1: Place hands in the corners of the length side of the fitted sheet

Step 2: Fold sheet in half horizontally, tucking the fitted top corners into the fitted bottom corners

Step 3: Fold the sheet lengthwise so all four fitted corners are on top of one another

Step 4: Grab the last corner and tuck into the pocket you’ve created

Step 5: Fold the sheet in half again, and fold over the smooth end to finish

Video:   https://vimeo.com/139982441


Read More 6 Ways to Cut Down Energy Costs In The Summer

How to Properly Clean a Mattress

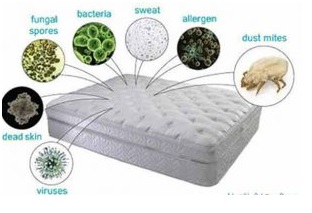
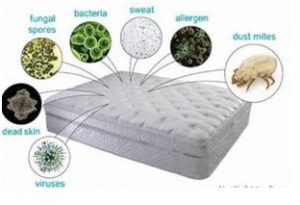
Dust, mold, mildew, body sweat, fungal spores, allergens – all make mattresses the ideal breeding ground for bacteria and dust mites.  If you’re as grossed out as I am by this, keep reading and learn how to clean your mattress for a better, cleaner sleep.

Vacuum It

Vacuum your mattress every month or so or as often as every time you change the sheets, if you or family members have severe allergies. Run the vacuum very slowly over the mattress, so it has time to inhale the dust and dust mites. Break out the crevice tool for the edges and crevices.

Treat Stains

Treat any stain immediately. The longer liquids sit in a mattress, the likelier you are to foster mold and mildew growth.

This may sound crazy, but use foaming shaving cream for mattress cleaning, in part because of its thickness. Liquids will soak right through a mattress, not allowing adequate time to dissolve the stain. Foaming shaving cream contains denatured alcohol, which is a stain remover, and it’s thick, so it sits on the surface to work on the stain. Wait 10 to 15 minutes, wipe with a damp cloth, and rinse with a 50/50 vinegar/water solution. Repeat if necessary.

Other helpful solutions for common mattress stains:

  • Blood: A 50/50 hydrogen peroxide/water solution.
  • Urine, fecal matter, or vomit: An enzyme cleaner, such as Bac-Out by BioClean, or Nature’s Miracle, available at pet stores.

Freshen Fast

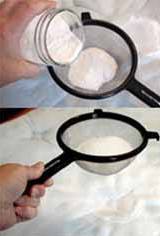
Use a mixture of cornstarch and baking soda to remove smells.  Place in a colander and just shake the mixture on to the mattress, let it sit for a few hours or longer, then vacuum. The cornstarch will absorb body oils, while the baking soda will work on smelly odors.

Sheet Strategy
Don’t put new sheets on until evening. This will allow the mattress to air all day discouraging dust mites and bacterial growth.

Pad It
Remember, mattress pads aren’t just for comfort. They keep your mattress cleaner, too.  Wash monthly in hot water, and machine dry thoroughly, unless the tag instructs otherwise.

Read More 6 Ways to Cut Down Energy Costs In The Summer

How to Avoid Ironing

I DO NOT like to iron! I want to pick out an outfit, put it on, and then be on my way.  I do not want to pick out an outfit, get the iron and ironing board out, and then iron it. It takes more time out of my schedule if I have to iron, and if you’re in a rush, it can be stressful! Here are a few of my ”tried and true” tips to help you out.

Be sure to dry permanent press clothing in a gentle/low heat dryer, not HOT!  Hot will only make a wrinkled mess and can melt the fabric. If you forget your clothes and don’t pull them out of the dryer in time, and they happened to get wrinkled, all you have to do is place a damp bath towel in with your clothes on gentle/low heat and dry for a few more minutes. Be sure to take them out just before or as soon as they are dry and lay flat or hang on a hanger.

After you’ve washed and dried your clothes, remove them immediately from the dryer. Then with a little spray bottle filled with water, spray the collar, button holes, and the sleeve edges. Then quickly “Finger Press” those focal points to be smooth and flat so they are no longer folded, curled, or crinkly. This easy finishing touch makes a big difference for permanent press shirts to look so much nicer….and it’s easy! No Iron involved!

If you do end up needing to get the dreaded iron out, then try to iron your clothes with a damp cloth. Place the damp cloth on top of the garment and iron. This will steam the fabric and it won’t be too hot. Try a small spot first to see if this will work on the fabric. Remember, too hot of a dryer or iron on permanent press fabric can melt it.

Read More 6 Ways to Cut Down Energy Costs In The Summer

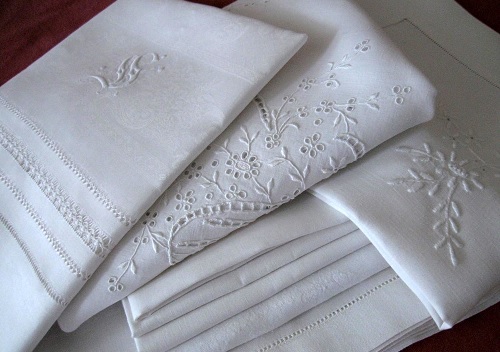
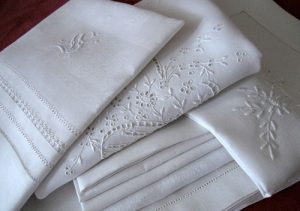
How to Wash Antique Linens

Some of us are fortunate enough to inherit a little piece of our family history. If we’re lucky, these items will be in good condition, but that’s not always the case. Some items may have dry rot, mouse nibbles and/or rust. You won’t be able to save these things if the fibers are already compromised. If you tug on two sides of a garment and it comes apart without much effort, your item has dry rot and has reached the end. Sometimes, you just have to let go, there’s no way to save it.

To start, here are a few items you should have on hand:
White Vinegar
Rust Remover
Restoration – (Oxyclean is similar, more widely available and slightly less expensive than Restoration, but it doesn’t work as well.)
Bleach pen
Laundry detergent (simple soap, nothing added)

***PLEASE NOTE THAT I DO NOT GUARANTEE ANY METHOD THAT YOU CHOOSE TO TRY. IT ALL DEPENDS ON THE CONDITION OF THE GARMENT.***

“Restoration” and white vinegar are preferred products. Read the label and use common sense. You may only need to use “Restoration” for your initial laundering to remove storage dirt. You can also use “Restoration” in the washing machine with your laundry, too. It removes odors, age spots, storage stains, label stains and often, some rust. If it doesn’t remove the rust, try using “Whink Rust & Stain Remover.” Be aware that if rust has already eaten away the fibers that you may be left with a hole where the rust had been after cleaning with rust/stain remover.

Use “Restoration” first and, if stains remain after two or three sessions with it, put the dampened piece outside in bright sunshine for a day. This is often a magical solution. Horrible stains will usually disappear within an hour. This is the least invasive method. It is effective and it’s free – it also sanitizes. However, sunlight does bleach and weaken fibers over time. Sunlight is destructive so I am not suggesting that you constantly subject your fragile items to sunlight. This method, used once or twice on a piece that would otherwise need to be thrown away, can be very helpful. If the stains persist, you may need to resort to using bleach with laundry detergent. I like to have a bleach pen on hand because it allows me to pinpoint where I apply the bleach. After using bleach, always rinse with white vinegar, then rinse again with clear water.

Step 1. Use hot water with “Restoration” until the water turns clear. (approx. 4- 6 hours or overnight) If the water is not clear after overnight soak, repeat this step. Extremely filthy items may require several soakings.

Step 2. Drain and refill container with water; add white vinegar (a splash or a cup, depending on container size); swish around and soak for 10-20 minutes.

Step 3. Drain and refill with lots of clear water; swish around and soak for 15 minutes. Done!

If stains remain, repeat entire process.
If there is rust, use rust remover on wet fabric, then repeat from Step 2.

If stains remain, lay wet/damp item outdoors in sunshine.

If stains remain, soak with laundry detergent and small amount of bleach. Or use a bleach pen on small stains. It is better to soak longer using very little bleach.

IMPORTANT!
DO NOT mix chemical treatments. Pre-rinse items that may have bleach or detergent residue with vinegar to neutralize the bleach and then rinse twice in clear water before trying another treatment. DO NOT bleach anything after using Oxyclean or peroxide or any other chemical treatment. Your items may turn permanently blue, or worse Rinse really well before trying any other product.


Read More 6 Ways to Cut Down Energy Costs In The Summer

Removing Muddy Water Stains and Mildew Odors

In light of the recent flooding in Oklahoma,  I’ve decided to post  with some helpful tips to help get rid of mildew odor and mud stains that have most likely affected many of you.

Mildew Odors

Washing your belongings a few times on a normal setting may get rid of the odor, but if that isn’t enough to combat the mildew smell, we’ve found a way to get your belongings back in shape and get that unpleasant smell out quickly. Here is how:

  1. Place your smelly belongings in the washing machine and fill with the hottest water possible. Add in 2 cups of white vinegar. Do not add any other products (detergent, softener etc.). This will allow the vinegar to penetrate the material without interference.  Run a full cycle.
  2. If the odor persist, repeat step 1, only this time use baking soda instead of vinegar. Run a full cycle once again.
  3. Dry until they are fully dry.

Muddy Water Stains

  1. Using the same method as above with vinegar works, but in case you don’t like the smell, you can always use a color-safe bleach and the warmest water your belongings will allow.
  2. Baking soda will also work.  Add approximately a 1/4 – 1/2 cup of baking soda to your load of laundry along with your favorite laundry detergent. Do not add any softener, this will allow the baking soda to penetrate the garments. Wash on the hottest setting your clothes/belongings will allow.
  3. If possible hang them out to dry to make sure all of the stains have been removed.  When hanging them out to dry isn’t an option, inspect them carefully before drying.  If needed, wash them again.
  4. Once all evidence of the stains are removed, dry them according to the label recommendations.

Read More 6 Ways to Cut Down Energy Costs In The Summer

Keep Your Clothes Lasting Longer

We’ve all done our share of laundry, but some of us have figured out a way to perfect it. Here are some of my favorite tips to keeping your clothes looking great and lasting longer.

Step One: Wait Before You Wash

Wear your clothing more than once. I know this might make some of you say “Gross!” but it’s really not.  You know if something needs to be washed.  If it reeks to high heaven – it needs to be washed, but over the course of an average day, clean people don’t get that smelly. Of course it depends on the activity you do during the day as well. Wearing your clothes at least twice before laundering them can save you a bundle on water and electric bills over the course of a year and save your clothes from wearing out before their time.

(Side note….I’m not talking about underwear & socks.  They need to be changed daily.)

Step Two: Divide and Conquer

Admit it, most of you will stuff everything in the washer to make one load. I get it, you want to save time and money, but this is hard on your clothes and they probably aren’t getting as clean as you think they are.  I sort laundry by “lights” and “darks”, which seems to be the traditional way of doing laundry.  Sorting clothes allows you to use different wash cycles (delicate vs. normal) and also allows for washing in different temperatures.

Most importantly, sorting clothes decreases the chances that a garment is going to bleed onto another when you control the cycle type and water temperature.

Step Three: Chose the Correct Wash Cycle & Water Temperature

Take a minute to read the labels on your clothing. You’ll find the information you need to choose both your water temperature and the type of washing cycle. Following the recommendations on the label is especially important if you are new to doing your own laundry or if the garment is new.

Read More 6 Ways to Cut Down Energy Costs In The Summer

How To Properly Wash Your Kids Stuffed Toys

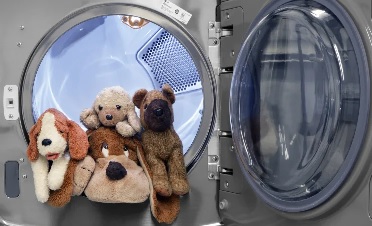
Did you know it’s perfectly safe to throw most stuffed toys in the washing machine? On gentle cycle using warm or cold water, a washing machine will get your stuffed animals clean without ruining them.

Most care labels instruct to hand wash, but after raising two kids and needing to deep clean their beloved friends, I tried machine washing.  Set the washing machine  to the delicate cycle, apply  some Spray N’ Wash, Mean Green, or your choice of stain remover if needed,  scrub a little, and wash. Afterwards hang them up to dry. I learned the hard way that throwing them in the dryer can melt the fake fur on some of them.  Poor Simba from the Lion King had a melted mane!

SOME THINGS TO CONSIDER WHEN DECIDING IF YOUR STUFFED ANIMALS CAN BE WASHED IN THE WASHING MACHINE:

  • The care label – if it can be hand washed, it can likely withstand the delicate cycle in the washing machine. Your washing machine may even have a hand wash cycle.
  • Material – Take notice of the care label and use your sense of touch as well as sight to thoroughly examine all parts of the stuffed animal to be washed. Polyester and acetate (a form of cotton) are fine to wash. The stuffed animals I washed have plastic pellets and were fine, but you wouldn’t want to machine wash something with foam balls such as Beanie Babies. Be cautious of delicate clothing items and things that are glued on, they may not survive!
  • Age – The older it is, the more fragile it will be!

Read More 6 Ways to Cut Down Energy Costs In The Summer
bottom Gears Mobile bottom Gears