header image

Blog

How To Remove Make-Up From Clothes

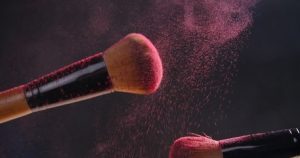
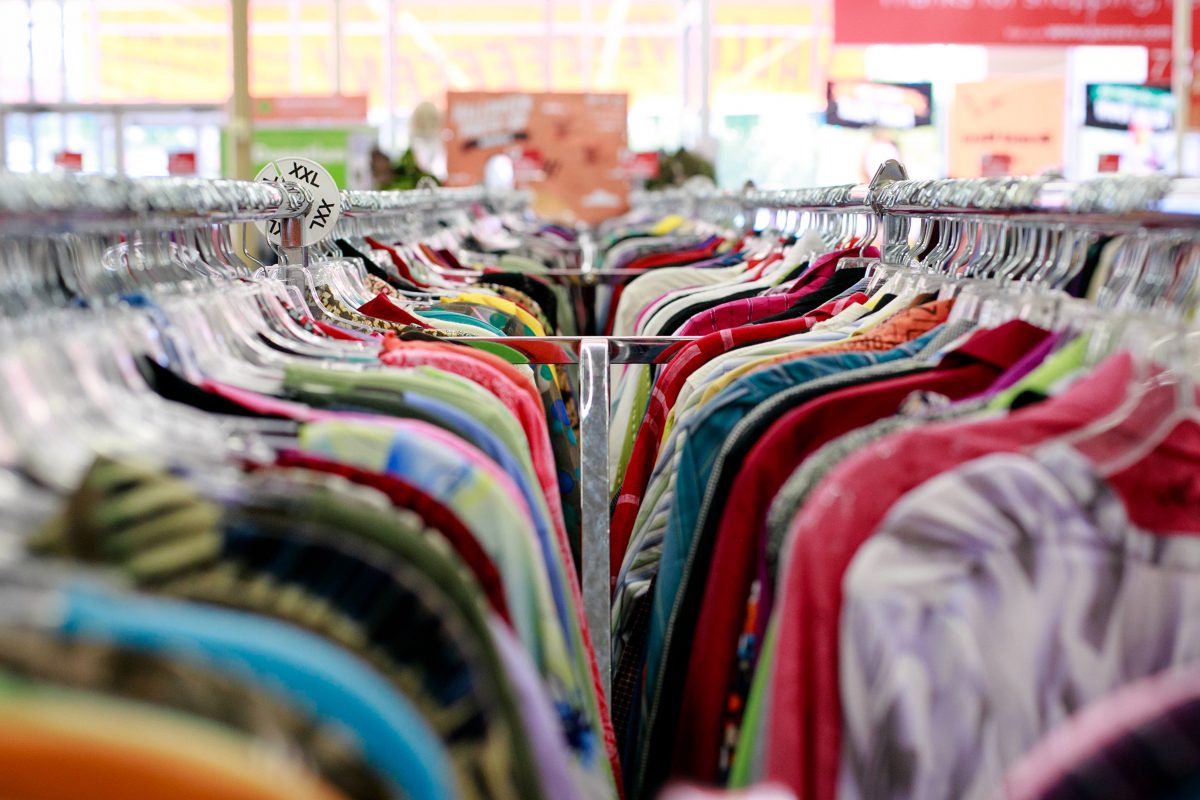
Halloween is fast approaching and we know there will be a lot of make-up stains on clothing. Removing cosmetics from clothing can be a chore. Knowing the most efficient methods for removing makeup stains can save you a lot of time, money, and frustration.

First of all, know the type of  makeup you’re dealing with: non-oily or oily. Non-oily are powder products like eye shadows and blushes. Oily types are lipsticks, cream blushes, and other liquid makeup. Each type requires a specific method of removal. So…..determine if your makeup stain is non-oily or oily.

Second, you should attempt to remove the stain as quickly as possible to avoid letting them set into your garments. Fresh stains come out a lot easier than when they’re left.

Lipstick

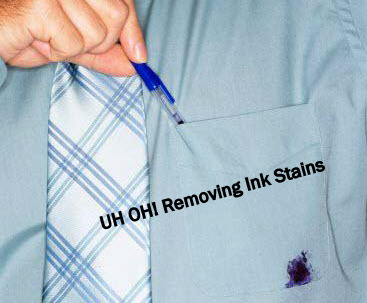
Lipstick is oil-based, and should be treated with a pre-wash stain remover before attempting to wash it out. Never rub the stain, as it only causes the lipstick to go deeper into the fabric. We recommend blotting the stain with a clean white cloth, and rinse the stained material in warm water (you want to use a white cloth to avoid any fabric dyes from transferring to the stain).  If the stain persist, apply a good liquid household detergent to the stain, but don’t rub, blot.

Rubbing alcohol will also remove lipstick stains. Again, using a white cloth, dab the stain with a small amount of isopropyl alcohol, then add a small amount of household detergent and wash the garment per the label instructions.

Liquid Makeup

Removing liquid makeup stains can be a battle. Try using Dawn dish soap as a removal agent. Liquid makeup is oil based, and we all know Dawn helps cut through grease.  Then add a small amount of household detergent and wash the garment per the label instructions.

Powder Blush or Eye Shadows

The first thing when you have a powder spill is to try and blow it off the garment. Sometimes that will be enough to get most of it off before laundering per your normal routine. Once you’ve done that, remaining makeup can be wiped off using a damp washcloth and a tiny amount of liquid soap.

Tip:

Be sure to read the care label on any garments before attempting to remove the stain. You may find the garment is “dry clean only” or discover other specifications that will determine your choice of stain removal.

Read More “6 Ways to Cut Down Energy Costs In The Summer”

Benefits of Turning Clothes Wrong Side Out

As the primary laundry care taker in our home I understand the frustration of having to turn clothes right side out while folding them. However, there are very good reasons for washing them wrong side out.

1) When you turn the garments wrong side out all the wear & tear of washing is done on the inner side & does not affect the outside (right side) of the garments. If fading occurs, it’s also on the inner side, therefore, leaving the right side looking new.

2) All the buttons, rivets, sequins etc. on the right side of the garment don’t undergo the friction during washing.

3) Turning wrong side out also helps when targeting tough spots on collars and cuffs. These areas get a better scrub during the washing process resulting in better cleaning of these areas.

4) Color fast fabrics can cross stain during washing. Turning the garments right side out can help to avoided or minimize this from happening.

5) As the garments rub against each other during washing it creates friction. Friction results in fuzziness and pilling (those pesky lint balls that form on fabric) – washing them inside out prevents this from happening.

Read More “6 Ways to Cut Down Energy Costs In The Summer”

Clever Ways To Use Mismatched Socks

Why is it when a perfectly good pair of socks goes into the laundry basket…only one of them make it out of the dryer?  This is a mystery we’d all like to know the answer to.  Instead of throwing them away, try some of these ideas.

1)  Dusting Mitts

Put one or both hands inside a sock and start dusting hard to reach places like blinds, the back of the tv, the baseboards, ceiling fan blades and more!

2)  Shoe Protectors

Keep your shoes protected in the closet and while traveling by placing them inside of a sock.

3)  Pet Toy

Put tennis balls in the toe portion of each sock then tie or sew ends together.

4)  Car Washing Mitt

Use to clean rims and other tiny, hard-to-reach places on your car’s interior and exterior.

5)  Glasses holder

If you misplace the holder for your glasses or sunglasses, place them in a sock to keep them from getting scratched.

6)  Potpourri Sachet

Fill a clean sock with potpourri and tie/ sew the end shut. Stick it in a closet, hamper, or drawer to keep it smelling fresh.

7)  Furniture Protectors

Place socks on the bottom of chairs or table legs to keep them from scratching during a  move.

8)  Foot & Hand Softener

Rubs hands and/ or feet with a generous amount of lotion.  Then place socks on overnight for smooth skin in the morning.

9)  Cool Pack Cover

Cover ice packs to make them more tolerable on bare skin. This will let you get the benefits without the freezing burn.

10)  Dry Erase/ Chalkboard Eraser

No more wasting paper towels.  Use a sock to wipe marker or chalkboard clean!


Read More “6 Ways to Cut Down Energy Costs In The Summer”

  1.  What’s the secret to soft, fluffy towels? Vinegar and baking soda. Add these two ingredients to your load of towels plus half the recommended amount of detergent.
  2.   Running late? Hang your items in the bathroom while you shower to release wrinkles.
  3. You’ve accidentally shrunk your favorite sweater. No worries – soak it in a solution of baby shampoo and warm water, then gently massage it back to its original size. See our blog titled “OH NO! Shrunken Clothes!”
  4.  Vinegar and Baking Soda instead of detergent will revive your old towels.
  5.  Tennis balls in the dryer will decrease wrinkles in your bed linens.
  6.  Add salt to the wash to prevent colors from fading
  7.  Wash colors inside out to prevent fading over time.
  8.  Maintain the shape of your sweaters by laying them flat to dry as opposed to hanging them.
  9.  Squeeze a large lemon in with those workout clothes! It will break down oils trapped in fabrics & leave a clean fresh scent.
  10.  Adding 1/2 cup of white distilled vinegar to your rinse cycle is a natural fabric softener.
  11.  Swimsuit stretched out? Avoid the urge to wring out all of the water. Instead lay flat between towel and roll to remove excess water.
  12.  A little dish soap, a toothbrush, & some hot water do wonders for ring around the collar.
  13.  Trying to get a blood stain out? Use hydrogen peroxide and rinse well
  14.  Make DIY Dryer balls by rolling aluminum foil into a ball and placing in the dryer.
  15.  Wash dark clothes and jeans inside out and air dry them to keep from fading
  16.  Remove stubborn armpit stains with lemon juice and baking soda.
  17. Use hot water for white loads, warm water for the average load, and cold water for bright colors.
  18.  Wash your socks in lingerie bags to ensure they’ll never lose their match.
  19.  Use chalk to eliminate grease or oily stains.
  20.  Add Borax to every wash to keep your whites, bright and your colors, colorful.
  21.  Over drying clothes is the leading culprit of static cling. Always set your dryer to the recommended dry time.
  22.  Always dry towels and bulky items separate from your light weight items.
  23.  Not a fan of bleach? Brighten your whites instead by adding 1 cup of white vinegar oxygen booster lemon juice to the wash. Air-dry your clothes in the sun. You’ll have bright whites with a fresh, clean scent.
  24.  The best defense to any stain is to treat as soon as possible. Keep a Tide-To-Go Stain Remover in your purse or vehicle for those moments.
  25. To loosen a stuck zipper, rub a bar of soap over the teeth.


Read More “6 Ways to Cut Down Energy Costs In The Summer”

OH NO! Shrunken Clothes!

Step One: Soak

Fill a sink or bathtub with lukewarm water then add a cap of baby shampoo to the water.

Place the garment into the sudsy water. Let it soak for a minute or two, then gently massage the item with your hands to help relax the fibers.

Remove the item from the water and gently squeeze it to remove some of the water. (But don’t wring the garment or rinse!)

Step Two: Absorb

Lay out a big, clean bath towel and lay the garment flat on top of it.

Roll the towel up from one end so the garment is wrapped inside. Press on the towel gently to absorb the excess water, then unroll the towel.

Step Three: Re-Shape

Grab another clean bath towel and lay the damp piece of clothing out on it.

Use your hands to gently stretch the item to its original size. Last, but not least, leave the clothing item on the towel and allow it to air dry completely.

NOTE:  Don’t rinse out the little bit of shampoo that is left in the garment after Step One.  This process doesn’t leave very much soap behind in the clothes, and the little soap that does remain helps  keep the fibers pliable during the stretching process.


Read More “6 Ways to Cut Down Energy Costs In The Summer”

Hat Sweat: How to Remove

Chances are, if you’ve got an athlete in your family, you’ve got a sweaty hat of some sort. You know the one….the hat that has the salty white residue around the edges. Help has arrived! Follow these simple steps and your hat will be back to looking good as new.

  • Apply a small amount of shampoo to the sweat stains and scrub the area with an old toothbrush. Rinse and wash as directed.
  • Moisten the area with cold water and apply a good amount of meat tenderizer. Work the tenderizer into the stain with your fingers or a toothbrush. Rinse and wash as directed.
  • Mix a paste with baking soda and water. Apply the paste to the stained area and add a small amount of white vinegar. Scrub the area with a toothbrush. Rinse and wash as directed.
  • Dissolve two aspirins in a half a cup of water. Apply the mixture to the stain liberally and allow it to set for at least two hours. Add a few drops of a gentle laundry detergent, such as Woolite and scrub with a toothbrush. Rinse and wash as directed.
  • Mix a solution of one part ammonia and one part water. Apply the mixture to the stain and scrub with a toothbrush. Rinse and wash as directed.
  • Mix a solution of one part white vinegar and two parts water. Apply the mixture to the stain and scrub with a toothbrush. Rinse and wash as directed.


  • NOTE: The bill of the cap often contains cardboard. Try not to get this part overly soaked as it may cause it to lose its shape. Quickly rinse to remove the cleaning products without fully soaking the bill.
  • If trying more than one removal method, be sure to thoroughly rinse the hat between each product to ensure they do not mix!! This could damage the hat and create toxic fumes.


Read More “6 Ways to Cut Down Energy Costs In The Summer”

Stinky Shoe Care

What you may not know is that the actual stink in your shoes is bacteria, and it’s living inside your shoes!  It’s not only important to get rid of the smell, but also the bacteria, because over time it can cause an infection or nail fungus.

Deodorizing Canvas or Fabric Shoes

Canvas or fabric shoes can be tossed in the washer and ran through a warm water cycle. To deodorize, add a cup of white vinegar to the rinse. Don’t use fabric softener, because it can trap bacteria in your shoes.

Place them outdoors in the sun to air-dry.  UV rays will also help kill any bacteria that may be left.  If placing them outside isn’t an option, place them in a sunny window sill or with a fan blowing on them.

Deodorizing Stinky Shoe Inserts

Take them out of the shoes and wash them in a sink full of warm, soapy water. Drain and refill with 2 cups water and 1 cup white vinegar. Let them soak for 5-10 minutes, rinse thoroughly. Finally, using a paper towel, press the insole to remove as much water as possible, and then allow them to air-dry.

Read More “6 Ways to Cut Down Energy Costs In The Summer”

How To Remove Ink Stains


How To Remove Ink Stains

Most of us have had an ink stain at some point or another, or a leaking pen ruin a favorite shirt or pants.  Before you toss those clothes in the rag bag, check out some of these simple at-home tips to deal with ink stain removal.

Hair Spray

Squirt the stain with hair spray and the pen marks should come right off.

Rubbing Alcohol

Try soaking the spot in rubbing alcohol for a few minutes to remove the ink, before putting the garment in the wash.

Vinegar

Treat an ink stain on a shirt by first wetting it with some white vinegar, then rub in a paste of 2 parts vinegar to 3 parts cornstarch. Let the paste thoroughly dry before washing the item.

Milk

Believe it or not, a Readers Digest article says to remove ink stains from colored clothes, an overnight milk bath will often do the trick. Just soak the soiled garment in milk overnight and launder as usual the next day.

Salt

Pour salt on an ink stain that’s still wet, gently dab with a wet paper towel, and then remove and brush off the salt. Repeat until the stain has completely lifted.

Sand Paper

Yes, you read that right.  The same Readers Digest article said to use a little fine-grit sandpaper and a gentle touch for removing or at least minimizing an ink stain or small scuff mark on suede clothing or shoes. Afterward, bring up the nap with a toothbrush or nailbrush. You might avoid an expensive trip to the dry cleaner.

Cream of Tartar

Make a paste by mixing 2 tablespoons of cream of tartar with 2 tablespoons of lemon juice. Cover the ink stain with the paste for 3 to 4 hours, then brush off the paste and wash the shirt.

Reminder: be sure that you have gotten all the ink out before you dry the washed garment in a dryer, because the heat of a dryer will set the stain.


Read More “6 Ways to Cut Down Energy Costs In The Summer”

Wash Before You Wear….ALWAYS!

With back to school comes new clothes shopping, so we thought we’d re-post this important blog.  Keep reading to find out why it’s so important to wash before you wear.

There are three good reasons to wash new clothes, especially those that are worn in direct contact with your skin, before you wear them.

One is to wash out extra dye that can be transferred to your skin or other garments. Most fabric made from synthetic fibers (polyester, acrylic) are colored with azo-aniline dyes. These dyes can cause severe skin reactions for those who are allergic to them. If the allergy is severe, the rash will be similar to poison ivy. But even less severe reactions can cause dry, itchy inflamed patches of skin.

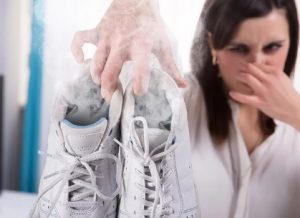
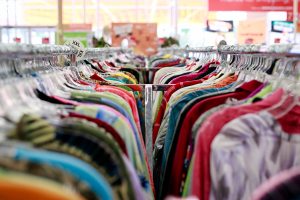
It is possible to transfer lice, scabies, bacteria and fungus from person to person when clothes are tried on. Dressing rooms can become breeding grounds for everything from viruses to athlete’s foot.

And, most importantly, to remove the chemical finishes that manufacturers put on clothes to enhance color or texture. The finishes won’t bother everyone, but if you have sensitive skin you can develop a rash especially in constant contact areas like armpits, collars, cuffs and trouser waists and thighs.

Urea formaldehyde is often the chemical used to prevent mildew on clothes that have to be shipped long distances in hot, humid containers from overseas to the United States. It has a very strong odor that will remain in the fabric until the garment is washed. One washing will not remove formaldehyde completely but you will reduce the build up significantly and it will continue to be removed with each wash.

It is especially important that children’s clothing, especially clothes for babies, be washed before they are worn. Babies are particularly sensitive to chemicals and skin rashes can occur. Select a detergent that is fragrance free and dye free as these can also cause skin reactions. Washing the clothes for children will also make them softer and more comfortable for them to wear.

Washing new sheets/blankets and towels is also important to remove chemicals since these come in direct contact with skin. Washing will also improve the absorbency of the fabric by removing surface fiber coatings.

If you have a tag on the garment that reads “wash separately before wearing”, beware of dye transfer and color bleeding. Washing will help remove the excess dye but check the rinse water. If color remains in the water, it make take several wash cycles to get rid of the excess dye so continue to wash separately or with similar colors.

Read More “6 Ways to Cut Down Energy Costs In The Summer”

Why A Clean Laundry Basket?

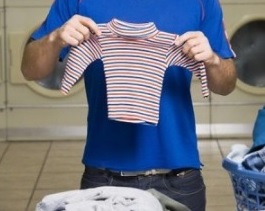
We see it all the time here at Sapulpa Laundry.  You spend your hard earned money washing and drying  your clothes, towels, sheets etc.. Then, without thinking, you place all of your clean belongings back in a dirty laundry basket.  Dead skin cells, grime from your sweaty workout clothes, and whatever else hitches a ride on your clothes throughout the day, are all lurking in that laundry basket!  Lets don’t forget to mention bacteria, including the dreaded staph bacteria also known as MRSA!

*Methicillin-resistant Staphylococcus aureus (MRSA) is a bacterium that causes infections in different parts of the body. It’s tougher to treat than most strains of staphylococcus aureus – or staph – because it’s resistant to some commonly used antibiotics.

What To Do: 

Wash it. Give that basket a good washing with soap and hot water, or simply use an antibacterial wipe and wipe the basket down thoroughly before putting your clean laundry back in it. You can also use any hard surface disinfectant, but be watchful of anything with the potential to discolor (i.e. bleach).  Make sure to dry the basket completely before putting your belongings back in it.

Bag it. Try using washable laundry bags. Wash the dirty bag along with the clothes. Once the bag is dried, place the clean clothes inside the bag to transport back home.

Line it. You can also use a disposable plastic laundry bag, clean trash bag, or a reusable cloth liner to line your laundry basket.  Set your clothes inside the bag that lines the basket.  Dispose of the plastic bag once you’ve put your belonging away and wash the cloth liner the next time you do laundry.


Read More “6 Ways to Cut Down Energy Costs In The Summer”
bottom Gears Mobile bottom Gears