![]()

Most people use far more detergent than they actually need to. Liquid, pods, powders – It’s no wonder there’s so much confusion about how to use laundry detergent correctly! Knowing how much detergent to use can extend the life of your clothes and help conserve money by saving on the expense of detergent. There are several factors to consider when it comes to using laundry detergent properly.
First, determine what kind of detergent is best for you. Liquid detergents are easy to pour and work great for spot-cleaning grease stains and ground-in dirt. While powder detergents are good for consistent cleaning overall, too much powder can leave a milky residue on your clothes if not measured properly. The popular pod takes the guesswork out of measuring out your detergent. Be sure to never use regular detergent in high-efficiency (HE) washers. This will create far too many suds and can damage the washer’s mechanics over time.
Second, consider load size. Most detergent measuring caps or instructions should state the ideal amount of detergent to use for certain load sizes.
Here’s a quick way to determine the load size: if the machine’s drum looks one-quarter full once all the clothes are inside, then that’s a small load. If it looks about half-full, it’s a medium load, and if it’s close to full, it’s a full load. Do not overload your washer—cramming in too many clothes won’t allow the detergent to distribute evenly, which can cause wrinkled, less-than-clean clothes.
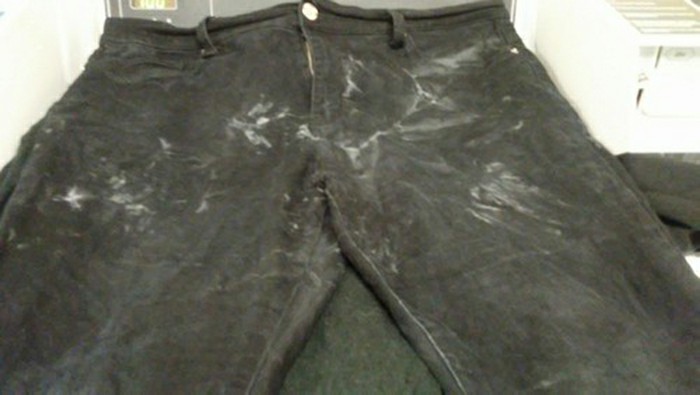
Finally, be careful when measuring out your laundry detergent. Using too much detergent won’t make your clothes cleaner—in fact, it will leave a residue on your clothes that can make them break down that much faster and too many suds will not allow an adequate amount of water to fill the machine. This is due to a water level sensor. Also, detergents today tend to be much more concentrated than they were in the past, so be sure to carefully check the recommended amounts on the detergent packaging and double-check the cap’s measuring lines before you pour.
![]()