Hieroglyphics or Laundry Symbols?

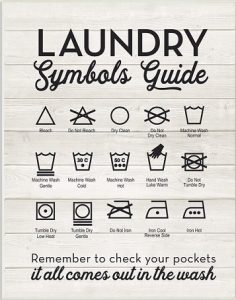
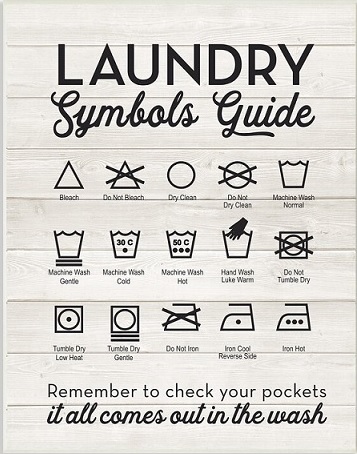
As if life wasn’t confusing enough with emoji’s and acronyms – now we have to deal with squares, circles, triangles, lines and dots on the labels of our clothing! However, clothing-care symbols are a code worth knowing.

The American Society for Testing and Materials, ASTM International, put out a standardized set of care symbols with the goal of creating a universally understood “laundry language”.

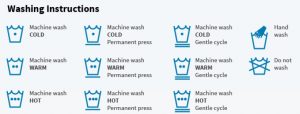
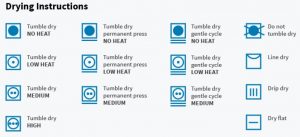
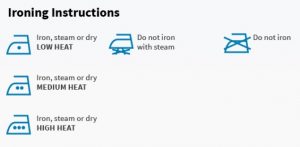
ASTM symbols follow a simple scheme and a set order: wash (tub shape), bleach (triangle), dry (square), iron (iron) and special care (circle). A circle by itself usually means dry cleaning or wet cleaning. A circle (special care) inside a square (drying) changes “dry” to “tumble dry.”

Adding lines, dots and other marks modify these base symbols and adds info. For example, a large X through a symbol offers a warning, where an empty symbol often means that any version of what the symbol represents is OK to use. A crossed-out triangle means do not bleach, where an empty triangle tells you that any bleach will do. Adding two parallel diagonal lines means to use only non-chlorine/oxygen bleach.

Clear as mud?  Don’t worry, I’ve included a chart to help you decipher what seem to be ancient Egyptian hieroglyphics:

Read More “6 Ways to Cut Down Energy Costs In The Summer”

Cleaning Summertime Mildewed Towels

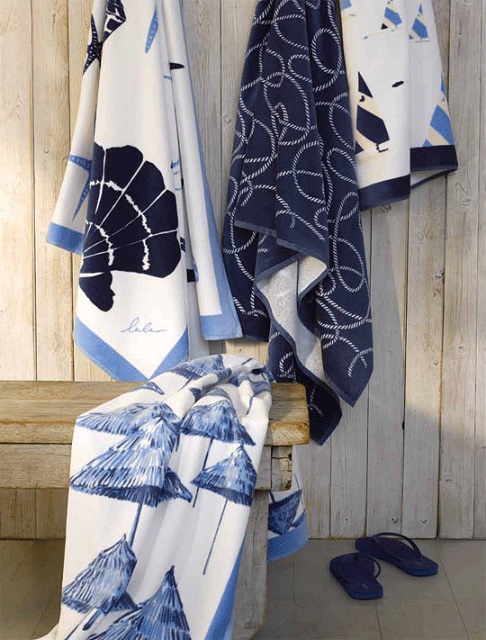
Its summertime and that means wet towels from the swimming pool, lake, or the beach. At some point most of us have used a towel, for whatever reason, and tossed it into the dirty laundry and forgotten it was wet. A few days later and the smell will remind you! That smell is caused by mildew that sets in, and isn’t very easy to get rid of.  Washing your towels a few times on a normal setting may get rid of that stink, but if that isn’t enough to combat the mildew smell, I’ve found a way to get your towels back in shape and get that unpleasant smell out quickly. Here is how:

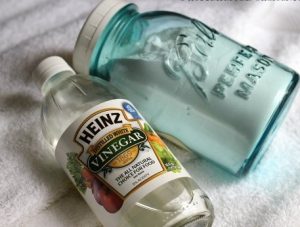
  1. Place your smelly towels in the washing machine and fill with the hottest water possible. Add in 2 cups of white vinegar and let them soak for at least 30 mins. Do not add any other products (detergent, softener etc.). This will allow the vinegar to penetrate the material without interference.
  2. Run a full cycle after your towels have soaked in the vinegar water. Leaving the towels in the washer repeat step 1, only this time use baking soda instead of vinegar. Run a full cycle once again.
  3. Dry the towels on hottest setting possible until they are fully dry

Your towels will smell like brand new!

Read More “6 Ways to Cut Down Energy Costs In The Summer”

Stuffed Animal Care


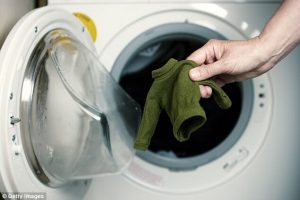
Did you know it’s perfectly safe to throw most stuffed animals in the washing machine? On gentle cycle using warm or cold water, a washing machine will get your stuffed animals clean without ruining them.

Most care labels instruct to hand wash, but after raising two kids and needing to deep clean their beloved friends, I tried machine washing.  Set the washing machine  to the delicate cycle, apply  some Spray N’ Wash, Mean Green, or your choice of stain remover if needed,  scrub a little, and wash. Afterwards hang them up to dry. I learned the hard way. Throwing them in the dryer can melt the faux fur.

SOME THINGS TO CONSIDER WHEN DECIDING IF YOUR STUFFED ANIMALS CAN BE WASHED IN THE WASHING MACHINE:

  • The care label – if it can be hand washed, it can likely withstand the delicate cycle in the washing machine. Your washing machine may even have a hand wash cycle.
  • Material – Take notice of the care label and use your sense of touch as well as sight to thoroughly examine all parts of the stuffed animal to be washed. Polyester and acetate (a form of cotton) are fine to wash. The stuffed animals I washed have plastic pellets and were fine, but you wouldn’t want to machine wash something with foam balls such as Beanie Babies. Be cautious of delicate clothing items and things that are glued on, they may not survive!
  • Age – The older it is, the more fragile it will be.

Read More “6 Ways to Cut Down Energy Costs In The Summer”

Brighter Cleaner Laundry


Why buy expensive or dangerous cleaning products, bleaches, or de-greasers when all you need is probably already in your pantry!

Did you know baking soda can work magic — including getting cleaner and brighter whites at a fraction of the cost.

It’s as easy as 1, 2, 3….

1) Put one cup of baking soda in your wash.

2) Then add your detergent

3) Run your wash on the normal setting and…..Ta-Da!  Brighter, cleaner whites!

Try this DIY homemade laundry detergent recipe. This is a project that will save you money and help you rid your home of toxic chemical cleaners and make your clothes brighter and cleaner in the process.

Ingredients

  • 1 bar (or 4.5 ounces) shaved bar soap (a homemade laundry bar, Ivory, or Zote)
  • 1 cup Borax
  • 1 cup baking soda

Directions

Thoroughly mix all ingredients together. Use 1 Tbsp per small load (or 2-3 Tbsp for large or heavily soiled loads) then add to your laundry.  Store remaining in a sealed container.

Keeping your colors brighter is a challenge at times. Colors fade when the chemical bonds between the dye and the fabric break down, so the best way to keep your colors bright is to wash clothes in a way that either prevents dyes from dissolving, protects the fibers in the fabric — or both. Follow these tips, and your colors will look as good as new!

  • Turn clothes inside out— According to experts, the tumbling action of the wash cycle and the dryer can cause fabric fibers to break as clothes collide into each other and against the walls of the machine. Turning clothes inside out before you wash them will keep the worst of the fraying on the inside.
  • Soak clothes in salt water— Salt is inexpensive, environmentally friendly and great for keeping your colors bright. Before you wash that colorful new top, soak it overnight in salt water. Simply fill your washer with cold water, add 1/4 to 1/2 cup of salt, and then add your clothes. In the morning, just add detergent and run the washer as you normally would. You can add additional clothes at this point, too — just be sure not to overfill the washer.
  • Wash in cold water— Washing in cold water instead of hot not only helps keep your colors bright, it also conserves energy and saves you money. For best results, use a detergent formulated for bright clothes and cold-water washing.
Read More “6 Ways to Cut Down Energy Costs In The Summer”

Wrinkle Free Permanent Press Clothing – Without the Iron!

I do not like to iron! I want to pick out an outfit, put it on, and then be on my way.  I do not want to pick out an outfit, get the iron and ironing board out, and then iron it. It takes more time out of my schedule if I have to iron, and if you’re in a rush, it can be stressful! Here are a few of my ”tried and true” tips to help you out.

∙Be sure to dry permanent press clothing in a gentle/low heat dryer, not HOT!  Hot will only make a wrinkled mess and can melt the fabric. If you forget your clothes and don’t pull them out of the dryer in time, and they happened to get wrinkled, all you have to do is place a damp bath towel in with your clothes on gentle/low heat and dry for a few more minutes. Be sure to take them out just before or as soon as they are dry and lay flat or hang on a hanger.

∙After you’ve washed and dried your clothes, remove them immediately from the dryer. Then with a little spray bottle filled with water, spray the collar, button hole placard, and the sleeve edges. Then quickly “Finger Press” those focal points to be smooth and flat so they are no longer folded, curled, or crinkly. This easy finishing touch makes a big difference for permanent press shirts to look so much nicer….and it’s easy! No Iron involved!

∙If you do end up needing to get the dreaded iron out, then try to iron your clothes with a damp cloth. Place the damp cloth on top of the garment and iron. This will steam the fabric and it won’t be too hot. Try a small spot first to see if this will work on the fabric. Remember, too hot of a dryer or iron on permanent press fabric can melt it.

Read More “6 Ways to Cut Down Energy Costs In The Summer”

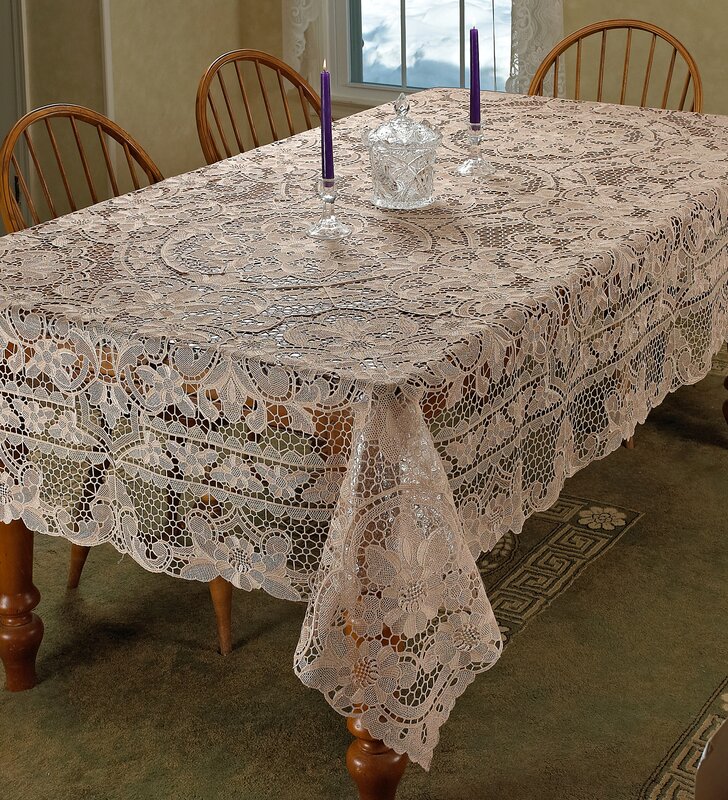
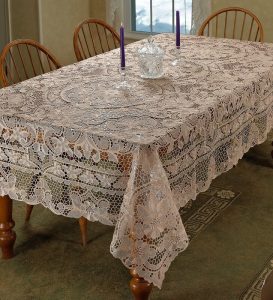
Caring for Antique Linens


Some of us are fortunate enough to inherit a little piece of our family history. If we’re lucky, these items will be in good condition, but that’s not always the case. Some items may have dry rot, mouse nibbles and/or rust. You won’t be able to save these things if the fibers are already compromised. If you tug on two sides of a garment and it comes apart without much effort, your item has dry rot and has reached the end. Sometimes, you just have to let go, there’s no way to save it.

To start, here are a few items you should have on hand:
White Vinegar
Rust Remover
Restoration – (OxiClean is similar, more widely available and slightly less expensive than Restoration, but it doesn’t work as well.)
Bleach pen
Laundry detergent (simple soap, nothing added)

***PLEASE NOTE THAT I DO NOT GUARANTEE ANY METHOD THAT YOU CHOOSE TO TRY. IT ALL DEPENDS ON THE CONDITION OF THE GARMENT.***

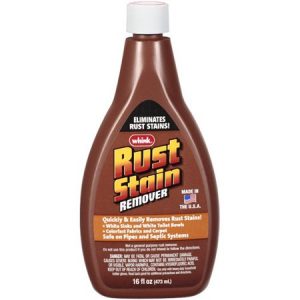
“Restoration” and white vinegar are preferred products. Read the label and use common sense. You may only need to use “Restoration” for your initial laundering to remove storage dirt. You can also use “Restoration” in the washing machine with your laundry, too. It removes odors, age spots, storage stains, label stains and often, some rust. If it doesn’t remove the rust, try using “Whink Rust & Stain Remover.” Be aware that if rust has already eaten away the fibers that you may be left with a hole where the rust had been after cleaning with rust/stain remover.

Use “Restoration” first and, if stains remain after two or three sessions with it, put the dampened piece outside in bright sunshine for a day. This is often a magical solution. Horrible stains will usually disappear within an hour. This is the least invasive method. It is effective and it’s free – it also sanitizes. However, sunlight does bleach and weaken fibers over time. Sunlight is destructive so I am not suggesting that you constantly subject your fragile items to sunlight. This method, used once or twice on a piece that would otherwise need to be thrown away, can be very helpful. If the stains persist, you may need to resort to using bleach with laundry detergent. I like to have a bleach pen on hand because it allows me to pinpoint where I apply the bleach. After using bleach, always rinse with white vinegar, then rinse again with clear water.

Step 1. Use hot water with “Restoration” until the water turns clear. (approx. 4- 6 hours or overnight) If the water is not clear after overnight soak, repeat this step. Extremely filthy items may require several soakings.

Step 2. Drain and refill container with water; add white vinegar (a splash or a cup, depending on container size); swish around and soak for 10-20 minutes.

Step 3. Drain and refill with lots of clear water; swish around and soak for 15 minutes. Done!

If stains remain, repeat entire process.
If there is rust, use rust remover on wet fabric, then repeat from Step 2.

If stains remain, lay wet/damp item outdoors in sunshine.

If stains remain, soak with laundry detergent and small amount of bleach. Or use a bleach pen on small stains. It is better to soak longer using very little bleach.

IMPORTANT!
DO NOT mix chemical treatments. Pre-rinse items that may have bleach or detergent residue with vinegar to neutralize the bleach and then rinse twice in clear water before trying another treatment. DO NOT bleach anything after using OxiClean or peroxide or any other chemical treatment. Your items may turn permanently blue, or worse Rinse really well before trying any other product.

Read More “6 Ways to Cut Down Energy Costs In The Summer”

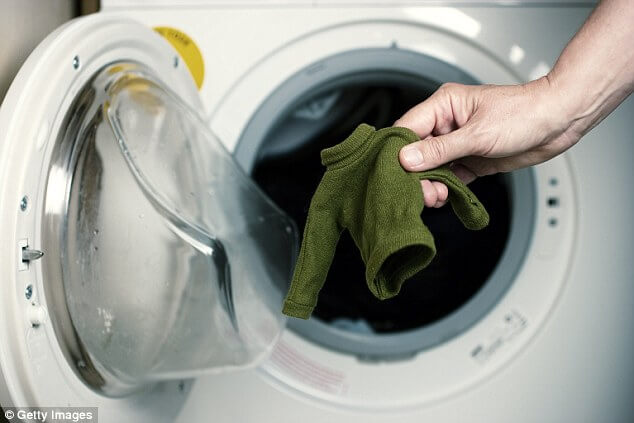
How to Unshrink Your Favorite Sweater

Step One: Soak

Fill a sink or bathtub with lukewarm water then add a cap of baby shampoo to the water.

Place the sweater into the sudsy water. Let it soak for a minute or two, then gently massage the item with your hands to help relax the fibers.

Remove the sweater from the water and gently squeeze it to remove some of the water. (But do not wring or rinse the sweater!)

Step Two: Absorb

Lay out a big, clean bath towel and lay the sweater flat on top of it.

Roll the towel up from one end so the sweater is wrapped inside. Press on the towel gently to absorb the excess water, then unroll the towel.

Step Three: Re-Shape

Grab another clean bath towel and lay the damp piece of clothing out on it.

Use your hands to gently stretch the item to its original size. Last, but not least, leave the sweater on the towel and allow it to air dry completely.

NOTE:  Do not rinse out the little bit of shampoo that is left in the garment after Step One.  This process doesn’t leave very much soap behind in the sweater, and the little soap that does remain helps  keep the fibers pliable during the stretching process.


Read More “6 Ways to Cut Down Energy Costs In The Summer”

Caring For Your Down Comforters & Pillows

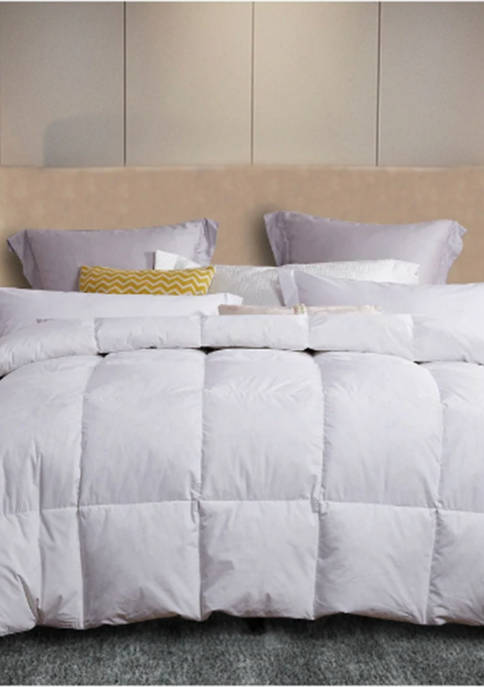
Manufacturers usually offer cleaning suggestions for their down items. Most recommend cleaning down items infrequently — typically every three to five years, but life happens and sometimes that’s just not sanitary. Try following these steps to get the best results when washing and drying down comforters and pillows.

Washing

Step 1

Check the comforter or pillow for worn stitching or holes, and repair with small fine stitches to avoid losing any down stuffing during the laundering process.  Most comforters are too big for your home washer. Instead, use the large capacity front-loading washing machines at your local Laundromat…specifically Sapulpa Laundry.

Step 2

Before laundering a down comforter or pillow, check for stains. Color-safe bleach can be used on stains caused by water or food, but blood or urine are best treated with an enzymatic cleaner such as Nature’s Miracle or Pure Green Kleen.  Pull the cover of the comforter or pillow away from the down while spot-treating stains to keep the cleaning product from damaging the down. Then launder.

Step 3

Put a sock stuffed with two tennis balls (secured with a knot) in the machine with the comforter or pillows. This addition will help keep the down from bunching and will agitate soil from the items being washed.

Step 4

Use a gentle or delicate-cycle setting and a minimal amount of mild laundry detergent. Choose lukewarm water; hot or cold water can be hard on the down. Use an extra rinse cycle to ensure all soap is rinsed from the down.

NOTE: Down bears a distinctive odor when wet. The odor will dissipate when the down dries.

Drying

Step 1

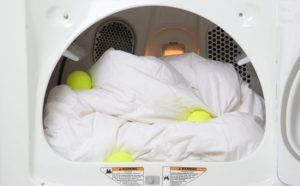
After the wash is complete, load your comforter or pillows into a dryer large enough to give the items plenty of room to fluff. Add a pair of clean tennis balls to help fluff the down and keep it evenly distributed.

Step 2

Run the dryer on air fluff or the lowest temperature possible. Stop the dryer periodically and break up any lumps that are forming in the comforter or pillow. Also ensure that the down is not getting too warm as extreme heat can scorch the down. Expect the drying process to take three to four hours.

Step 3

Make sure the down item is dry before taking it out of the dryer to avoid the formation of mildew. If the item is still slightly damp, hang it out on a clothesline or lay flat on a table with a fan blowing on it to get the down as dry as possible. Once you bring the comforter or pillow inside, leave the item out for another month to ensure all moisture has evaporated before storing.


Read More “6 Ways to Cut Down Energy Costs In The Summer”

Properly Wash Your Clothes

Start by sorting your clothes according to colors or whites and by using the garments care labels. Some garments may say hand wash or delicate cycle etc. Washing symbols can be difficult to decipher but you can usually find the correct wash temperature by looking at the garments label (check out our blog “Understanding Laundry Language”). The machine wash symbol often looks like a tub of water, if there’s a cross through it, it can’t be machine washed.

 (Do not machine wash)

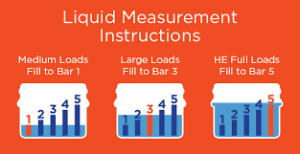
If you’re using a Tide Pod, or one of the other “pod” detergents, toss it into the drum first. The detergent will properly dissolve during the wash cycle. For small and medium loads use only one pod, for large loads use two pods. When using liquid detergent pour it into the dosing cap. Fill until line 1 for medium loads, line 3 for large loads, and line 5 for HE full loads. For powder detergent, fill the drum until line 1 for medium loads, line 3 for large loads, and line 5 for HE full loads.

Fill the machine with your clothes. Don’t overload the drum – 3/4 full is about right.

Choose a water temperature that’s right for your laundry load. Select a wash cycle.  Start the machine.

Read More “6 Ways to Cut Down Energy Costs In The Summer”

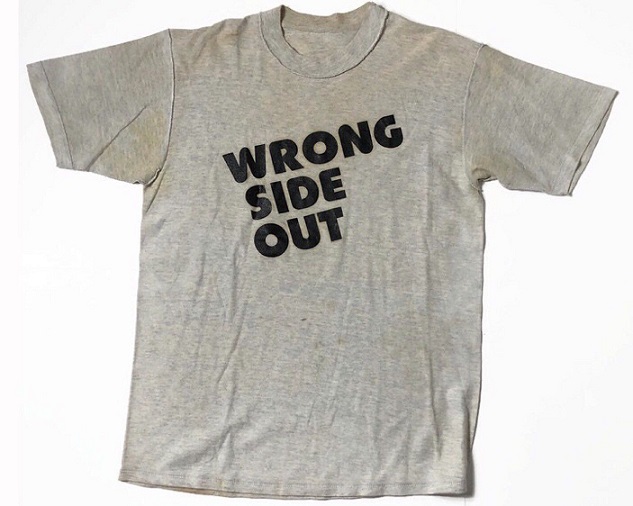
As the primary laundry caretaker in our home I understand the frustration of having to turn clothes right side out while folding them. However, there are particularly good reasons for washing them wrong side out.

1) When you turn the garments wrong side out all the wear & tear of washing is done on the inner side & does not affect the outside (right side) of the garments. If fading occurs, it’s also on the inner side, therefore, leaving the right side looking new.

2) All the buttons, rivets, sequins etc. on the right side of the garment don’t undergo the friction during washing.

3) Turning wrong side out also helps when targeting tough spots on collars and cuffs. These areas get a better scrub during the washing process resulting in better cleaning of these areas.

4) Color fast fabrics can cross stain during washing. Turning the garments wrong side out can help to avoided or minimize this from happening.

5) As the garments rub against each other during washing it creates friction. Friction results in fuzziness and pilling (those pesky lint balls that form on fabric) – washing them wrong side out prevents this from happening.

Read More “6 Ways to Cut Down Energy Costs In The Summer”
bottom Gears Mobile bottom Gears