header image

Blog

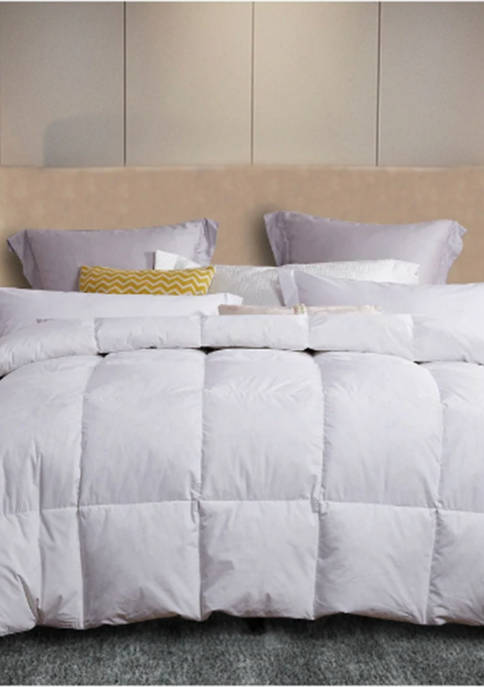
Caring For Your Down Comforters & Pillows
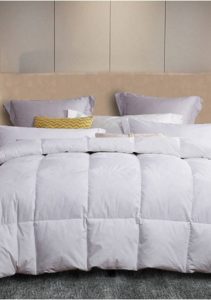
Manufacturers usually offer cleaning suggestions for their down items. Most recommend cleaning down items infrequently — typically every three to five years, but life happens and sometimes that’s just not sanitary. Try following these steps to get the best results when washing and drying down comforters and pillows.

Washing

Step 1

Check the comforter or pillow for worn stitching or holes, and repair with small fine stitches to avoid losing any down stuffing during the laundering process.  Most comforters are too big for your home washer. Instead, use the large capacity front-loading washing machines at your local Laundromat…specifically Sapulpa Laundry.

Step 2

Before laundering a down comforter or pillow, check for stains. Color-safe bleach can be used on stains caused by water or food, but blood or urine are best treated with an enzymatic cleaner such as Nature’s Miracle or Pure Green Kleen.  Pull the cover of the comforter or pillow away from the down while spot-treating stains to keep the cleaning product from damaging the down. Then launder.

Step 3

Put a sock stuffed with two tennis balls (secured with a knot) in the machine with the comforter or pillows. This addition will help keep the down from bunching and will agitate soil from the items being washed.

Step 4

Use a gentle or delicate-cycle setting and a minimal amount of mild laundry detergent. Choose lukewarm water; hot or cold water can be hard on the down. Use an extra rinse cycle to ensure all soap is rinsed from the down.

NOTE: Down bears a distinctive odor when wet. The odor will dissipate when the down dries.

Drying

Step 1

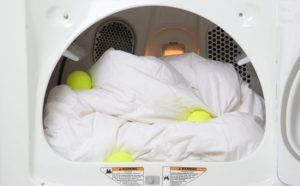
After the wash is complete, load your comforter or pillows into a dryer large enough to give the items plenty of room to fluff. Add a pair of clean tennis balls to help fluff the down and keep it evenly distributed.
Step 2

Run the dryer on air fluff or the lowest temperature possible. Stop the dryer periodically and break up any lumps that are forming in the comforter or pillow. Also ensure that the down is not getting too warm as extreme heat can scorch the down. Expect the drying process to take three to four hours.

Step 3

Make sure the down item is dry before taking it out of the dryer to avoid the formation of mildew. If the item is still slightly damp, hang it out on a clothesline or lay flat on a table with a fan blowing on it to get the down as dry as possible. Once you bring the comforter or pillow inside, leave the item out for another month to ensure all moisture has evaporated before storing.


Read More “6 Ways to Cut Down Energy Costs In The Summer”

Cleaning White Shoes

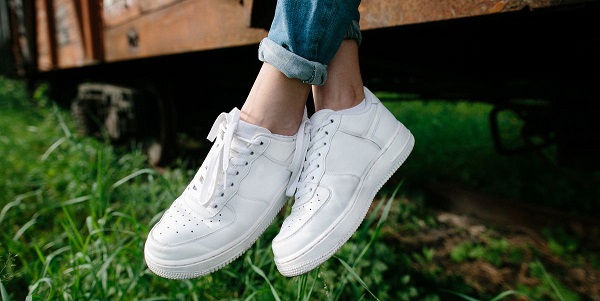
Have you ever looked down at your white sneakers and been self-conscious?  If you have, then follow these easy to do steps and feel good about your white, almost new looking, shoes.

First of all, start with preventative care.  Grab a bottle of stain repellent at the shoe store, or anywhere they carry shoe supplies, and spray your shoes. Simply spray the repellent evenly on the surface of your shoes and let them dry overnight. Give your shoes a nice cleaning every few weeks to ensure they stay looking brand new.

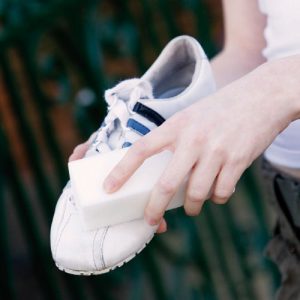
Next, clean the soles. When the soles or the rubber part on your favorite pair of shoes needs a good cleaning, give them a good scrub. Try this one spot-cleaning method that’s sure to work – and it’s probably not what you think. Pick up a Magic Eraser next time you’re in the store, because it will soon become your go-to for keeping your sneakers white. Simply wet the Magic Eraser with water, and rub your shoes in a circular motion to watch the eraser work its magic.

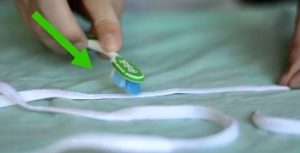
Last, but not least – don’t forget the shoelaces. Remove your shoelaces from your sneakers. Fill your sink with hot water and add a few dashes of your favorite laundry detergent. Massage the laces between your thumb and index finger. You can also use the detergent and a toothbrush to get a deep cleaning. Squeeze the laces in a towel or paper towel to get out excess water, then hang them to dry.

Specialty sneakers.  Sometimes sneakers have a different type of material that needs to be cleaned a little bit differently.

How to Clean:

White canvas sneakers: Combine baking soda with an equal amount of a mixture that’s half water and half hydrogen peroxide until it forms a paste. After making sure all excess dirt is brushed off your sneakers, apply the mixture. Let your shoes sit for a few hours until the mixture has hardened. Shake off the hardened mixture and use an old toothbrush or crumpled up paper towel to remove the excess paste. You’ll notice those sneakers are way whiter! If the sneakers are still damp or wet let them dry before wearing them.

White leather sneakers: It might sound too good to be true, but getting your favorite white leather sneakers looking good-as-new, is as easy as taking a toothbrush with your favorite white toothpaste to the surfaces of the shoe. Use warm water with the toothpaste. You can even add sugar to the toothpaste to create an exfoliate effect for any areas where dirt seems to be caked on. Wipe with a clean towel or paper towel. Again, if the sneakers are still damp or wet let them dry before wearing them.


Read More “6 Ways to Cut Down Energy Costs In The Summer”

How to Avoid Ironing

I DO NOT like to iron! I want to pick out an outfit, put it on, and then be on my way.  It takes more time out of my schedule, and if you are in a rush, it can be stressful! Here are a few of my “tried and true” tips to help you out.

∙ Be sure to dry permanent press clothing in a gentle/low heat dryer, not HOT!  Hot will only make a wrinkled mess and can melt the fabric. If you forget your clothes and don’t pull them out of the dryer in time, and they happened to get wrinkled, all you have to do is place a damp bath towel in with your clothes on gentle/low heat and dry for a few more minutes. Be sure to take them out just before or as soon as they are dry and lay flat or hang on a hanger.

∙ After you have washed and dried your clothes, remove them immediately from the dryer. Then with a little spray bottle filled with water, spray the collar, buttonhole placard, and the sleeve edges. Then quickly “Finger Press” those focal points to be smooth and flat so they are no longer folded, curled, or crinkly. This easy finishing touch makes a big difference for permanent press shirts to look so much nicer….and it’s easy! No Iron involved!

∙ If you do end up needing to get the dreaded iron out, then try to iron your clothes with a damp cloth. Place the damp cloth on top of the garment and iron. This will steam the fabric and it won’t be too hot. Try a small spot first to see if this will work on the fabric. Remember, too hot of a dryer or iron on permanent press fabric can melt it.


Read More “6 Ways to Cut Down Energy Costs In The Summer”

Properly Wash Your Clothes

Start by sorting your clothes according to colors or whites and by using the garments care labels. Some garments may say hand wash or delicate cycle etc. Washing symbols can be difficult to decipher but you can usually find the correct wash temperature by looking at the garments label (check out our blog “Understanding Laundry Language”). The machine wash symbol often looks like a tub of water, if there’s a cross through it, it can’t be machine washed.

 (Do not machine wash)

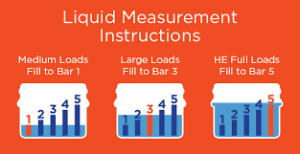
If you’re using a Tide Pod, or one of the other “pod” detergents, toss it into the drum first. The detergent will properly dissolve during the wash cycle. For small and medium loads use only one pod, for large loads use two pods. When using liquid detergent pour it into the dosing cap. Fill until line 1 for medium loads, line 3 for large loads, and line 5 for HE full loads. For powder detergent, fill the drum until line 1 for medium loads, line 3 for large loads, and line 5 for HE full loads.

Fill the machine with your clothes. Don’t overload the drum – 3/4 full is about right.

Choose a water temperature that’s right for your laundry load. Select a wash cycle.  Start the machine.

Read More “6 Ways to Cut Down Energy Costs In The Summer”

Red Wine Stains

Red wine is one of the hardest stains to remove. If you act quickly, you should be able to effectively remove the stain before it sets.

Note: Silk is a delicate fabric, always do a test patch in a discreet area on the fabric before using it on the stain.

Step 1 – Be Quick

If you spill red wine on your blouse, tie, or upholstery, the faster you work on it, the more successful you’ll be at removing it. Allowing it to dry will make it almost impossible to get out. If you’re in a restaurant, or otherwise away from home, and unable to work on the stain, blot it with a napkin or paper towel to get as much of the wine out as you can. Do not rub – it will only grind the stain into the fabric and make it harder to remove.

Step 2 – Try Homemade Remedies First

Homemade remedies don’t contain a lot of harsh chemicals that can damage delicate fabrics like silk, so it’s always best to give them a try before moving on to something stronger.

Try mixing a solution of one half hydrogen peroxide and one half cold water and letting the stained area soak in it overnight. If it doesn’t come out the first time, pour out the mixture, mix up a fresh batch, and soak just the stained area again. This may take several attempts and you’ll need to blot the area in between each application. If it’s a bad stain, use full strength peroxide. Don’t allow the stained garments to dry until the red wine is completely gone.

Again….do a test patch in a discreet area on the fabric before using it on the stain.

Another effective solution is mixing Dawn dishwashing liquid and warm water. Soak the affected area, and then rinse just the stained area with cold water. You may need to soak it a few times. I’ve read some have tried vinegar or rubbing alcohol mixed with Dawn and been successful.

If a slight stain remains, dab rubbing alcohol onto it; then, put a cloth soaked in alcohol on top of the stain to keep it wet and let it sit. Blot the moisture away to remove the wine. Repeat if necessary.

Step 3 – Try Commercial Cleaners

There are several good commercial cleaners on the market for removing red wine as well.

Spray and Wash works well on red wine stains, while remaining gentle enough for silk. Spray it on, keep the area wet and blot away as much of the wine as possible.

Gonzo “Wine Away” is a very popular one that is available at most hardware stores. Follow the directions on the package and use in a well-ventilated area.

Again….I can’t stress enough….do a test patch in a discreet area on the fabric before using it on the stain.

Erado-Sol, a commercial cleaner, is the best over the counter cleaner and will usually remove 100 percent of the stain. It may be difficult to find, so I recommend looking online.

Read More “6 Ways to Cut Down Energy Costs In The Summer”

The Importance of Washing New Clothes


There are three good reasons to wash new clothes, especially those that are worn in direct contact with your skin, before you wear them.

  • One is to wash out extra dye that can be transferred to your skin or other garments. Most fabric made from synthetic fibers (polyester, acrylic) are colored with azo-aniline dyes. These dyes can cause severe skin reactions for those who are allergic to them. If the allergy is severe, the rash will be similar to poison ivy. But even less severe reactions can cause dry, itchy inflamed patches of skin.
  • It is possible to transfer lice, scabies, bacteria and fungus from person to person when clothes are tried on. Dressing rooms can become breeding grounds for everything from viruses to athlete’s foot.


  • And, most importantly, to remove the chemical finishes that manufacturers put on clothes to enhance color or texture. The finishes won’t bother everyone, but if you have sensitive skin you can develop a rash especially in constant contact areas like armpits, collars, cuffs and trouser waists and thighs.


Urea formaldehyde is often the chemical used to prevent mildew on clothes that have to be shipped long distances in hot, humid containers from overseas to the United States. It has a very strong odor that will remain in the fabric until the garment is washed. One washing will not remove formaldehyde completely but you will reduce the build up significantly and it will continue to be removed with each wash.


It is especially important that children’s clothing, especially clothes for babies, be washed before they are worn. Babies are particularly sensitive to chemicals and skin rashes can occur. Select a detergent that is fragrance free and dye free as these can also cause skin reactions. Washing the clothes for children will also make them softer and more comfortable for them to wear.

Washing new sheets/blankets and towels is also important to remove chemicals since these come in direct contact with skin. Washing will also improve the absorbency of the fabric by removing surface fiber coatings.


If you have a tag on the garment that reads “wash separately before wearing”, beware of dye transfer and color bleeding. Washing will help remove the excess dye but check the rinse water. If color remains in the water, it make take several washings to get rid of the excess dye so continue to wash separately or with similar colors.


Read More “6 Ways to Cut Down Energy Costs In The Summer”

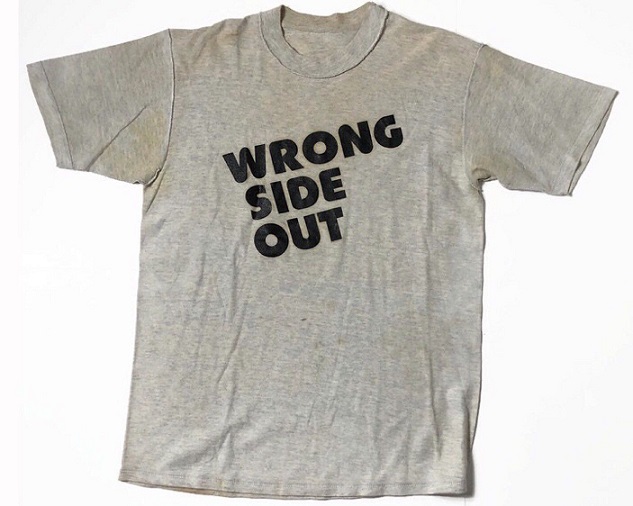
As the primary laundry caretaker in our home I understand the frustration of having to turn clothes right side out while folding them. However, there are particularly good reasons for washing them wrong side out.

1) When you turn the garments wrong side out all the wear & tear of washing is done on the inner side & does not affect the outside (right side) of the garments. If fading occurs, it’s also on the inner side, therefore, leaving the right side looking new.

2) All the buttons, rivets, sequins etc. on the right side of the garment don’t undergo the friction during washing.

3) Turning wrong side out also helps when targeting tough spots on collars and cuffs. These areas get a better scrub during the washing process resulting in better cleaning of these areas.

4) Color fast fabrics can cross stain during washing. Turning the garments wrong side out can help to avoided or minimize this from happening.

5) As the garments rub against each other during washing it creates friction. Friction results in fuzziness and pilling (those pesky lint balls that form on fabric) – washing them wrong side out prevents this from happening.

Read More “6 Ways to Cut Down Energy Costs In The Summer”

Grease Stain Removal

You probably already have some of these cleaning agents in your home, and a couple that might be worth bringing home.  Here’s how to take grease stains off clothes, step by step.

Dish Soap and Hot Water

Treat stained clothes the same way you would a sink full of greasy dishes – remove grease from the surface with dish-washing liquid.  Dish detergent is designed to break up surface grease and allow it to rinse away.

  • Place the garment stain-side down on white paper towels. (Printed paper towels could transfer ink color to your clothes.)
  • Squirt a dime-size amount of dishwashing liquid on the backside of the grease stains. Gently rub the dish detergent into the stain center and work your way to the edges. Give it a minute or so to work its breakdown magic.
  • Rinse the treated area under warm to hot running water for a minute or so to remove the dish detergent. The water temperature will depend on what the fabric can handle. For 100 percent cotton, you can usually use hot water.
  • Follow the rinse with a spin in the washing machine, using the hottest water that’s safe for the fabric and your regular laundry detergent.  If you can’t read the clothing label care tab, choose a warm water wash.

Laundry Detergent Pre-treatment

Rub a liquid laundry detergent into the stain, and let sit for 3-5 minutes.

Wash the stained item separately from the rest of your clothes in the hottest recommended water, adding a little bleach or bleach alternative to the wash water. Extend the wash cycle to give the garment some extra time in the spin cycle.

Absorbent Powder

Another good tip that works on grease stains that are fresh is to use absorbent powder (such as cornstarch, salt, baking powder or talcum powder).

  • Apply the absorbent of choice, and let it set until the powder has absorbed as much of the grease stain as possible. Brush away the absorbent remnants with a stiff-bristle brush.

WD-40 and Dish Detergent

Place the garment on paper towels, grease stain side up. Spray the greasy area with WD-40. Let stand 10 minutes.

  • Turn the garment over and spray the underside  as well. Allow to sit another 10 minutes.
  • Using paper towels, blot on some hand dishwashing liquid, replacing the towels as they absorb the grease.
  • Rinse the treated area, and wash separately from the rest of your laundry.

Lestoil Heavy Duty Cleaner

Lestoil Heavy Duty Cleaner is made by Clorox. It safely removes oil spots, grease stains and tar from washable fabrics. It’s effective and easy to use, but it does have a very strong smell.

Simply pour Lestoil onto the greasy stain and let it soak in for about 20 minutes before washing. And if you’re washing a huge greasy load of laundry, add some to the wash water to get the load clean and grease-free.

Lestoil is also good for removing stains from fabric on sofas, chairs, carpets, and concrete driveways.

Last But Not Least

Inspect the treated area before drying to ensure the greasy stains are completely removed. If you can still see any residue, repeat the pre-treating and washing process until clear.


Read More “6 Ways to Cut Down Energy Costs In The Summer”


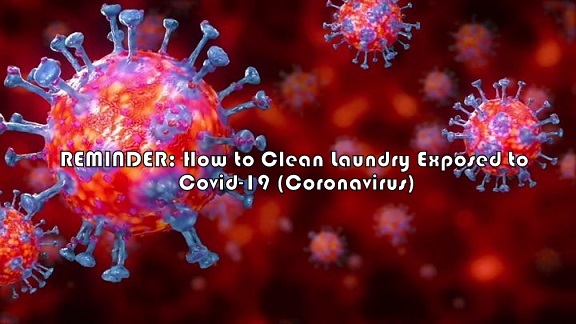
We’ve all heard how important it is to wash our hands and clean surfaces that come in contact with Covid-19 (Coronavirus) but what about our clothes, linens and towels that we deal with daily?

It’s imperative that we remember to clean those items as well and clean them correctly. Below are the proper steps to cleaning those items – according to the CDC guidelines – https://www.cdc.gov/coronavirus/2019-ncov/prepare/cleaning-disinfection.html


Clothing, Towels, Linens and Other Items:

  • Wear disposable gloves when handling dirty laundry from an ill person and then discard after each use. If using reusable gloves, those gloves should be dedicated for cleaning and disinfection of surfaces for COVID-19 and should not be used for other household purposes.  Clean hands immediately after gloves are removed.


  • If no gloves are used when handling dirty laundry, be sure to wash hands afterwards.


  • If possible, do not shake dirty laundry. This will minimize the possibility of dispersing the virus through the air.


  • Launder items as appropriate in accordance with the manufacturer’s instructions. If possible, launder items using the warmest appropriate water setting for the items and dry items completely. Dirty laundry from an ill person can be washed with other people’s items.


Clean and disinfect clothes hampers. If possible, consider placing a bag liner that is either disposable (can be thrown away) or can be laundered.

Read More “6 Ways to Cut Down Energy Costs In The Summer”

Most people use far more detergent than they actually need to. Liquid, pods, powders – It’s no wonder there’s so much confusion about how to use laundry detergent correctly! Knowing how much detergent to use can extend the life of your clothes and help conserve money by saving on the expense of detergent. There are several factors to consider when it comes to using laundry detergent properly.

First, determine what kind of detergent is best for you. Liquid detergents are easy to pour and work great for spot-cleaning grease stains and ground-in dirt. While powder detergents are good for consistent cleaning overall, too much powder can leave a milky residue on your clothes if not measured properly.  The popular pod takes the guesswork out of measuring out your detergent.  Be sure to never use regular detergent in high-efficiency (HE) washers. This will create far too many suds and can damage the washer’s mechanics over time.

Second, consider load size. Most detergent measuring caps or instructions should state the ideal amount of detergent to use for certain load sizes.

Here’s a quick way to determine the load size: if the machine’s drum looks one-quarter full once all the clothes are inside, then that’s a small load. If it looks about half-full, it’s a medium load, and if it’s close to full, it’s a full load. Do not overload your washer—cramming in too many clothes won’t allow the detergent to distribute evenly, which can cause wrinkled, less-than-clean clothes.

Finally, be careful when measuring out your laundry detergent. Using too much detergent won’t make your clothes cleaner—in fact, it will leave a residue on your clothes that can make them break down that much faster and too many suds will not allow an adequate amount of water to fill the machine.  This is due to a water level sensor. Also, detergents today tend to be much more concentrated than they were in the past, so be sure to carefully check the recommended amounts on the detergent packaging and double-check the cap’s measuring lines before you pour. 

Read More “6 Ways to Cut Down Energy Costs In The Summer”
bottom Gears Mobile bottom Gears