Caring for Antique Linens
 

Some of us are fortunate enough to inherit a little piece of our family history. If we’re lucky, these items will be in good condition, but that’s not always the case. Some items may have dry rot, mouse nibbles and/or rust. You won’t be able to save these things if the fibers are already compromised. If you tug on two sides of a garment and it comes apart without much effort, your item has dry rot and has reached the end. Sometimes, you just have to let go, there’s no way to save it.

To start, here are a few items you should have on hand:
White Vinegar
Rust Remover
Restoration – (OxiClean is similar, more widely available and slightly less expensive than Restoration, but it doesn’t work as well.)
Bleach pen
Laundry detergent (simple soap, nothing added)

***PLEASE NOTE THAT I DO NOT GUARANTEE ANY METHOD THAT YOU CHOOSE TO TRY. IT ALL DEPENDS ON THE CONDITION OF THE GARMENT.***

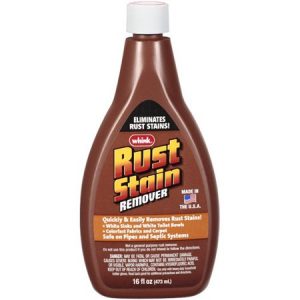
“Restoration” and white vinegar are preferred products. Read the label and use common sense. You may only need to use “Restoration” for your initial laundering to remove storage dirt. You can also use “Restoration” in the washing machine with your laundry, too. It removes odors, age spots, storage stains, label stains and often, some rust. If it doesn’t remove the rust, try using “Whink Rust & Stain Remover.” Be aware that if rust has already eaten away the fibers that you may be left with a hole where the rust had been after cleaning with rust/stain remover.

Use “Restoration” first and, if stains remain after two or three sessions with it, put the dampened piece outside in bright sunshine for a day. This is often a magical solution. Horrible stains will usually disappear within an hour. This is the least invasive method. It is effective and it’s free – it also sanitizes. However, sunlight does bleach and weaken fibers over time. Sunlight is destructive so I am not suggesting that you constantly subject your fragile items to sunlight. This method, used once or twice on a piece that would otherwise need to be thrown away, can be very helpful. If the stains persist, you may need to resort to using bleach with laundry detergent. I like to have a bleach pen on hand because it allows me to pinpoint where I apply the bleach. After using bleach, always rinse with white vinegar, then rinse again with clear water.

Step 1. Use hot water with “Restoration” until the water turns clear. (approx. 4- 6 hours or overnight) If the water is not clear after overnight soak, repeat this step. Extremely filthy items may require several soakings.

Step 2. Drain and refill container with water; add white vinegar (a splash or a cup, depending on container size); swish around and soak for 10-20 minutes.

Step 3. Drain and refill with lots of clear water; swish around and soak for 15 minutes. Done!

If stains remain, repeat entire process.
If there is rust, use rust remover on wet fabric, then repeat from Step 2.

If stains remain, lay wet/damp item outdoors in sunshine.

If stains remain, soak with laundry detergent and small amount of bleach. Or use a bleach pen on small stains. It is better to soak longer using very little bleach.

IMPORTANT!
DO NOT mix chemical treatments. Pre-rinse items that may have bleach or detergent residue with vinegar to neutralize the bleach and then rinse twice in clear water before trying another treatment. DO NOT bleach anything after using OxiClean or peroxide or any other chemical treatment. Your items may turn permanently blue, or worse Rinse really well before trying any other product.

Read More “6 Ways to Cut Down Energy Costs In The Summer”

Cleaning White Shoes

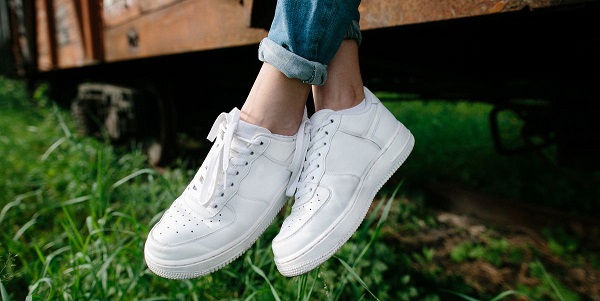
Have you ever looked down at your white sneakers and been self-conscious?  If you have, then follow these easy to do steps and feel good about your white, almost new looking, shoes.

First of all, start with preventative care.  Grab a bottle of stain repellent at the shoe store, or anywhere they carry shoe supplies, and spray your shoes. Simply spray the repellent evenly on the surface of your shoes and let them dry overnight. Give your shoes a nice cleaning every few weeks to ensure they stay looking brand new.

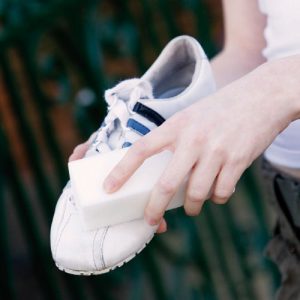
Next, clean the soles. When the soles or the rubber part on your favorite pair of shoes needs a good cleaning, give them a good scrub. Try this one spot-cleaning method that’s sure to work – and it’s probably not what you think. Pick up a Magic Eraser next time you’re in the store, because it will soon become your go-to for keeping your sneakers white. Simply wet the Magic Eraser with water, and rub your shoes in a circular motion to watch the eraser work its magic.

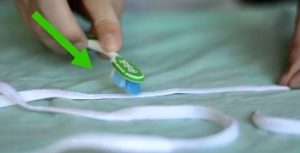
Last, but not least – don’t forget the shoelaces. Remove your shoelaces from your sneakers. Fill your sink with hot water and add a few dashes of your favorite laundry detergent. Massage the laces between your thumb and index finger. You can also use the detergent and a toothbrush to get a deep cleaning. Squeeze the laces in a towel or paper towel to get out excess water, then hang them to dry.

Specialty sneakers.  Sometimes sneakers have a different type of material that needs to be cleaned a little bit differently.

How to Clean:

White canvas sneakers: Combine baking soda with an equal amount of a mixture that’s half water and half hydrogen peroxide until it forms a paste. After making sure all excess dirt is brushed off your sneakers, apply the mixture. Let your shoes sit for a few hours until the mixture has hardened. Shake off the hardened mixture and use an old toothbrush or crumpled up paper towel to remove the excess paste. You’ll notice those sneakers are way whiter! If the sneakers are still damp or wet let them dry before wearing them.

White leather sneakers: It might sound too good to be true, but getting your favorite white leather sneakers looking good-as-new, is as easy as taking a toothbrush with your favorite white toothpaste to the surfaces of the shoe. Use warm water with the toothpaste. You can even add sugar to the toothpaste to create an exfoliate effect for any areas where dirt seems to be caked on. Wipe with a clean towel or paper towel. Again, if the sneakers are still damp or wet let them dry before wearing them.


Read More “6 Ways to Cut Down Energy Costs In The Summer”

Removing Smoke Odor On Clothes

We all know that smell. The one that lingers after a night out, dinner around a camp fire or an evening spent at a concert. That lingering odor that follows you home. How do you get that annoying smoke odor out of your clothes?

WITHOUT WASHING:

Air it Out

The first thing a smoky garment needs is some fresh air.  Hang the garments in a well ventilated area…even better hang outside.  It’s amazing what a little sun and fresh air can do.

Odor Eliminating Spray or Essential Oils

If the smoke smell remains, keep the garments hanging and use an odor eliminating such as Febreze all over the front and back.  You can make your own odor eliminating spray by combining equal parts vinegar and water in a spray bottle.  Add 20-30 drops of your favorite essential oil such as lemon or mint oil.

Baking Soda

Place garment in an extra large plastic zipper bag with plenty of room for the garment to move around.  If you don’t have a large enough zipper bag – use a plastic shopping bag or garbage bag. Add ½ cup of baking soda, seal or tie the bag securely, give it a quick shake and let the entire thing sit overnight.  That will give the baking soda time to absorb the odor.  Once it’s done sitting, take the bag outside, open and shake off excess baking soda. Tumble garment in low or no heat drying cycle to help.

IN THE WASHING MACHINE:

Vinegar Pre-Soak

Before washing, give your garment a nice, long, soak.  Add 1 cup vinegar to a sink or tub, then fill with warm water. Add a few drops of your favorite essential oil for a fresh scent.  Soak garment for 30-60 minutes, then wash as directed.

Scent Booster

I’ve tried  Downy Unstopables and love what they do.  Just add a scoop to a load of smoky-smelling clothes and let them go to work.

Lemon Juice

Fresh lemon juice can do wonders for all kinds of cleaning purposes, especially in the laundry room.  Whiten whites and remove all sorts of odors, such as smoke, just by adding ½ a cup of lemon juice to the wash.

Vodka

Alcohol is a powerful odor remover and safe on most washable fabrics.  Pour ½ cup of cheap vodka (or rubbing alcohol) into the wash to eliminate tough odors.


Read More “6 Ways to Cut Down Energy Costs In The Summer”

The Importance of Sorting Clothes

Interestingly enough, you’ll find several different opinions when it comes to sorting your laundry.  Our method is certainly not the only way.  If you have a method that works for you, then by all means keep doing it!  But if you’re getting worn out, torn or discolored clothes, then this article is for you.

What’s the reason to sort clothes in the first place? Do you really need to sort clothes at all?  In our opinion, you do.  Sorting clothes allows you to use different wash cycles (delicate, normal, permanent press) and also allows for washing in different temperatures.

Most importantly, sorting clothes decreases the chances that a garment is going to bleed onto another when you control the cycle type and water temperature.

Sorting Clothes by Color

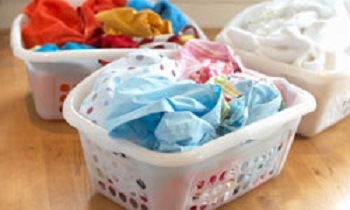
There are several distinct piles in which to sort clothes: whites, darks, lights, jeans, and delicates.

∙Whites:  T-shirts, underwear, socks and other similar items fall into this category.  This pile is for white sturdy cottons that can withstand normal agitation in the washer on a warm or hot wash cycle.

∙Darks: Grays, blacks, navies, reds, dark purples and similar colors are sorted into this load.

∙Lights: More pastel-type colors such as pinks, lavenders, light blues, lights greens and yellows are placed in this pile of laundry.

∙Jeans: All items with denim material are washed together in this load.

∙Delicates: This category includes several types of clothing – lingerie, washable silks, and any clothing you’d like to keep from the harsh agitation of the washer.

Sorting Clothes by Fabric Weight

Please note that color is not the only consideration when sorting clothes. The weight of the garment should be considered as well.

For example, if you have several pairs of heavy cotton pants, or denim, then you don’t want to wash those with thin t-shirts.  Washing light- weight clothes with heavy material can possibly tear or rip those garments.

If they are placed in the dryer together, they obviously won’t dry at the same rate since one fabric is much heavier than the other.

It’s best just to separate these types of garments from the start and wash them in two separate loads.

Read More “6 Ways to Cut Down Energy Costs In The Summer”

Removing Yellow Stains

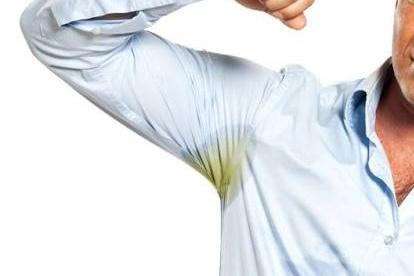
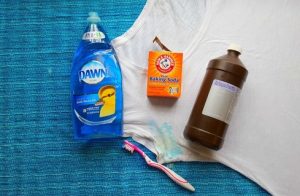
Stains occur when the aluminum in your antiperspirant or deodorant combines with the salt in your sweat. The stains are notoriously difficult to get rid of with normal washing in the laundry machine.  According to  We recommend doing a pre-test on a small area before trying.

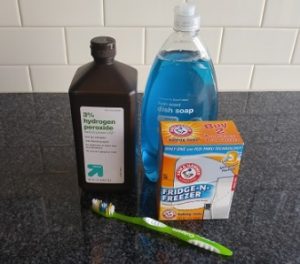
Here’s what you need:

  • 3% hydrogen peroxide
  • Dish soap
  • Baking soda
  • Toothbrush

Apply the ingredients directly to the shirt, use an old toothbrush to work them in for a minute, and then let the shirt sit for at least an hour before putting it in the washing machine.  To prevent the stains in the first place, Degree deodorant says it helps to wear loose clothing, make sure your antiperspirant deodorant is dry before you get dressed and don’t use too much product.


Read More “6 Ways to Cut Down Energy Costs In The Summer”

Antique Linen Care

Some of us are fortunate enough to inherit a little piece of our family history. If we’re lucky, these items will be in good condition, but that’s not always the case. Some items may have dry rot, mouse nibbles and/or rust. You won’t be able to save these things if the fibers are already compromised. If you tug on two sides of a garment and it comes apart without much effort, your item has dry rot and has reached the end. But if you’re lucky enough to have a piece of family history here are some ways to take care of it.

To start, here are a few items you should have on hand:
White Vinegar
Rust Remover
Restoration – (Oxyclean is similar, more widely available and slightly less expensive than Restoration, but it doesn’t work as well.)
Bleach pen
Laundry detergent (simple soap, nothing added)

***PLEASE NOTE THAT I DO NOT GUARANTEE ANY METHOD THAT YOU CHOOSE TO TRY. IT ALL DEPENDS ON THE CONDITION OF THE GARMENT.***

“Restoration” and white vinegar are preferred products. Read the label and use common sense. You may only need to use “Restoration” for your initial laundering to remove storage dirt. You can also use “Restoration” in the washing machine with your laundry, too. It removes odors, age spots, storage stains, label stains and often, some rust. If it doesn’t remove the rust, try using “Whink Rust & Stain Remover.” Be aware that if rust has already eaten away the fibers that you may be left with a hole where the rust had been after cleaning with rust/stain remover.

Use “Restoration” first and, if stains remain after two or three sessions with it, put the dampened piece outside in bright sunshine for a day. This is often a magical solution. Horrible stains will usually disappear within an hour. This is the least invasive method. It is effective and it’s free – it also sanitizes. However, sunlight does bleach and weaken fibers over time. Sunlight is destructive so I am not suggesting that you constantly subject your fragile items to sunlight. This method, used once or twice on a piece that would otherwise need to be thrown away, can be very helpful. If the stains persist, you may need to resort to using bleach with laundry detergent. I like to have a bleach pen on hand because it allows me to pinpoint where I apply the bleach. After using bleach, always rinse with white vinegar, then rinse again with clear water.

Step 1. Use hot water with “Restoration” until the water turns clear. (approx. 4- 6 hours or overnight) If the water is not clear after overnight soak, repeat this step. Extremely filthy items may require several soakings.

Step 2. Drain and refill container with water; add white vinegar (a splash or a cup, depending on container size); swish around and soak for 10-20 minutes.

Step 3. Drain and refill with lots of clear water; swish around and soak for 15 minutes. Done!

If stains remain, repeat entire process.
If there is rust, use rust remover on wet fabric, then repeat from Step 2.

If stains remain, lay wet/damp item outdoors in sunshine.

If stains remain, soak with laundry detergent and small amount of bleach. Or use a bleach pen on small stains. It is better to soak longer using very little bleach.

IMPORTANT!
DO NOT mix chemical treatments. Pre-rinse items that may have bleach or detergent residue with vinegar to neutralize the bleach and then rinse twice in clear water before trying another treatment. DO NOT bleach anything after using Oxyclean or peroxide or any other chemical treatment. Your items may turn permanently blue, or worse Rinse really well before trying any other product.
Read More “6 Ways to Cut Down Energy Costs In The Summer”

Remove Embarrassing Underarm Stains

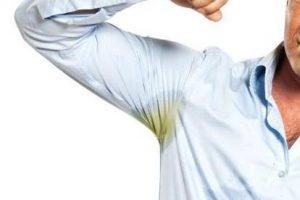
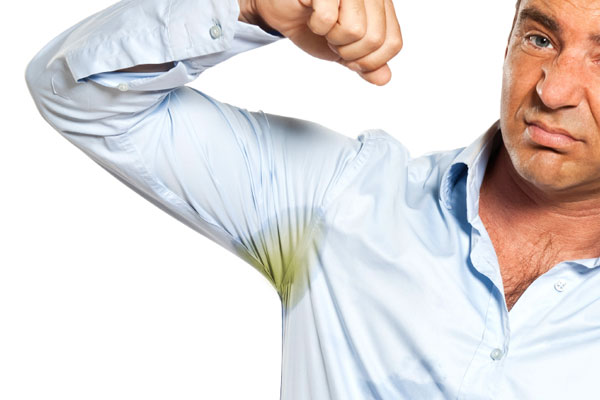
Stains occur when the aluminum in your antiperspirant or deodorant combines with the salt in your sweat. The stains are notoriously difficult to get rid of with normal washing in the laundry machine. We recommend doing a pre-test on a small area before trying.

Method #1

You will need:

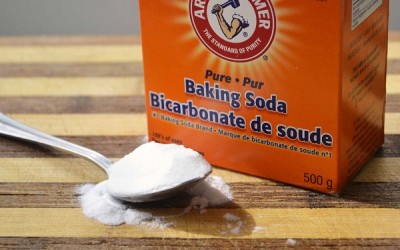
  • 3% hydrogen peroxide
  • Dish soap
  • Baking soda
  • Toothbrush

Apply the ingredients directly to the shirt, use an old toothbrush to work them in for a minute, and then let the shirt sit for at least an hour before putting it in the washing machine.

Method #2

You will need:

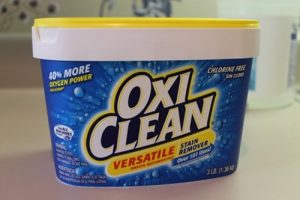
  • OxiClean
  • Toothbrush

Fill up a sink with warm water and mix it with one scoop of OxiClean.  Place your shirt in the sink, making sure the yellow stains are completely submerged. For mild stains, just let the shirt sit for an hour. For more stubborn stains, rub a thick mixture of OxiClean and water on the stain, and let the shirt sit overnight before putting it in the diluted mixture.  After you’re done soaking the shirt, scrub the stain with the toothbrush, then rinse and launder as usual.

To prevent the stains in the first place, Degree deodorant says it helps to wear loose clothing, make sure your antiperspirant deodorant is dry before you get dressed and don’t use too much product.

Read More “6 Ways to Cut Down Energy Costs In The Summer”

How To Avoid the Iron!


I DO NOT like to iron! I want to pick out an outfit, put it on, and then be on my way.  I do not want to pick out an outfit, get the iron and ironing board out, and then iron it. It takes more time out of my schedule if I have to iron, and if you’re in a rush, it can be stressful! Here are a few of my ”tried and true” tips to help you out.

∙Be sure to dry permanent press clothing in a gentle/low heat dryer, not HOT!  Hot will only make a wrinkled mess and can melt the fabric. If you forget your clothes and don’t pull them out of the dryer in time, and they happened to get wrinkled, all you have to do is place a damp bath towel in with your clothes on gentle/low heat and dry for a few more minutes. Be sure to take them out just before or as soon as they are dry and lay flat or hang on a hanger.

∙After you’ve washed and dried your clothes, remove them immediately from the dryer. Then with a little spray bottle filled with water, spray the collar, button hole placard, and the sleeve edges. Then quickly “Finger Press” those focal points to be smooth and flat so they are no longer folded, curled, or crinkly. This easy finishing touch makes a big difference for permanent press shirts to look so much nicer….and it’s easy! No Iron involved!

∙If you do end up needing to get the dreaded iron out, then try to iron your clothes with a damp cloth. Place the damp cloth on top of the garment and iron. This will steam the fabric and it won’t be too hot. Try a small spot first to see if this will work on the fabric. Remember, too hot of a dryer or iron on permanent press fabric can melt it.

Read More “6 Ways to Cut Down Energy Costs In The Summer”

Remove Embarrassing Underarm Stains

Stains occur when the aluminum in your antiperspirant or deodorant combines with the salt in your sweat. The stains are notoriously difficult to get rid of with normal washing in the laundry machine. We recommend doing a pre-test on a small area before trying.

Method #1

You will need:

  • 3% hydrogen peroxide
  • Dish soap
  • Baking soda
  • Toothbrush

Apply the ingredients directly to the shirt, use an old toothbrush to work them in for a minute, and then let the shirt sit for at least an hour before putting it in the washing machine.

Method #2

You will need:

  • OxiClean
  • Toothbrush

Fill up a sink with warm water and mix it with one scoop of OxiClean.  Place your shirt in the sink, making sure the yellow stains are completely submerged. For mild stains, just let the shirt sit for an hour. For more stubborn stains, rub a thick mixture of OxiClean and water on the stain, and let the shirt sit overnight before putting it in the diluted mixture.  After you’re done soaking the shirt, scrub the stain with the toothbrush, then rinse and launder as usual.

To prevent the stains in the first place, Degree deodorant says it helps to wear loose clothing, make sure your antiperspirant deodorant is dry before you get dressed and don’t use too much product.

Read More “6 Ways to Cut Down Energy Costs In The Summer”

5 Ways To Use Vinegar In Your Laundry


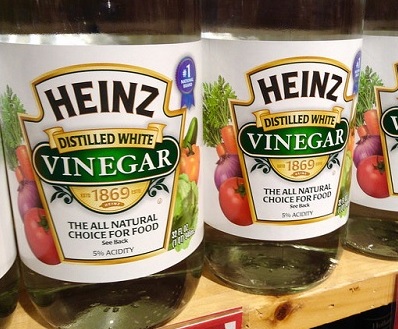
White distilled vinegar can be used in the laundry to whiten, brighten, reduce odor and soften clothes without harsh chemicals. It’s safe to use in both standard and high efficiency washers and is beneficial to septic tanks. In the grocery store, you will usually find distilled white vinegar next to apple cider vinegar used most often in cooking.

When buying vinegar to use in the laundry, choose white distilled vinegar. It contains no tannins (natural plant dyes that can stain clothes) and it’s less expensive

Brighten & Whiten Clothes

The acetic acid in distilled white vinegar is so mild that it will not harm washable fabrics; yet is strong enough to dissolve residues left by soaps and detergents. Adding just 1/2 cup vinegar to the final rinse will result in brighter, clearer colors. If using an automatic dispenser, add the distilled white vinegar to the fabric softener dispenser or add the vinegar manually at the beginning of the rinse cycle.

The mild acetic acid in vinegar also acts as a whitener and brightener for gray, dingy clothes in the laundry. To get stained white socks and dingy dishcloths white again, add 1 cup of white distilled vinegar to a large pot of water. Heat to boiling and add the articles. Let soak overnight and then launder as usual. This should only be used on 100 percent cotton clothing.

Banish Mildew Odor

Leaving wet towels in a hamper or a load of wet clothing in the washer can create mildew growth and a moldy smell. To get everything smelling fresh, fill the washer with hot water, add two cups of white distilled vinegar and run through the wash cycle. Then, run a normal cycle with detergent. This works well for small amounts of mold and sour smells.

Naturally Soften Clothes

If you don’t like the idea of using heavily scented commercial fabric softeners, but want softer clothes, white distilled vinegar acts as a natural fabric softener and leaves no residue on laundry. Just add 1/2 cup to the final rinse cycle.

If you do like a light scent, add a couple of drops of essential oil like lavender to the bottle of vinegar.

Commercial fabric softeners interfere with the fire retardant qualities of children’s clothing—especially pajamas—and should never be used with their laundry. White distilled vinegar is safe and hypoallergenic for all children’s clothes.

Reduce Lint and Pet Hair

Just 1/2 cup of white distilled vinegar in the rinse cycle, will help prevent lint and pet hair from clinging to clothes.

Fight Under Arm Odors

Fill a spray bottle with undiluted distilled white vinegar and keep it on hand in the laundry room to remove perspiration odor and stains on washable clothing. Spray the vinegar directly on the inside of the underarm areas before tossing them into the washing machine. Allow it to work for at least ten minutes before washing. The vinegar will help to cut through residual deodorant left on clothing and prevent underarm yellowing.


Read More “6 Ways to Cut Down Energy Costs In The Summer”
bottom Gears Mobile bottom Gears