Keeping Pillows Clean
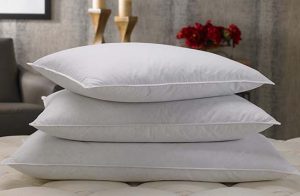
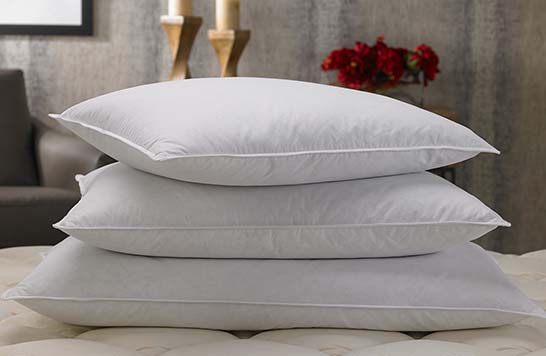
Over-sized, bulky and awkward – sometimes it’s hard to know how to wash your pillows.  Just remember with all of the germs, kids, pets, and guests it’s important to remember to wash them.The best way, plain and simple; machine wash your pillows. Most down and synthetic pillows can be machine washed and dried on low heat, but check the label to be sure.

You’ll want to wash and dry at least two pillows at a time to keep your machine balanced, but take care not to stuff too many in at once. Pillows need plenty of water to get thoroughly clean, and plenty of space to get thoroughly dry. Just follow these simple steps and you’ll have clean, fluffy pillows.

NOTE: Foam pillows should not be washed! Sprinkling them with cornstarch, letting them sit for an hour or longer, then vacuuming thoroughly instead.

Detergent / Water Temperature

Make sure you use something that’s fragrance-free and will rinse clean.  Homemade laundry soap is always a good choice: 2 cups soap flakes and 1 cup each baking soda, washing soda, and borax. Water needs to be 140 degrees or higher to kill dust mites, so make sure your water heater isn’t set too low. It’s good to consider an extra spin cycle to squeeze out as much dampness as possible.

Drying

Make sure you dry pillows completely, even a little dampness could reintroduce the very mildew, bacteria, and dust mites you’re trying to avoid. Dry on low, checking them every 20 to 30 minutes to ensure even drying. For extra fluff, dry with dryer balls or a tennis ball in a sock.

Freshening Between Drying

Put your pillows in the dryer on “air fluff” every few months, to get rid of much of the dust.  If you can handle a little bit of the smell until it dissipates, you can include a vinegar-dampened washcloth, since vinegar is so good at killing mold and mildew.

Pillow Protectors

Removable pillow protectors buy you more time between full-on pillow cleaning.  Simply remove and machine-wash protectors in hot water once a month.

Read More “6 Ways to Cut Down Energy Costs In The Summer”

How To Remove Ink Stains

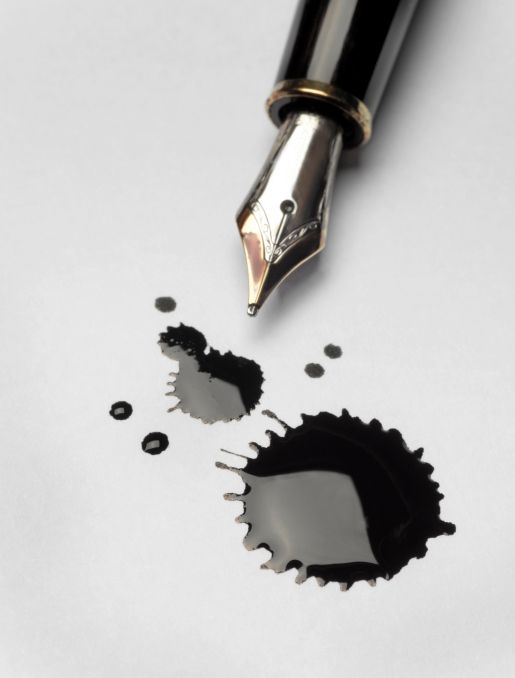
Most of us have had an ink stain at some point or another, or a leaking pen ruin a favorite shirt or pants.  Before you toss those clothes in the rag bag, check out some of these simple at-home tips to deal with ink stain removal.

Hair Spray

Squirt the stain with hair spray and the pen marks should come right off.

Rubbing Alcohol

Try soaking the spot in rubbing alcohol for a few minutes to remove the ink, before putting the garment in the wash.

Vinegar

Treat an ink stain on a shirt by first wetting it with some white vinegar, then rub in a paste of 2 parts vinegar to 3 parts cornstarch. Let the paste thoroughly dry before washing the item.

Milk

Believe it or not, a Readers Digest article says to remove ink stains from colored clothes, an overnight milk bath will often do the trick. Just soak the soiled garment in milk overnight and launder as usual the next day.

Salt

Pour salt on an ink stain that’s still wet, gently dab with a wet paper towel, and then remove and brush off the salt. Repeat until the stain has completely lifted.

Sand Paper

Yes, you read that right.  The same Readers Digest article said to use a little fine-grit sandpaper and a gentle touch for removing or at least minimizing an ink stain or small scuff mark on suede clothing or shoes. Afterward, bring up the nap with a toothbrush or nailbrush. You might avoid an expensive trip to the dry cleaner.

Cream of Tartar

Make a paste by mixing 2 tablespoons of cream of tartar with 2 tablespoons of lemon juice. Cover the ink stain with the paste for 3 to 4 hours, then brush off the paste and wash the shirt.

Reminder: be sure that you have gotten all the ink out before you dry the washed garment in a dryer, because the heat of a dryer will set the stain.


Read More “6 Ways to Cut Down Energy Costs In The Summer”

Cleaner, Brighter, Clothes

Why buy expensive or dangerous cleaning products, bleaches or de-greasers when all you need is probably already in your cabinet!

Did you know baking soda can work magic — including getting cleaner and brighter  whites at a fraction of the cost.

It’s as easy as 1, 2, 3…..

1) Put one cup of baking soda in your wash.

2) Then add your detergent

3) Run your wash on the normal setting and……Voila!  Brighter, cleaner whites!

Try this DIY homemade laundry detergent recipe. This is a project that will save you money and help you rid your home of toxic chemical cleaners and make your clothes brighter and cleaner in the process.

Ingredients

  • 1 bar (or 4.5 ounces) shaved bar soap (a homemade laundry bar, Ivory, or Zote)
  • 1 cup Borax
  • 1 cup baking soda

Directions

Thoroughly mix all ingredients together. Use 1 Tbsp per small load (or 2-3 Tbsp for large or heavily soiled loads) then add  to your laundry.  Store remaining in a sealed container.

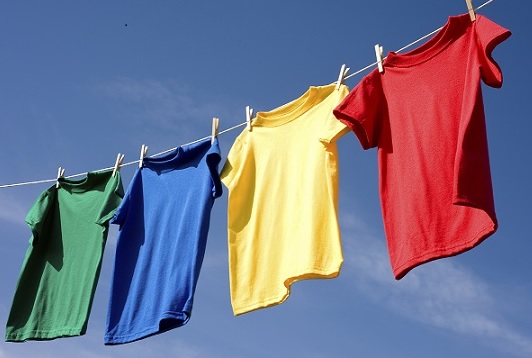
Keeping your colors brighter is a challenge at times. Colors fade when the chemical bonds between the dye and the fabric break down, so the best way to keep your colors bright is to wash clothes in a way that either prevents dyes from dissolving, protects the fibers in the fabric — or both. Follow these tips, and your colors will look as good as new!

  • Turn clothes inside out— According to experts, the tumbling action of the wash cycle and the dryer can cause fabric fibers to break as clothes collide into each other and against the walls of the machine. Turning clothes inside out before you wash them will keep the worst of the fraying on the inside.
  • Soak clothes in salt water— Salt is inexpensive, environmentally friendly and great for keeping your colors bright. Before you wash that colorful new top, soak it overnight in salt water. Simply fill your washer with cold water, add 1/4 to 1/2 cup of salt, and then add your clothes. In the morning, just add detergent and run the washer as you normally would. You can add additional clothes at this point, too — just be sure not to overfill the washer.
  • Wash in cold water— Washing in cold water instead of hot not only helps keep your colors bright, it also conserves energy and saves you money. For best results, use a detergent formulated for bright clothes and cold-water washing.

Read More “6 Ways to Cut Down Energy Costs In The Summer”

Cleaning Stuffed Animals

Did you know it’s perfectly safe to throw most stuffed animals in the washing machine? On gentle cycle using warm or cold water, a washing machine will get your stuffed animals clean without ruining them.

Most care labels instruct to hand wash, but after raising two kids and needing to deep clean their beloved friends, I tried machine washing.  Set the washing machine  to the delicate cycle, apply  some Spray N’ Wash, Mean Green, or your choice of stain remover if needed,  scrub a little, and wash. Afterwards hang them up to dry. I learned the hard way that throwing them in the dryer can melt the fake fur on some of them.  Poor Simba from the Lion King had a melted mane!

SOME THINGS TO CONSIDER WHEN DECIDING IF YOUR STUFFED ANIMALS CAN BE WASHED IN THE WASHING MACHINE:

  • The care label – if it can be hand washed, it can likely withstand the delicate cycle in the washing machine. Your washing machine may even have a hand wash cycle.
  • Material – Take notice of the care label and use your sense of touch as well as sight to thoroughly examine all parts of the stuffed animal to be washed. Polyester and acetate (a form of cotton) are fine to wash. The stuffed animals I washed have plastic pellets and were fine, but you wouldn’t want to machine wash something with foam balls such as Beanie Babies. Be cautious of delicate clothing items and things that are glued on, they may not survive!
  • Age – The older it is, the more fragile it will be.


Read More “6 Ways to Cut Down Energy Costs In The Summer”

Remove Embarrassing Underarm Stains

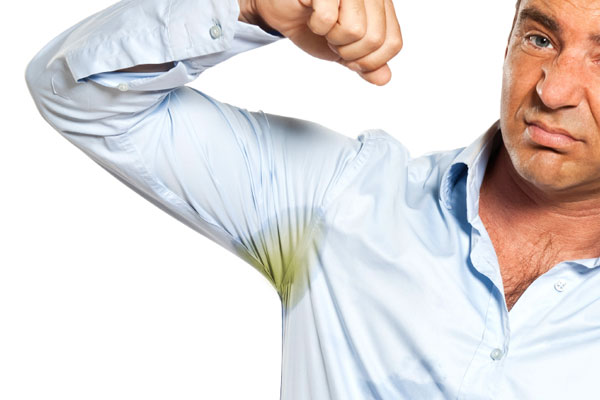
Stains occur when the aluminum in your antiperspirant or deodorant combines with the salt in your sweat. The stains are notoriously difficult to get rid of with normal washing in the laundry machine. We recommend doing a pre-test on a small area before trying.

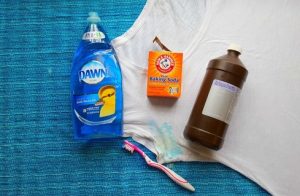
Method #1

You will need:

  • 3% hydrogen peroxide
  • Dish soap
  • Baking soda
  • Toothbrush

Apply the ingredients directly to the shirt, use an old toothbrush to work them in for a minute, and then let the shirt sit for at least an hour before putting it in the washing machine.

Method #2

You will need:

  • OxiClean
  • Toothbrush

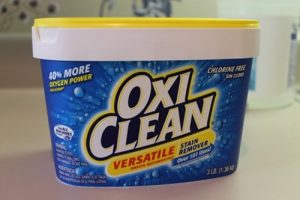
Fill up a sink with warm water and mix it with one scoop of OxiClean.  Place your shirt in the sink, making sure the yellow stains are completely submerged. For mild stains, just let the shirt sit for an hour. For more stubborn stains, rub a thick mixture of OxiClean and water on the stain, and let the shirt sit overnight before putting it in the diluted mixture.  After you’re done soaking the shirt, scrub the stain with the toothbrush, then rinse and launder as usual.

To prevent the stains in the first place, Degree deodorant says it helps to wear loose clothing, make sure your antiperspirant deodorant is dry before you get dressed and don’t use too much product.

Read More “6 Ways to Cut Down Energy Costs In The Summer”

Detergent Overload

Most people use far more detergent than they actually need to. Liquid, pods, powders – It’s no wonder there’s so much confusion about how to use laundry detergent correctly!  Knowing how much detergent to use can extend the life of your clothes and help conserve money by saving on the expense of detergent.

There are several factors to consider when it comes to using laundry detergent properly. First, determine what kind of detergent is best for you. Liquid detergents are easy to pour and work great for spot-cleaning grease stains and ground-in dirt. While powder detergents are good for consistent cleaning overall, too much powder can leave a milky residue on your clothes if not measured properly.  The popular pod takes the guesswork out of measuring out your detergent.  Be sure to never use regular detergent in high-efficiency (HE) washers. This will create far too many suds and can damage the washer’s mechanics over time.

Second, consider load size. Most detergent measuring caps or instructions should state the ideal amount of detergent to use for certain load sizes. Here’s a quick way to determine the load size: if the machine’s drum looks one-quarter full once all the clothes are inside, then that’s a small load. If it looks about half-full, it’s a medium load, and if it’s close to full, it’s a full load. Do not overload your washer—cramming in too many clothes won’t allow the detergent to distribute evenly, which can cause wrinkled, less-than-clean clothes.

Finally, be careful when measuring out your laundry detergent. Using too much detergent won’t make your clothes cleaner—in fact, it will leave a residue on your clothes that can make them break down that much faster and too many suds will not allow an adequate amount of water to fill the machine.  This is due to a water level sensor. Also, detergents today tend to be much more concentrated than they were in the past, so be sure to carefully check the recommended amounts on the detergent packaging and double-check the cap’s measuring lines before you pour.

Read More “6 Ways to Cut Down Energy Costs In The Summer”

Laundry Tips & Tricks Your Mom Never Taught You

Ok, so maybe your Mom did tell you about  these tips and tricks, but in case she didn’t, we’re here to help you out.  Sometimes there are just some laundry care tips that don’t fit into any particular category. You’ll be surprised after you read through these when they just might come in handy.

  • Before you wear a new garment, put a little dot of clear nail polish on the front and back threads of each button. Buttons will stay on longer when the threads are sealed.
  • Zippers won’t stick if you rub them with the edge of a bar of soap.
  • To remove a hem crease, sponge the line on the fabric with a clean white cloth dipped in distilled white vinegar and then press with a warm iron from the wrong side of the garment.
  • When washing clothes, add detergent to the washer first. Pouring detergent on clothing can leave streaks and even cause fabrics to fade.
  • Avoid getting perfume, aftershave or hair spray on leather because the alcohol may ruin the finish and color.
  • Wash nylon clothing every time after wearing. Nylon is very hard to clean once it becomes heavily soiled. Treat any oily stains immediately after they happen with warm or hot water to prevent them from becoming permanent..
  • NEVER use an acetone-based nail polish remover on garments to remove stains! The acetone will dissolve the fabric!
  • Knit garments should always be folded to store on a shelf or in a drawer. Hanging knits can cause them to stretch completely out of shape.
  • Turn all clothes inside out before washing to prevent fading and keep the right side looking like new.
  • If you don’t have a mesh laundry bag for washing your delicate fabrics, place them in a pillowcase and fasten the loose end with a plastic bag tie or shoelace before tossing it in the washer.
  • To reduce wrinkles, wet a hand towel with water, wring out the excess water and toss in the dryer with wrinkled items. Dry on high for about five minutes. Remove the clothes while still damp and hang to dry.
Read More “6 Ways to Cut Down Energy Costs In The Summer”

Easy Grease Stain Removal

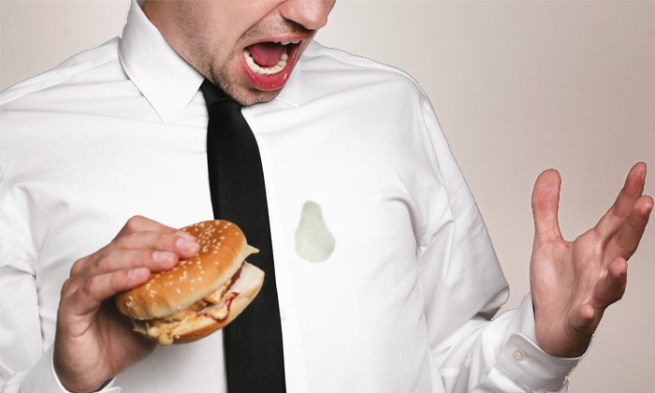
No matter how hard you try, sometimes you get a greasy, oily stain on your favorite shirt or pair of pants.  Don’t worry, they don’t need to become a permanent memory on your clothes.  With some regular cleaning products you probably already have, and a couple that might be worth purchasing, grease stain removal is a breeze.

Dish Soap & Hot Water

Treat the stained garment by removing grease from the surface with dish-washing liquid. Dish detergent is designed to break up surface grease and allow it to rinse away.

  • Place the garment stain-side down on white paper towels.(Don’t use printed paper towels – it could transfer ink color to your clothes.)
  • Squirt a dime-size amount of dish-washing liquid on the backside of the grease stains.Gently massage the dish detergent into the stain center and work your way to the edges. Give it a minute or so to work.
  • Rinse the treated area under warm to hot running water for a minute to remove the dish detergent. The water temperature will depend on what the fabric can handle. For 100% cotton, you can use hot water.
  • Follow the rinse with a spin in the washing machine, using the hottest water that’s safe for the fabric and your regular laundry detergent. If you can’t read the clothing label care tab, choose a warm water wash just to be safe.

Laundry Detergent Pre-treat

Rub a liquid a laundry detergent into the stain, and let it sit for 3-5 minutes. Wash the stained item separately from the rest of your clothes in the hottest recommended water, adding a little bleach or bleach alternative to the wash water.

Extend the wash cycle to give the garment some extra time in the spin cycle. With a top-loading washer, wait 6-8 minutes into the cycle, stop it, and spin the dial back for another 10 minutes.

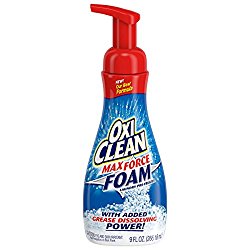
For really tough, greasy stains, OxiClean Max Force Foam Laundry Pre-Treater 9  is one of the toughest grease stain busters around.

WD-40 & Dish Soap

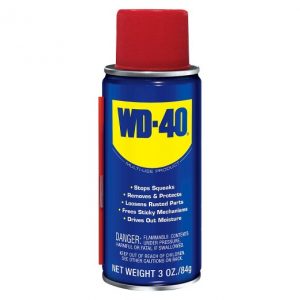
Place the garment on paper towels, grease stain side up. Spray the greasy area with WD-40. Let stand 10 minutes. Then turn the garment over and spray the underside  as well.

Allow to sit another 10 minutes.  Using paper towels, blot on some hand dishwashing liquid, replacing the towels as they absorb the grease. Rinse the treated area, and wash separately from the rest of your laundry.

Last, but not least, inspect the treated area before drying to ensure the greasy stains are completely removed.

Before placing the garment in the dryer, inspect the formerly greasy area. If you can still see any residue, repeat the pre-treating and washing process until clear. Then, go ahead and dry the garment as usual.


Read More “6 Ways to Cut Down Energy Costs In The Summer”

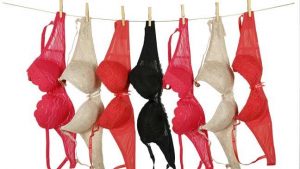
Bra-Washing 101

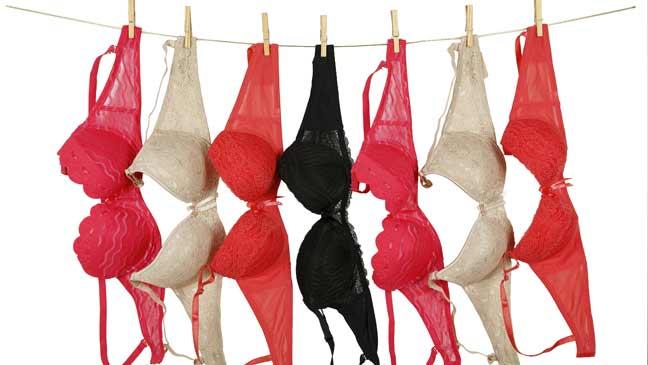
Although bras don’t necessarily fall in the “wash after every use” category, like underwear and socks, they do require more maintenance than you might be currently giving them.

“Rule of Three”

They should be washed every three wears rather than every three days. It’s a good idea to have one to wash, one to wear and one to store and swap out.

The reason you should have multiple bras to swap out is because the fibers in the elastics don’t have a chance to rebound and go back to where they were. In a matter of days, you’ll find the back of your bra hiking, because those elastics have already stretched.

Washing

Ideally, bras should be hand washed in warm water, using a delicate detergent. Gently rub until it’s clean, make sure it’s thoroughly rinsed and hang or lay flat to dry.

If you’re rushed for time, use your machine on the gentle/delicate cycle  and use a gentle detergent. Be sure to secure the hook and eye because a lot of time that hook and eye can snag the lace or fabric.

Thankfully, newer washing machines, which don’t have agitators, are much gentler on bras. But even so, placing your bra in a lingerie bag before putting it in the machine is best. Lingerie bags prevent warping of underwire bras, fraying and excessive stress on the elastic waist.

Drying

Never put your bra in the dryer. Heat can cause your bra to shrink and that will impact the fit and comfort. A well-made bra should last up to five years if it is hand-washed and air-dried.

Read More “6 Ways to Cut Down Energy Costs In The Summer”

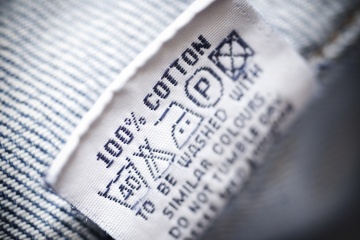
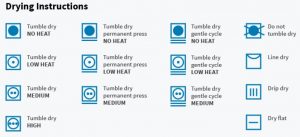
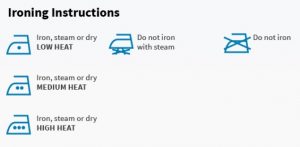
Decoding Laundry Symbols

As if life wasn’t confusing enough with emoji’s and acronyms – now we have to deal with squares, circles, triangles, lines and dots on the labels of our clothing! However, clothing-care symbols are a code worth knowing.

The American Society for Testing and Materials, ASTM International, put out a standardized set of care symbols with the goal of creating a universally understood “laundry language”.

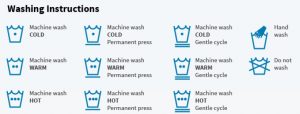
ASTM symbols follow a simple scheme and a set order: wash (tub shape), bleach (triangle), dry (square), iron (iron) and special care (circle). A circle by itself usually means dry cleaning or wet cleaning. A circle (special care) inside a square (drying) changes “dry” to “tumble dry.”

Adding lines, dots and other marks modify these base symbols and adds info. For example, a large X through a symbol offers a warning, where an empty symbol often means that any version of what the symbol represents is OK to use. A crossed-out triangle means do not bleach, where an empty triangle tells you that any bleach will do. Adding two parallel diagonal lines means to use only non-chlorine/oxygen bleach.

Clear as mud?  Don’t worry, I’ve included a chart to help you decipher what seem to be ancient Egyptian hieroglyphics:


Read More “6 Ways to Cut Down Energy Costs In The Summer”
bottom Gears Mobile bottom Gears