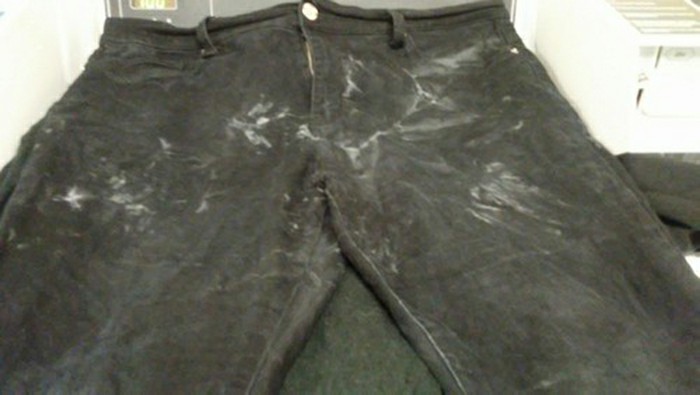
Battling White Residue Left On Clothes

Residue left on freshly laundered clothes is frustrating and expensive because most of the time you need to rewash the items to get rid of it.

There are several culprits that contribute to this. Through process of elimination, hopefully you’ll be able to solve your residue problem.

Undissolved Detergent

When you are using a top loading machine always pour powdered detergent into the empty washer first before loading clothes. This will give it time to dissolve as the machine fills with water.

If you are washing in cold water the powdered detergent may not dissolve entirely. For best results with cold water and powdered detergent, dissolve it first in a cup of hot water before adding to the washer.

NEVER pour detergent directly on dry clothes or throw the detergent pack (Pod) on top of the load. Doing so will not let the detergent disperses evenly, causing blue or green streaks to appear on lighter clothing.

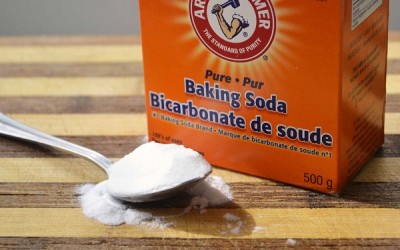
If you have a front loading washer, or with a top loader with an automatic detergent dispenser, it may be clogged with lumps of detergent. Even liquid products will clump. Remove all detergent dispensers and clean with hot water mixed with 1/2 cup distilled white vinegar.  Make sure it’s not apple cider vinegar.

If the dispensers are not removable. Fill each dispenser with heated pure distilled white vinegar and allow to sit for at least 30 minutes. Then run a wash cycle with no laundry in the drum to clean out the dispensers.

Too Much Detergent

More is not always better. Using too much detergent can leave residue on clothes.

This is particularly true in high-efficiency washers – both top loading and front loading. These washers use much less water during the wash and rinse cycles. Using more than 3 teaspoons (yes, 3 teaspoons) of detergent will leave residue in and on your clothes.

Too much fabric softener

Never pour fabric softener directly on wet clothes and always use the smallest recommended amount. If you have an automatic dispenser, clean it frequently.

Clogged or Failing Water Pump 

If the water in the wash or rinse cycle is draining too slowly, it could be lint, undissolved detergent and/or soil. This can be redeposit on your clothes.

Many new washers have a small door near the bottom of the washer to access the filter right above the water pump. On older washers, you will have to access from the back of the machine in order to clean the pump area.

Open the area to your drain line filter and be sure that it is not clogged with lint or small items that could slow the flow of rinse water.

If you have cleaned the filter and the washer is still slow to drain, the water pump is probably failing.

Overloading Washer

Stuffing too many items into a washer doesn’t leave room for the clothes to move around freely and for the soil and residue to be washed away.

Dirty Washer

If you have never cleaned your washer, it can have soil, minerals and detergent residue that can build-up and redeposit on clothes. It’s like the soap scum in your shower. This is because of the small amount of water in HE, high efficiency, machines. You need to clean HE washers monthly and a standard machine at least twice per year.

 Washing With Hard Water

Hard water can react with detergents and leave mineral deposits that remain on clothes.

Get Rid of the Residue

Once you have eliminated all of the causes of the problem, the only way to get rid of the residue is to rewash the clothes. Wash the stained items again in the hottest water suitable for the fabric but DO NOT add any detergent or fabric softener. Instead, add one cup of distilled white vinegar to the wash cycle to help fibers relax slightly and release the residue.

Read More 6 Ways to Cut Down Energy Costs In The Summer

Pillow Washing 101

Oversized, bulky and awkward – sometimes it’s hard to know how to wash your pillows.  Just remember with all of the germs, kids, pets, and guests it’s important to remember to wash them. The best way, plain and simple; machine wash your pillows. Most down and synthetic pillows can be machine washed and dried on low heat, but check the label to be sure.

You’ll want to wash and dry at least two pillows at a time to keep your machine balanced, but take care not to stuff too many in at once. Pillows need plenty of water to get thoroughly clean, and plenty of space to get thoroughly dry. Just follow these simple steps and you’ll have clean, fluffy pillows.

NOTE: Foam pillows should not be washed! Sprinkling them with cornstarch, letting them sit for an hour or longer, then vacuuming thoroughly instead.

Detergent / Water Temperature

Make sure you use something that’s fragrance-free and will rinse clean.  Homemade laundry soap is always a good choice: 2 cups soap flakes and 1 cup each baking soda, washing soda, and borax. Water needs to be 140 degrees or higher to kill dust mites, so make sure your water heater isn’t set too low. It’s good to consider an extra spin cycle to squeeze out as much dampness as possible.

Drying

Make sure you dry pillows completely, even a little dampness could reintroduce the very mildew, bacteria, and dust mites you’re trying to avoid. Dry on low, checking them every 20 to 30 minutes to ensure even drying. For extra fluff, dry with dryer balls or a tennis ball in a sock.

Freshening Between Drying

Put your pillows in the dryer on “air fluff” every few months, to get rid of much of the dust.  If you can handle a little bit of the smell until it dissipates, you can include a vinegar-dampened washcloth, since vinegar is so good at killing mold and mildew.

Pillow Protectors

Removable pillow protectors buy you more time between full-on pillow cleaning.  Simply remove and machine-wash protectors in hot water once a month.


Read More 6 Ways to Cut Down Energy Costs In The Summer

Why Wash New Garments Before Wearing Them?

There are three good reasons to wash new clothes, especially those that are worn in direct contact with your skin, before you wear them.

  • One is to wash out extra dye that can be transferred to your skin or other garments. Most fabric made from synthetic fibers (polyester, acrylic) are colored with azo-aniline dyes. These dyes can cause severe skin reactions for those who are allergic to them. If the allergy is severe, the rash will be similar to poison ivy. But even less severe reactions can cause dry, itchy inflamed patches of skin.
  • It is possible to transfer lice, scabies, bacteria and fungus from person to person when clothes are tried on. Dressing rooms can become breeding grounds for everything from viruses to athlete’s foot.
  • And, most importantly, to remove the chemical finishes that manufacturers put on clothes to enhance color or texture. The finishes won’t bother everyone, but if you have sensitive skin you can develop a rash especially in constant contact areas like armpits, collars, cuffs and trouser waists and thighs.

Urea formaldehyde is often the chemical used to prevent mildew on clothes that have to be shipped long distances in hot, humid containers from overseas to the United States. It has a very strong odor that will remain in the fabric until the garment is washed. One washing will not remove formaldehyde completely but you will reduce the build up significantly and it will continue to be removed with each wash.

It is especially important that children’s clothing, especially clothes for babies, be washed before they are worn. Babies are particularly sensitive to chemicals and skin rashes can occur. Select a detergent that is fragrance free and dye free as these can also cause skin reactions. Washing the clothes for children will also make them softer and more comfortable for them to wear.

Washing new sheets/blankets and towels is also important to remove chemicals since these come in direct contact with skin. Washing will also improve the absorbency of the fabric by removing surface fiber coatings.

If you have a tag on the garment that reads “wash separately before wearing”, beware of dye transfer and color bleeding. Washing will help remove the excess dye but check the rinse water. If color remains in the water, it make take several wash cycles to get rid of the excess dye so continue to wash separately or with similar colors.

Read More 6 Ways to Cut Down Energy Costs In The Summer

How To Avoid the Iron!


I DO NOT like to iron! I want to pick out an outfit, put it on, and then be on my way.  I do not want to pick out an outfit, get the iron and ironing board out, and then iron it. It takes more time out of my schedule if I have to iron, and if you’re in a rush, it can be stressful! Here are a few of my ”tried and true” tips to help you out.

Be sure to dry permanent press clothing in a gentle/low heat dryer, not HOT!  Hot will only make a wrinkled mess and can melt the fabric. If you forget your clothes and don’t pull them out of the dryer in time, and they happened to get wrinkled, all you have to do is place a damp bath towel in with your clothes on gentle/low heat and dry for a few more minutes. Be sure to take them out just before or as soon as they are dry and lay flat or hang on a hanger.

After you’ve washed and dried your clothes, remove them immediately from the dryer. Then with a little spray bottle filled with water, spray the collar, button hole placard, and the sleeve edges. Then quickly “Finger Press” those focal points to be smooth and flat so they are no longer folded, curled, or crinkly. This easy finishing touch makes a big difference for permanent press shirts to look so much nicer….and it’s easy! No Iron involved!

If you do end up needing to get the dreaded iron out, then try to iron your clothes with a damp cloth. Place the damp cloth on top of the garment and iron. This will steam the fabric and it won’t be too hot. Try a small spot first to see if this will work on the fabric. Remember, too hot of a dryer or iron on permanent press fabric can melt it.

Read More 6 Ways to Cut Down Energy Costs In The Summer

Achieve Laundry Perfection in Three Simple Steps


We’ve all done our share of laundry, but some of us have figured out a way to perfect it. Here are some of my favorite tips to keeping your clothes looking great and lasting longer.

Step One: Wait Before You Wash

Wear your clothing more than once. I know this might make some of you say “Gross!” but it’s really not.  You know if something needs to be washed.  If it reeks to high heaven – it needs to be washed, but over the course of an average day, clean people don’t get that smelly. Of course it depends on the activity you do during the day as well. Wearing your clothes at least twice before laundering them can save you a bundle on water and electric bills over the course of a year and save your clothes from wearing out before their time.

(Side note….I’m not talking about underwear & socks.  They need to be changed daily.)

Step Two: Divide and Conquer

Admit it, most of you will stuff everything in the washer to make one load. I get it, you want to save time and money, but this is hard on your clothes and they probably aren’t getting as clean as you think they are.  I sort laundry by “lights” and “darks”, which seems to be the traditional way of doing laundry.  Sorting clothes allows you to use different wash cycles (delicate vs. normal) and also allows for washing in different temperatures.

Most importantly, sorting clothes decreases the chances that a garment is going to bleed onto another when you control the cycle type and water temperature.

Step Three: Chose the Correct Wash Cycle & Water Temperature

Take a minute to read the labels on your clothing. You’ll find the information you need to choose both your water temperature and the type of washing cycle. Following the recommendations on the label is especially important if you are new to doing your own laundry or if the garment is new.

Read More 6 Ways to Cut Down Energy Costs In The Summer
bottom Gears Mobile bottom Gears