Proper Care For Your Sneakers

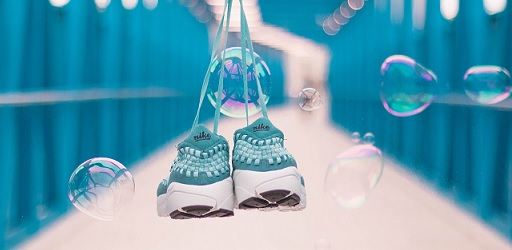
Have you ever looked down at your white sneakers and been self-conscious?  If you have, then follow these easy to do steps and feel good about your white, almost new looking, shoes.

First of all, start with preventative care.  Grab a bottle of stain repellent at the shoe store, or anywhere they carry shoe supplies, and spray your shoes. Simply spray the repellent evenly on the surface of your shoes and let them dry overnight. Give your shoes a nice cleaning every few weeks to ensure they stay looking brand new.

Next, clean the soles. When the soles or the rubber part on your favorite pair of shoes needs a good cleaning, give them a good scrub. Try this one spot-cleaning method that’s sure to work – and it’s probably not what you think. Pick up a Magic Eraser next time you’re in the store, because it will soon become your go-to for keeping your sneakers white. Simply wet the Magic Eraser with water, and rub your shoes in a circular motion to watch the eraser work its magic.

Last, but not least – don’t forget the shoelaces. Remove your shoelaces from your sneakers. Fill your sink with hot water and add a few dashes of your favorite laundry detergent. Massage the laces between your thumb and index finger. You can also use the detergent and a toothbrush to get a deep cleaning. Squeeze the laces in a towel or paper towel to get out excess water, then hang them to dry.

Specialty sneakers.  Sometimes sneakers have a different type of material that needs to be cleaned a little bit differently.

How to Clean:

White canvas sneakers: Combine baking soda with an equal amount of a mixture that’s half water and half hydrogen peroxide until it forms a paste. After making sure all excess dirt is brushed off your sneakers, apply the mixture. Let your shoes sit for a few hours until the mixture has hardened. Shake off the hardened mixture and use an old toothbrush or crumpled up paper towel to remove the excess paste. You’ll notice those sneakers are way whiter! If the sneakers are still damp or wet let them dry before wearing them.

White leather sneakers: It might sound too good to be true, but getting your favorite white leather sneakers looking good-as-new, is as easy as taking a toothbrush with your favorite white toothpaste to the surfaces of the shoe. Use warm water with the toothpaste. You can even add sugar to the toothpaste to create an exfoliate effect for any areas where dirt seems to be caked on. Wipe with a clean towel or paper towel. Again, if the sneakers are still damp or wet let them dry before wearing them.


Read More “6 Ways to Cut Down Energy Costs In The Summer”

The Mystery of Laundry Symbols

As if life wasn’t confusing enough with emoji’s and acronyms – now we have to deal with squares, circles, triangles, lines and dots on the labels of our clothing! However, clothing-care symbols are a code worth knowing.

The American Society for Testing and Materials, ASTM International, put out a standardized set of care symbols with the goal of creating a universally understood “laundry language”.

ASTM symbols follow a simple scheme and a set order: wash (tub shape), bleach (triangle), dry (square), iron (iron) and special care (circle). A circle by itself usually means dry cleaning or wet cleaning. A circle (special care) inside a square (drying) changes “dry” to “tumble dry.”

Adding lines, dots and other marks modify these base symbols and adds info. For example, a large X through a symbol offers a warning, where an empty symbol often means that any version of what the symbol represents is OK to use. A crossed-out triangle means do not bleach, where an empty triangle tells you that any bleach will do. Adding two parallel diagonal lines means to use only non-chlorine/oxygen bleach.

Clear as mud?  Don’t worry, I’ve included a chart to help you decipher what seem to be ancient Egyptian hieroglyphics:


Read More “6 Ways to Cut Down Energy Costs In The Summer”

Avoid Over-Stuffing the Washing Machine

We have been asked from time to time: “How do you know when the washing machine is full enough?” and “Do you stuff it full, or just put a few things in at a time?”. These are good questions, and vary from machine to machine.

Overstuffing is NEVER a good idea.  An overstuffed load will not come clean!

Clothes need a certain amount of room in the washer to move around, and a sufficient amount of water and detergent is needed.  The extra room allows them to move against each other, and that abrasion helps get them clean.  If the clothes aren’t subjected to enough water the dirt, grime, sweat and detergent won’t be rinsed from the fabric. And that means dingy, still dirty clothes. Gross!

Overstuffing can cause clothes to wrinkle since there is not enough room in the drum of the washer for them to move around.

When you move your clothes from the washer to the dryer and you notice every item is wrinkled, it’s a sure sign you’ve overloaded the machine.

Overloading can cause your clothes to pill more readily.  When overcrowded, the clothes rub against each other too much and this abrasion causes them to look older faster and to pill. Pilling is a surface defect caused by wear, and causes little fiber balls to form.

Guide to Load Sizing

Keep in mind that these are loosely loaded clothes in the washer.  If you have to push your clothes down, or in for front load washers, to make room for more in the washer…then you’ve put way too many in there.

Small Load – fills about 1/3 of your machine.

Medium Load – fills about 1/2 of your machine.

Large Load – fills about 3/4 of your machine.

Read More “6 Ways to Cut Down Energy Costs In The Summer”

Keeping Pillows Clean


Over-sized, bulky and awkward – sometimes it’s hard to know how to wash your pillows.  Just remember with all of the germs, kids, pets, and guests it’s important to remember to wash them.The best way, plain and simple; machine wash your pillows. Most down and synthetic pillows can be machine washed and dried on low heat, but check the label to be sure.

You’ll want to wash and dry at least two pillows at a time to keep your machine balanced, but take care not to stuff too many in at once. Pillows need plenty of water to get thoroughly clean, and plenty of space to get thoroughly dry. Just follow these simple steps and you’ll have clean, fluffy pillows.

NOTE: Foam pillows should not be washed! Sprinkling them with cornstarch, letting them sit for an hour or longer, then vacuuming thoroughly instead.

Detergent / Water Temperature

Make sure you use something that’s fragrance-free and will rinse clean.  Homemade laundry soap is always a good choice: 2 cups soap flakes and 1 cup each baking soda, washing soda, and borax. Water needs to be 140 degrees or higher to kill dust mites, so make sure your water heater isn’t set too low. It’s good to consider an extra spin cycle to squeeze out as much dampness as possible.

Drying

Make sure you dry pillows completely, even a little dampness could reintroduce the very mildew, bacteria, and dust mites you’re trying to avoid. Dry on low, checking them every 20 to 30 minutes to ensure even drying. For extra fluff, dry with dryer balls or a tennis ball in a sock.

Freshening Between Drying

Put your pillows in the dryer on “air fluff” every few months, to get rid of much of the dust.  If you can handle a little bit of the smell until it dissipates, you can include a vinegar-dampened washcloth, since vinegar is so good at killing mold and mildew.

Pillow Protectors

Removable pillow protectors buy you more time between full-on pillow cleaning.  Simply remove and machine-wash protectors in hot water once a month.

Read More “6 Ways to Cut Down Energy Costs In The Summer”
bottom Gears Mobile bottom Gears