How To Remove Make-Up From Clothes

Halloween is fast approaching and we know there will be a lot of make-up stains on clothing. Removing cosmetics from clothing can be a chore. Knowing the most efficient methods for removing makeup stains can save you a lot of time, money, and frustration.

First of all, know the type of  makeup you’re dealing with: non-oily or oily. Non-oily are powder products like eye shadows and blushes. Oily types are lipsticks, cream blushes, and other liquid makeup. Each type requires a specific method of removal. So…..determine if your makeup stain is non-oily or oily.

Second, you should attempt to remove the stain as quickly as possible to avoid letting them set into your garments. Fresh stains come out a lot easier than when they’re left.

Lipstick

Lipstick is oil-based, and should be treated with a pre-wash stain remover before attempting to wash it out. Never rub the stain, as it only causes the lipstick to go deeper into the fabric. We recommend blotting the stain with a clean white cloth, and rinse the stained material in warm water (you want to use a white cloth to avoid any fabric dyes from transferring to the stain).  If the stain persist, apply a good liquid household detergent to the stain, but don’t rub, blot.

Rubbing alcohol will also remove lipstick stains. Again, using a white cloth, dab the stain with a small amount of isopropyl alcohol, then add a small amount of household detergent and wash the garment per the label instructions.

Liquid Makeup

Removing liquid makeup stains can be a battle. Try using Dawn dish soap as a removal agent. Liquid makeup is oil based, and we all know Dawn helps cut through grease.  Then add a small amount of household detergent and wash the garment per the label instructions.

Powder Blush or Eye Shadows

The first thing when you have a powder spill is to try and blow it off the garment. Sometimes that will be enough to get most of it off before laundering per your normal routine. Once you’ve done that, remaining makeup can be wiped off using a damp washcloth and a tiny amount of liquid soap.

Tip:

Be sure to read the care label on any garments before attempting to remove the stain. You may find the garment is “dry clean only” or discover other specifications that will determine your choice of stain removal.

Read More “6 Ways to Cut Down Energy Costs In The Summer”

  1.  What’s the secret to soft, fluffy towels? Vinegar and baking soda. Add these two ingredients to your load of towels plus half the recommended amount of detergent.
  2.   Running late? Hang your items in the bathroom while you shower to release wrinkles.
  3. You’ve accidentally shrunk your favorite sweater. No worries – soak it in a solution of baby shampoo and warm water, then gently massage it back to its original size. See our blog titled “OH NO! Shrunken Clothes!”
  4.  Vinegar and Baking Soda instead of detergent will revive your old towels.
  5.  Tennis balls in the dryer will decrease wrinkles in your bed linens.
  6.  Add salt to the wash to prevent colors from fading
  7.  Wash colors inside out to prevent fading over time.
  8.  Maintain the shape of your sweaters by laying them flat to dry as opposed to hanging them.
  9.  Squeeze a large lemon in with those workout clothes! It will break down oils trapped in fabrics & leave a clean fresh scent.
  10.  Adding 1/2 cup of white distilled vinegar to your rinse cycle is a natural fabric softener.
  11.  Swimsuit stretched out? Avoid the urge to wring out all of the water. Instead lay flat between towel and roll to remove excess water.
  12.  A little dish soap, a toothbrush, & some hot water do wonders for ring around the collar.
  13.  Trying to get a blood stain out? Use hydrogen peroxide and rinse well
  14.  Make DIY Dryer balls by rolling aluminum foil into a ball and placing in the dryer.
  15.  Wash dark clothes and jeans inside out and air dry them to keep from fading
  16.  Remove stubborn armpit stains with lemon juice and baking soda.
  17. Use hot water for white loads, warm water for the average load, and cold water for bright colors.
  18.  Wash your socks in lingerie bags to ensure they’ll never lose their match.
  19.  Use chalk to eliminate grease or oily stains.
  20.  Add Borax to every wash to keep your whites, bright and your colors, colorful.
  21.  Over drying clothes is the leading culprit of static cling. Always set your dryer to the recommended dry time.
  22.  Always dry towels and bulky items separate from your light weight items.
  23.  Not a fan of bleach? Brighten your whites instead by adding 1 cup of white vinegar oxygen booster lemon juice to the wash. Air-dry your clothes in the sun. You’ll have bright whites with a fresh, clean scent.
  24.  The best defense to any stain is to treat as soon as possible. Keep a Tide-To-Go Stain Remover in your purse or vehicle for those moments.
  25. To loosen a stuck zipper, rub a bar of soap over the teeth.


Read More “6 Ways to Cut Down Energy Costs In The Summer”

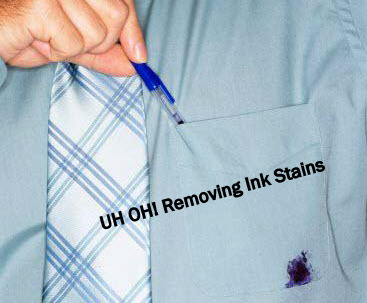
How To Remove Ink Stains


How To Remove Ink Stains

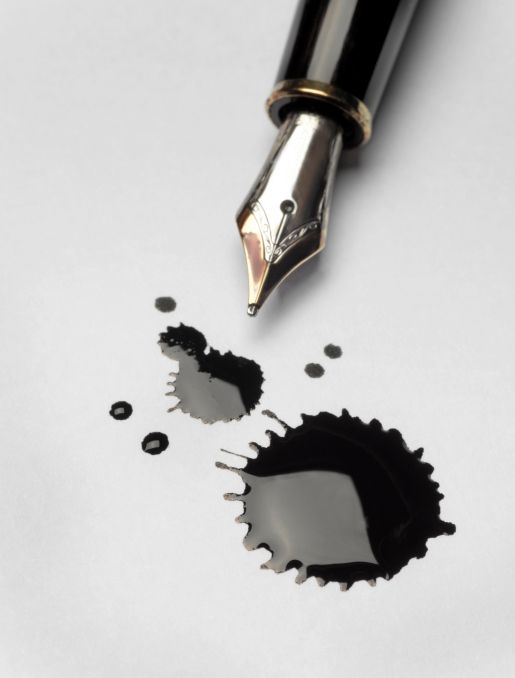
Most of us have had an ink stain at some point or another, or a leaking pen ruin a favorite shirt or pants.  Before you toss those clothes in the rag bag, check out some of these simple at-home tips to deal with ink stain removal.

Hair Spray

Squirt the stain with hair spray and the pen marks should come right off.

Rubbing Alcohol

Try soaking the spot in rubbing alcohol for a few minutes to remove the ink, before putting the garment in the wash.

Vinegar

Treat an ink stain on a shirt by first wetting it with some white vinegar, then rub in a paste of 2 parts vinegar to 3 parts cornstarch. Let the paste thoroughly dry before washing the item.

Milk

Believe it or not, a Readers Digest article says to remove ink stains from colored clothes, an overnight milk bath will often do the trick. Just soak the soiled garment in milk overnight and launder as usual the next day.

Salt

Pour salt on an ink stain that’s still wet, gently dab with a wet paper towel, and then remove and brush off the salt. Repeat until the stain has completely lifted.

Sand Paper

Yes, you read that right.  The same Readers Digest article said to use a little fine-grit sandpaper and a gentle touch for removing or at least minimizing an ink stain or small scuff mark on suede clothing or shoes. Afterward, bring up the nap with a toothbrush or nailbrush. You might avoid an expensive trip to the dry cleaner.

Cream of Tartar

Make a paste by mixing 2 tablespoons of cream of tartar with 2 tablespoons of lemon juice. Cover the ink stain with the paste for 3 to 4 hours, then brush off the paste and wash the shirt.

Reminder: be sure that you have gotten all the ink out before you dry the washed garment in a dryer, because the heat of a dryer will set the stain.


Read More “6 Ways to Cut Down Energy Costs In The Summer”

Natural Stain Remover’s


There are so many hidden chemicals in today’s products. Chemicals, unbeknownst to us, that can cause eczema, hives, contact dermatitis etc. If you’d like to switch to some natural products, here are a few to try:

White Vinegar

You can use white vinegar for so many things – cleaning, softener for your clothes and as a stain remover. Mixing white vinegar with dish detergent is a great remedy for removing greasy stains.

Boiling Water

Fruit stains, like berries, are particularly hard to get out of clothes. Household Management 101 claims if you pour boiling water directly on the stain it allows it to penetrate the fabric and effectively remove fruit stains.  They also recommend submerging the stain in a bowl of white vinegar for about an hour after you’ve poured the boiling water on the stain.  If parts of the stain remain, they say to use whitening toothpaste on the remaining stain and rinse well.

 Baking Soda

Baking soda is another product that most of us have in the pantry already. It’s an excellent natural stain remover  for many different types of stains.

Sprinkle some of on a wet stain and let it sit for about half an hour before washing. It’s really that simple.

Hydrogen Peroxide

Hydrogen peroxide is a nontoxic chemical that can be used in so many ways and is affordable.

For sweat soaked, dirt stains – soak the stain in water mixed with hydrogen peroxide (50/50) for an hour and then add some hydrogen peroxide to the wash water.  Be sure to test the fabric before washing!

Denatured Alcohol

Denatured alcohol is also a great stain remover. Use a small amount with hot water to remove stains caused by grass or paint.

Read More “6 Ways to Cut Down Energy Costs In The Summer”

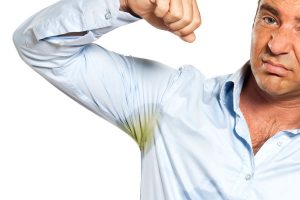
Remove Embarrassing Underarm Stains

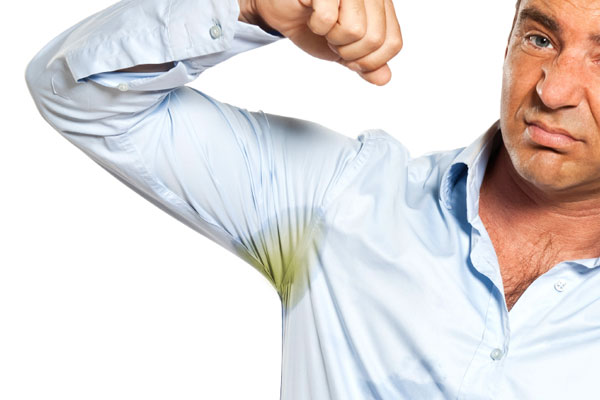
Stains occur when the aluminum in your antiperspirant or deodorant combines with the salt in your sweat. The stains are notoriously difficult to get rid of with normal washing in the laundry machine. We recommend doing a pre-test on a small area before trying.

Method #1

You will need:

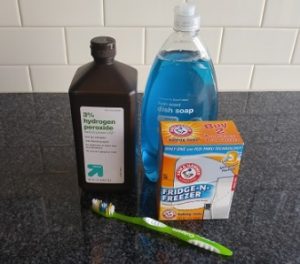
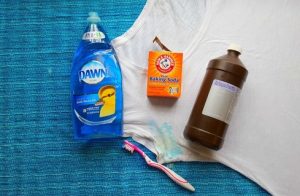
  • 3% hydrogen peroxide
  • Dish soap
  • Baking soda
  • Toothbrush

Apply the ingredients directly to the shirt, use an old toothbrush to work them in for a minute, and then let the shirt sit for at least an hour before putting it in the washing machine.

Method #2

You will need:

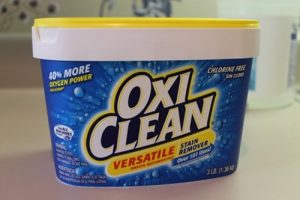
  • OxiClean
  • Toothbrush

Fill up a sink with warm water and mix it with one scoop of OxiClean.  Place your shirt in the sink, making sure the yellow stains are completely submerged. For mild stains, just let the shirt sit for an hour. For more stubborn stains, rub a thick mixture of OxiClean and water on the stain, and let the shirt sit overnight before putting it in the diluted mixture.  After you’re done soaking the shirt, scrub the stain with the toothbrush, then rinse and launder as usual.

To prevent the stains in the first place, Degree deodorant says it helps to wear loose clothing, make sure your antiperspirant deodorant is dry before you get dressed and don’t use too much product.

Read More “6 Ways to Cut Down Energy Costs In The Summer”

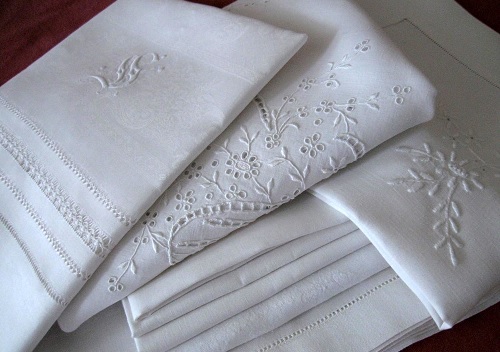
How to Wash Antique Linens

Some of us are fortunate enough to inherit a little piece of our family history. If we’re lucky, these items will be in good condition, but that’s not always the case. Some items may have dry rot, mouse nibbles and/or rust. You won’t be able to save these things if the fibers are already compromised. If you tug on two sides of a garment and it comes apart without much effort, your item has dry rot and has reached the end. Sometimes, you just have to let go, there’s no way to save it.

To start, here are a few items you should have on hand:
White Vinegar
Rust Remover
Restoration – (Oxyclean is similar, more widely available and slightly less expensive than Restoration, but it doesn’t work as well.)
Bleach pen
Laundry detergent (simple soap, nothing added)

***PLEASE NOTE THAT I DO NOT GUARANTEE ANY METHOD THAT YOU CHOOSE TO TRY. IT ALL DEPENDS ON THE CONDITION OF THE GARMENT.***

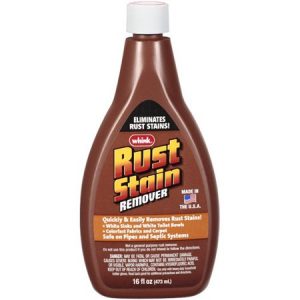
“Restoration” and white vinegar are preferred products. Read the label and use common sense. You may only need to use “Restoration” for your initial laundering to remove storage dirt. You can also use “Restoration” in the washing machine with your laundry, too. It removes odors, age spots, storage stains, label stains and often, some rust. If it doesn’t remove the rust, try using “Whink Rust & Stain Remover.” Be aware that if rust has already eaten away the fibers that you may be left with a hole where the rust had been after cleaning with rust/stain remover.

Use “Restoration” first and, if stains remain after two or three sessions with it, put the dampened piece outside in bright sunshine for a day. This is often a magical solution. Horrible stains will usually disappear within an hour. This is the least invasive method. It is effective and it’s free – it also sanitizes. However, sunlight does bleach and weaken fibers over time. Sunlight is destructive so I am not suggesting that you constantly subject your fragile items to sunlight. This method, used once or twice on a piece that would otherwise need to be thrown away, can be very helpful. If the stains persist, you may need to resort to using bleach with laundry detergent. I like to have a bleach pen on hand because it allows me to pinpoint where I apply the bleach. After using bleach, always rinse with white vinegar, then rinse again with clear water.

Step 1. Use hot water with “Restoration” until the water turns clear. (approx. 4- 6 hours or overnight) If the water is not clear after overnight soak, repeat this step. Extremely filthy items may require several soakings.

Step 2. Drain and refill container with water; add white vinegar (a splash or a cup, depending on container size); swish around and soak for 10-20 minutes.

Step 3. Drain and refill with lots of clear water; swish around and soak for 15 minutes. Done!

If stains remain, repeat entire process.
If there is rust, use rust remover on wet fabric, then repeat from Step 2.

If stains remain, lay wet/damp item outdoors in sunshine.

If stains remain, soak with laundry detergent and small amount of bleach. Or use a bleach pen on small stains. It is better to soak longer using very little bleach.

IMPORTANT!
DO NOT mix chemical treatments. Pre-rinse items that may have bleach or detergent residue with vinegar to neutralize the bleach and then rinse twice in clear water before trying another treatment. DO NOT bleach anything after using Oxyclean or peroxide or any other chemical treatment. Your items may turn permanently blue, or worse Rinse really well before trying any other product.

Read More “6 Ways to Cut Down Energy Costs In The Summer”

How to Clean Your Mattress


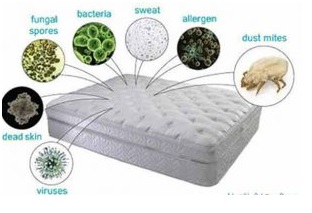
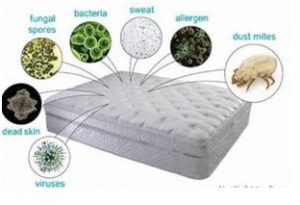
Dust, mold, mildew, body sweat, fungal spores, allergens – all make mattresses the ideal breeding ground for bacteria and dust mites.  If you’re as grossed out as I am by this, keep reading and learn how to clean your mattress for a better, cleaner sleep.

Vacuum It

Vacuum your mattress every month or so or as often as every time you change the sheets, if you or family members have severe allergies. Run the vacuum very slowly over the mattress, so it has time to inhale the dust and dust mites. Break out the crevice tool for the edges and crevices.

Treat Stains

Treat any stain immediately. The longer liquids sit in a mattress, the likelier you are to foster mold and mildew growth.

This may sound crazy, but use foaming shaving cream for mattress cleaning, in part because of its thickness. Liquids will soak right through a mattress, not allowing adequate time to dissolve the stain. Foaming shaving cream contains denatured alcohol, which is a stain remover, and it’s thick, so it sits on the surface to work on the stain. Wait 10 to 15 minutes, wipe with a damp cloth, and rinse with a 50/50 vinegar/water solution. Repeat if necessary.

Other helpful solutions for common mattress stains:

  • Blood: A 50/50 hydrogen peroxide/water solution.
  • Urine, fecal matter, or vomit: An enzyme cleaner, such as Bac-Out by BioClean, or Nature’s Miracle, available at pet stores.

Freshen Fast

Use a mixture of cornstarch and baking soda to remove smells.  Place in a colander and just shake the mixture on to the mattress, let it sit for a few hours or longer, then vacuum. The cornstarch will absorb body oils, while the baking soda will work on smelly odors.

Sheet Strategy
Don’t put new sheets on until evening. This will allow the mattress to air all day discouraging dust mites and bacterial growth.

Pad It
Remember, mattress pads aren’t just for comfort. They keep your mattress cleaner, too.  Wash monthly in hot water, and machine dry thoroughly, unless the tag instructs otherwise.

Read More “6 Ways to Cut Down Energy Costs In The Summer”

How To Remove Ink Stains

Most of us have had an ink stain at some point or another, or a leaking pen ruin a favorite shirt or pants.  Before you toss those clothes in the rag bag, check out some of these simple at-home tips to deal with ink stain removal.

Hair Spray

Squirt the stain with hair spray and the pen marks should come right off.

Rubbing Alcohol

Try soaking the spot in rubbing alcohol for a few minutes to remove the ink, before putting the garment in the wash.

Vinegar

Treat an ink stain on a shirt by first wetting it with some white vinegar, then rub in a paste of 2 parts vinegar to 3 parts cornstarch. Let the paste thoroughly dry before washing the item.

Milk

Believe it or not, a Readers Digest article says to remove ink stains from colored clothes, an overnight milk bath will often do the trick. Just soak the soiled garment in milk overnight and launder as usual the next day.

Salt

Pour salt on an ink stain that’s still wet, gently dab with a wet paper towel, and then remove and brush off the salt. Repeat until the stain has completely lifted.

Sand Paper

Yes, you read that right.  The same Readers Digest article said to use a little fine-grit sandpaper and a gentle touch for removing or at least minimizing an ink stain or small scuff mark on suede clothing or shoes. Afterward, bring up the nap with a toothbrush or nailbrush. You might avoid an expensive trip to the dry cleaner.

Cream of Tartar

Make a paste by mixing 2 tablespoons of cream of tartar with 2 tablespoons of lemon juice. Cover the ink stain with the paste for 3 to 4 hours, then brush off the paste and wash the shirt.

Reminder: be sure that you have gotten all the ink out before you dry the washed garment in a dryer, because the heat of a dryer will set the stain.


Read More “6 Ways to Cut Down Energy Costs In The Summer”

Remove Embarrassing Underarm Stains

Stains occur when the aluminum in your antiperspirant or deodorant combines with the salt in your sweat. The stains are notoriously difficult to get rid of with normal washing in the laundry machine. We recommend doing a pre-test on a small area before trying.

Method #1

You will need:

  • 3% hydrogen peroxide
  • Dish soap
  • Baking soda
  • Toothbrush

Apply the ingredients directly to the shirt, use an old toothbrush to work them in for a minute, and then let the shirt sit for at least an hour before putting it in the washing machine.

Method #2

You will need:

  • OxiClean
  • Toothbrush

Fill up a sink with warm water and mix it with one scoop of OxiClean.  Place your shirt in the sink, making sure the yellow stains are completely submerged. For mild stains, just let the shirt sit for an hour. For more stubborn stains, rub a thick mixture of OxiClean and water on the stain, and let the shirt sit overnight before putting it in the diluted mixture.  After you’re done soaking the shirt, scrub the stain with the toothbrush, then rinse and launder as usual.

To prevent the stains in the first place, Degree deodorant says it helps to wear loose clothing, make sure your antiperspirant deodorant is dry before you get dressed and don’t use too much product.

Read More “6 Ways to Cut Down Energy Costs In The Summer”

Laundry Myths – Debunked

Some laundry tips are nothing more than old wives’ tales and are simply a waste of time and money. Below are a few laundry myths debunked with some real information you can use that will make laundry easier. 

Hair Spray To Remove Ink

The idea of using hair spray to remove ink from laundry began in the 50s and was actually a valid tip back then. It was the alcohol in hair spray that worked on the ink stain. However, today’s hair sprays are different from those aerosols of the 50’s. Today, most hair sprays don’t even contain alcohol and can actually cause stains themselves or set the ink in.

Begin by wetting a cotton swab with isopropyl or rubbing alcohol ( test the fabric to be sure the alcohol does not damage or discolor the material). Start by working from the outside of the stain to the inside, dab the spot with the swab. Change to a new swab as ink is absorbed to keep from redistributing the ink.

If traces of the ink remain, mix a solution of oxygen-based bleach (OxiClean, Clorox 2, Purex 2 Color Safe Bleach) and cool water. Follow the package directions as to how much product per gallon of water. Completely submerge the garment and allow it to soak for at least eight hours, then check the stain.

If it’s gone, wash as usual as directed on the label. If it remains, mix a fresh solution and repeat. It may take several soakings to remove the stain but it should come out.

Use More Detergent To Get Cleaner Clothes

More is not better when it comes to laundry detergent.  Most of us, at some time or another, are guilty of using too much detergent.  This creates excess suds that actually redeposit soil onto our clothing. 

We recommend using half as much detergent as recommended and see if you are pleased with the results. You can always add more but you can’t take it out. Most detergents these days are highly concentrated and don’t require as much as in the past.

Hot Water Kills All Laundry Germs

Unfortunately, using hot water alone for laundry does not kill all germs and bacteria. Washing clothing or linens of someone who is ill can spread the germs throughout the entire washer whether you use hot or cold water. Only a disinfectant like bleach, pine oil or a phenolic disinfectant (Lysol) will sanitize the laundry and the washer.

The Sock Monster

Most missing socks are not eaten by a monster in your washer or dryer or even trapped in the machine. (You would know if a sock got into the motor of either one pretty quickly.)

Most socks disappear between leaving the foot and the clothes hamper or the clothes hamper and the machine. Check behind your washer and dryer for a stash of socks that have fallen, or check the inside of pant legs for those secret clingers due to static.

Keep a basket or bin or mesh bag in the laundry room or near your clothes hamper for all those extra socks. Once a month go through and sort and match or just buy one kind of sock so they all match!

Read More “6 Ways to Cut Down Energy Costs In The Summer”
bottom Gears Mobile bottom Gears