Liquid Softener vs. Sheets – Pros and Cons

Are you perplexed as to which fabric softener you should use? Both fabric softeners and dryer sheets indeed make your clothes feel softer and smell better, and they do reduce wrinkles too — especially if you line dry your clothes. However, there are a number of misconceptions about these 2 popular laundry aids.  Below are a few of the more popular myths.

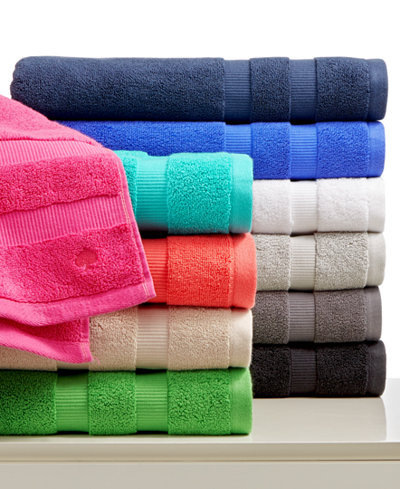
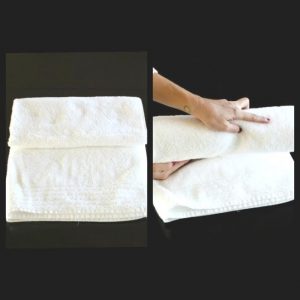
Myth #1:  fabric softeners and dryer sheets shouldn’t be used with microfiber towels. This is true.

Liquid fabric softeners as well as dryer sheets will significantly damage the fibers in microfiber. Microfiber towels should not be subjected to heat at all. Not only are dryer sheets a problem, but the heat itself can wreak havoc on your microfiber towels. If you must dry them quickly, then choose a low or no-heat option.

Myth #2:  Fabric softener and dryer sheets shouldn’t be used with athletic sportswear, spandex & nylon garments. This is true.

Fabric softener can reduce the ability of certain fabrics to manage moisture and breathe — including sportswear, swimsuits, undergarments, and athletic gear with wicking properties intended to keep you dry and cool.The waxy softening agents in fabric softeners interfere with the garment’s ability to wick away moisture to keep you cool & dry, so you should avoid using softeners with most sportswear.

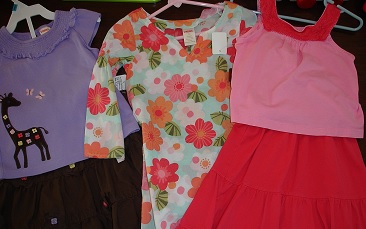
Myth #3: Fabric softeners won’t stain your clothes. This is false.

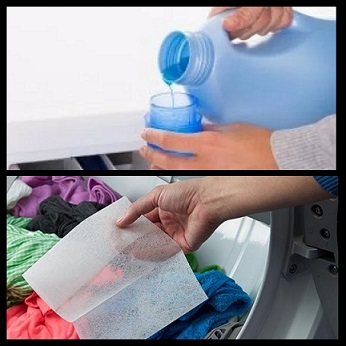
Most fabric softeners state right on the bottle that you shouldn’t pour fabric softener directly on your clothes.When liquid fabric softener is used on certain fabrics (or fabric blends), oily looking spots or discoloration can result. A fabric softener stain looks blue-gray and greasy.

Both fabric softeners and dryer sheets help eliminate static and wrinkles while making clothes feel softer and smell better. Keep in mind that if you are not using a dispenser or a softener ball, make sure to add liquid softener during the final rinse when the tub is full of water to avoid staining.


Read More 6 Ways to Cut Down Energy Costs In The Summer

Pillow Washing 101

Oversized, bulky and awkward – sometimes it’s hard to know how to wash your pillows.  Just remember with all of the germs, kids, pets, and guests it’s important to remember to wash them. The best way, plain and simple; machine wash your pillows. Most down and synthetic pillows can be machine washed and dried on low heat, but check the label to be sure.

You’ll want to wash and dry at least two pillows at a time to keep your machine balanced, but take care not to stuff too many in at once. Pillows need plenty of water to get thoroughly clean, and plenty of space to get thoroughly dry. Just follow these simple steps and you’ll have clean, fluffy pillows.

NOTE: Foam pillows should not be washed! Sprinkling them with cornstarch, letting them sit for an hour or longer, then vacuuming thoroughly instead.

Detergent / Water Temperature

Make sure you use something that’s fragrance-free and will rinse clean.  Homemade laundry soap is always a good choice: 2 cups soap flakes and 1 cup each baking soda, washing soda, and borax. Water needs to be 140 degrees or higher to kill dust mites, so make sure your water heater isn’t set too low. It’s good to consider an extra spin cycle to squeeze out as much dampness as possible.

Drying

Make sure you dry pillows completely, even a little dampness could reintroduce the very mildew, bacteria, and dust mites you’re trying to avoid. Dry on low, checking them every 20 to 30 minutes to ensure even drying. For extra fluff, dry with dryer balls or a tennis ball in a sock.

Freshening Between Drying

Put your pillows in the dryer on “air fluff” every few months, to get rid of much of the dust.  If you can handle a little bit of the smell until it dissipates, you can include a vinegar-dampened washcloth, since vinegar is so good at killing mold and mildew.

Pillow Protectors

Removable pillow protectors buy you more time between full-on pillow cleaning.  Simply remove and machine-wash protectors in hot water once a month.


Read More 6 Ways to Cut Down Energy Costs In The Summer

Achieve Laundry Perfection in Three Simple Steps


We’ve all done our share of laundry, but some of us have figured out a way to perfect it. Here are some of my favorite tips to keeping your clothes looking great and lasting longer.

Step One: Wait Before You Wash

Wear your clothing more than once. I know this might make some of you say “Gross!” but it’s really not.  You know if something needs to be washed.  If it reeks to high heaven – it needs to be washed, but over the course of an average day, clean people don’t get that smelly. Of course it depends on the activity you do during the day as well. Wearing your clothes at least twice before laundering them can save you a bundle on water and electric bills over the course of a year and save your clothes from wearing out before their time.

(Side note….I’m not talking about underwear & socks.  They need to be changed daily.)

Step Two: Divide and Conquer

Admit it, most of you will stuff everything in the washer to make one load. I get it, you want to save time and money, but this is hard on your clothes and they probably aren’t getting as clean as you think they are.  I sort laundry by “lights” and “darks”, which seems to be the traditional way of doing laundry.  Sorting clothes allows you to use different wash cycles (delicate vs. normal) and also allows for washing in different temperatures.

Most importantly, sorting clothes decreases the chances that a garment is going to bleed onto another when you control the cycle type and water temperature.

Step Three: Chose the Correct Wash Cycle & Water Temperature

Take a minute to read the labels on your clothing. You’ll find the information you need to choose both your water temperature and the type of washing cycle. Following the recommendations on the label is especially important if you are new to doing your own laundry or if the garment is new.

Read More 6 Ways to Cut Down Energy Costs In The Summer

Choosing the Correct Water Temperature

Most people think the way to get the job done is to wash everything in a single load with cold water. That way, you get it all done at once, and there’s no color transfer between clothes, but that’s not always the case.  Washing everything together in cold will prevent color transfer, but unfortunately it won’t get everything clean.

When to wash in hot water

Hot wash works well on ground-in and hard-to-remove dirt on sturdy fabrics.

Generally speaking, you should wash white clothes in hot water. Washing colors in hot water is also recommended if the clothes are really dirty or greasy, and they’re made of sturdy, color-fast fabric. (Wash them separately, of course.)

Use it to clean seriously soiled sturdy garments (gardening or children’s clothing), and to regularly disinfect dish towels, washcloths, bath towels, bedding, and pillowcases.

Light and dark fabrics should be separated as hot water may cause these clothes to bleed.

Delicate and coarse or sturdy fabrics should be separated to prevent abrasion and protect clothes from wear and tear.

 When to wash in warm water

Warm water (or permanent press wash setting) minimizes color fading and wrinkling. Wash light clothes, as well as regular and sturdy fabrics, towels, jeans, 100 percent manmade fibers, and blends of natural and manmade fibers. It’s also appropriate for moderately dirty clothes that don’t need the extra power of a hot water temperature wash.

 When to wash in cold water

Washing clothes with cold water will protect most dark or bright-colored clothing from running and minimizes shrinkage. Use the cold wash cycle for lightly soiled fabrics and clothes with blood, wine or coffee stains, dark or bright colors that may run or fade, delicate fabrics including washable silk, Spandex swimsuits, and active wear; and delicate lingerie. It’s also okay for lightly soiled clothes.

There’s a misconception that washing clothes in cold water won’t get clothes clean. This is because detergent is formulated for, and fully activated in, warm water. Cooler water won’t fully activate detergent, which means you’ll need to use more to make up for the temperature difference to get your cold wash clothes clean. Thankfully there are several brands of detergent that are designed to work in all temperatures. Tide, Arm & Hammer, All, and Wisk are just a few that we recommend.

Read More 6 Ways to Cut Down Energy Costs In The Summer

How To Care For Your Towels

Its important to know, you should always wash and dry bath towels before using them for the first time. Most towels have silicone or other finishes. Washing the towels removes these finishes and allows for maximum absorbency.

  • To set colors, wash colored towels with similar colors in warm water for the first several washings. Using about half the recommended amount of detergent, add 1/2 to 1 cup of white vinegar to the wash water. The vinegar helps set the colors and removes excess detergent residue.
  • Wash towels every three to four days. Use warm water and color-safe bleach (if needed) for colored towels. Use hot water and non-chlorine bleach (if needed) for white towels. White towels should be washed separately or with other white items to avoid subtle discoloration over time.

  • Wash bath towels separately from clothing for sanitary reasons.
  • Use fabric softeners according to directions, but use only every three or four washes. Waxy buildup from softeners can deteriorate the towel fibers over time and reduce their absorbency.
  • Give your towels a shake when taking them out of the washer. This will help fluff the terry loops that aid absorbency. Don’t iron terry towels; this will reduce absorbency.
  • Ensure that towels are dry when you remove them from the dryer. Even slightly damp towels can quickly mildew, but avoid over drying; it can ruin the individual cotton fibers.
  • Many towels feature decorative trims. If possible, use towels with specialty trims as accents only, so you can limit their laundering and reduce the wear on ribbon, lace, or other decorative elements.

  • Fold bath towels and hand towels in thirds for best use of shelf space: Fold the towel in half, with open ends to the left, then fold in half again. Fold up the bottom third of the towel, then fold the top third down. When storing, face the outer edge of the towel to the front to make it easy to grab a single towel.

  • Linen hand towels for the bath can be safely ironed for a crisp finish. After ironing, fold linen towels in thirds like other towels.

Read More 6 Ways to Cut Down Energy Costs In The Summer

Cleaning Stuffed Animals

Did you know it’s perfectly safe to throw most stuffed animals in the washing machine? On gentle cycle using warm or cold water, a washing machine will get your stuffed animals clean without ruining them.

Most care labels instruct to hand wash, but after raising two kids and needing to deep clean their beloved friends, I tried machine washing.  Set the washing machine  to the delicate cycle, apply  some Spray N’ Wash, Mean Green, or your choice of stain remover if needed,  scrub a little, and wash. Afterwards hang them up to dry. I learned the hard way that throwing them in the dryer can melt the fake fur on some of them.  Poor Simba from the Lion King had a melted mane!

SOME THINGS TO CONSIDER WHEN DECIDING IF YOUR STUFFED ANIMALS CAN BE WASHED IN THE WASHING MACHINE:

  • The care label – if it can be hand washed, it can likely withstand the delicate cycle in the washing machine. Your washing machine may even have a hand wash cycle.
  • Material – Take notice of the care label and use your sense of touch as well as sight to thoroughly examine all parts of the stuffed animal to be washed. Polyester and acetate (a form of cotton) are fine to wash. The stuffed animals I washed have plastic pellets and were fine, but you wouldn’t want to machine wash something with foam balls such as Beanie Babies. Be cautious of delicate clothing items and things that are glued on, they may not survive!
  • Age – The older it is, the more fragile it will be.


Read More 6 Ways to Cut Down Energy Costs In The Summer

Always Wash New Clothes

There are three good reasons to wash new clothes, especially those that are worn in direct contact with your skin, before you wear them.

  • One is to wash out extra dye that can be transferred to your skin or other garments. Most fabric made from synthetic fibers (polyester, acrylic) are colored with azo-aniline dyes. These dyes can cause severe skin reactions for those who are allergic to them. If the allergy is severe, the rash will be similar to poison ivy. But even less severe reactions can cause dry, itchy inflamed patches of skin.
  • It is possible to transfer lice, scabies, bacteria and fungus from person to person when clothes are tried on. Dressing rooms can become breeding grounds for everything from viruses to athlete’s foot.
  • And, most importantly, to remove the chemical finishes that manufacturers put on clothes to enhance color or texture. The finishes won’t bother everyone, but if you have sensitive skin you can develop a rash especially in constant contact areas like armpits, collars, cuffs and trouser waists and thighs.

Urea formaldehyde is often the chemical used to prevent mildew on clothes that have to be shipped long distances in hot, humid containers from overseas to the United States. It has a very strong odor that will remain in the fabric until the garment is washed. One washing will not remove formaldehyde completely but you will reduce the build up significantly and it will continue to be removed with each wash.

It is especially important that children’s clothing, especially clothes for babies, be washed before they are worn. Babies are particularly sensitive to chemicals and skin rashes can occur. Select a detergent that is fragrance free and dye free as these can also cause skin reactions. Washing the clothes for children will also make them softer and more comfortable for them to wear.

Washing new sheets/blankets and towels is also important to remove chemicals since these come in direct contact with skin. Washing will also improve the absorbency of the fabric by removing surface fiber coatings.

If you have a tag on the garment that reads “wash separately before wearing”, beware of dye transfer and color bleeding. Washing will help remove the excess dye but check the rinse water. If color remains in the water, it make take several wash cycles to get rid of the excess dye so continue to wash separately or with similar colors.

Read More 6 Ways to Cut Down Energy Costs In The Summer

Prevent Colors from Fading


The best way to keep colors from fading is to wash your clothes as little and as gently as possible. Water, the friction from agitation, detergent, and drying all contribute to pulling out the bright colors from your clothing. Hand-washing and line-drying aren’t practical, so you need to learn how to wash clothes in the machine to minimize color fading.

Wash Dark Colors Together

Anyone who has ever washed one red sock with an entire load of whites knows the pain that can happen when colors fade away. To prevent dark colors from fading, keep like colors together.

Turn Clothes Inside Out

Some of the wear and tear that happens on your garments can be prevented by turning them inside out before washing and drying. Washing and drying clothing is rough on the outside of your clothing. Turning garments inside out reduces pilling, which dulls the look of the fabric. It’s even more important to turn clothing inside out when you hang clothes outside to dry. While the sun is an excellent and efficient drying tool, it will take the colors right out of your clothing.

Read the Care Label

It takes only a few seconds, but reading the care labels may save a lot of heartaches when your clothes come out of the wash. Check for instructions, which might say to wash only in cold water, or with like colors. Don’t forget to check for drying instructions as well. The label may indicate that the clothing needs to be dried on low, or drip-dried.

Don’t Stuff the Washer (and Dryer!)

Stuffing the washer to capacity is tempting, but it comes with several negatives. It makes the machine work harder, and it is tougher on your clothes. The detergent and rinse water aren’t distributed properly, and clothing doesn’t come out as clean when it is packed into a washing machine. Similarly, clothing takes a lot longer to dry when a dryer is stuffed. Let the items move freely by leaving a bit of room.

Wash in Cold

One of the best pieces of laundry advice is to wash colors in cold. Detergents have come a long way in recent years, and most perform just as well in cold water as they do in hot or warm water.

Don’t Over-dry

It’s easy to let clothing over-dry. While this is bad for all laundry, it is particularly bad for bright and dark colors. Over-drying will cause your colors to fade. Clothes should be slightly damp when they are pulled from the dryer. Since drying adds heat and friction to the equation, it’s even better to line-dry clothes to retain colors. Again – just remember to turn colored items inside out to prevent fading from the sun.

Read More 6 Ways to Cut Down Energy Costs In The Summer

Laundry Tips & Tricks Your Mom Never Taught You

Ok, so maybe your Mom did tell you about  these tips and tricks, but in case she didn’t, we’re here to help you out.  Sometimes there are just some laundry care tips that don’t fit into any particular category. You’ll be surprised after you read through these when they just might come in handy.

  • Before you wear a new garment, put a little dot of clear nail polish on the front and back threads of each button. Buttons will stay on longer when the threads are sealed.
  • Zippers won’t stick if you rub them with the edge of a bar of soap.
  • To remove a hem crease, sponge the line on the fabric with a clean white cloth dipped in distilled white vinegar and then press with a warm iron from the wrong side of the garment.
  • When washing clothes, add detergent to the washer first. Pouring detergent on clothing can leave streaks and even cause fabrics to fade.
  • Avoid getting perfume, aftershave or hair spray on leather because the alcohol may ruin the finish and color.
  • Wash nylon clothing every time after wearing. Nylon is very hard to clean once it becomes heavily soiled. Treat any oily stains immediately after they happen with warm or hot water to prevent them from becoming permanent..
  • NEVER use an acetone-based nail polish remover on garments to remove stains! The acetone will dissolve the fabric!
  • Knit garments should always be folded to store on a shelf or in a drawer. Hanging knits can cause them to stretch completely out of shape.
  • Turn all clothes inside out before washing to prevent fading and keep the right side looking like new.
  • If you don’t have a mesh laundry bag for washing your delicate fabrics, place them in a pillowcase and fasten the loose end with a plastic bag tie or shoelace before tossing it in the washer.
  • To reduce wrinkles, wet a hand towel with water, wring out the excess water and toss in the dryer with wrinkled items. Dry on high for about five minutes. Remove the clothes while still damp and hang to dry.
Read More 6 Ways to Cut Down Energy Costs In The Summer

How to Wash Hats Without Ruining the Shape


There comes a time when your favorite hat needs a good cleaning. But before you start, take time to look at the little tag on the inside to get an idea of the fiber content and the manufacturer’s cleaning instructions. Of course, your tag may be gone or unreadable so, we’ll cover instructions for safe cleaning of almost any type of baseball cap.

Newer baseball hats are often made of cotton twill, cotton polyester blends or jersey mesh. These fabrics are strong and durable and usually colorfast. New hats use a plastic form to shape the brim, not cardboard. These plastic forms can withstand a wash without becoming deformed.

To clean, pre-treat exceptionally dirty areas like sweatbands with a solvent-based spray or gel like Shout or Spray ‘n Wash or a bit of heavy duty laundry detergent like Persil or Tide. These detergents have enough enzymes to break apart body soil and oil grime. Wash the hat with the rest of similarly colored clothing on the delicate cycle using cool water. Do not use bleach. If you are very concerned with protecting the shape of the hat, you can use a specially designed hat form and toss it in the washer.

Allow the hat to dry in the form or over a large coffee can or other head-shaped container. Do not put baseball hats in the dryer because excessive heat and tumbling action can distort the hat’s shape.

If the hat has a cardboard or paper filled bill, you will have to do spot-cleaning only. Use a soft-bristled brush and scrub the stained areas with a heavy-duty detergent/water mixture. Do not over wet the area. Blot with a clean white cloth dipped in water. Allow to air dry. You may need to repeat the steps several times.

You’ve probably heard of washing hats in the dishwasher on the top rack. I wouldn’t recommend this because dishwasher detergents are harsh and often contain bleach that can ruin your hat. Also, the high temperatures aren’t good for the fabric and may cause the hat to shrink.

Cleaning Newer Wool Baseball Hats

Wool baseball hats should be hand washed using cool water and a mild detergent designated for wool. Be gentle and don’t scrub or twist the fibers. Rinse well in cool water and roll gently in a thick towel to absorb most of the moisture. Allow to air dry on a head-shaped object. If you dry your wool hat on your own head, it will dry to the precise shape of your head and cause it to be too tight.

Cleaning Older or Commemorative Baseball Hats

Commemorative hats should always be stored in a covered case to prevent dust and grease from accumulating on the hap. These should only need a light dusting or brushing to keep them at their best. Always store away from direct light and intense heat.

If a deeper cleaning is needed, first do a colorfastness test. Using a white cloth with a bit of mild detergent, gently rub an inconspicuous area of the cap.

If there is color transfer, do not proceed. If it is colorfast, continue using the cloth to clean the entire hat. Do not immerse the hat in water. The bill may be shaped using cardboard that will dissolve. Rinse your cloth in clean water to “rinse” the hat. Air dry on a head-shaped container.

If you have an autograph that you want to preserve, keep the hat in a dark, air conditioned space to prevent fading and mold or mildew from forming. If you want to wear the autographed hat, protect the signature by covering the signed area with a white, pressing cloth and iron the area on high heat.  This will help set the ink.


Read More 6 Ways to Cut Down Energy Costs In The Summer
bottom Gears Mobile bottom Gears