header image

Blog

The Best Way To Clean Pillows

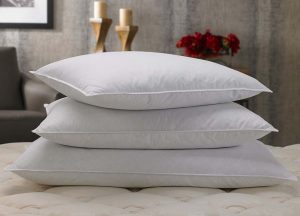
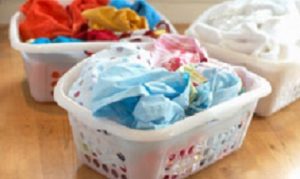
Over sized, bulky and awkward – sometimes it’s hard to know how to wash your pillows.  Just remember with all of the germs, kids, pets, and guests it’s important to remember to wash them.The best way, plain and simple; machine wash your pillows. Most down and synthetic pillows can be machine washed and dried on low heat, but check the label to be sure.

You’ll want to wash and dry at least two pillows at a time to keep your machine balanced, but take care not to stuff too many in at once. Pillows need plenty of water to get thoroughly clean, and plenty of space to get thoroughly dry. Just follow these simple steps and you’ll have clean, fluffy pillows.

NOTE: Foam pillows should not be washed! Instead, sprinkling them with cornstarch, letting them sit for an hour or longer, then vacuuming thoroughly instead.

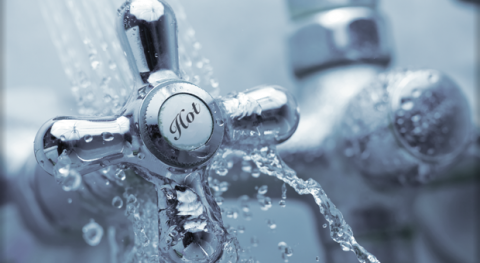
Detergent / Water Temperature

Make sure you use something that’s fragrance-free and will rinse clean.  Homemade laundry soap is always a good choice: 2 cups soap flakes and 1 cup each baking soda, washing soda, and borax. Water needs to be 140 degrees or higher to kill dust mites, so make sure your water heater isn’t set too low. It’s good to consider an extra spin cycle to squeeze out as much dampness as possible.

Drying

Make sure you dry pillows completely, even a little dampness could reintroduce the very mildew, bacteria, and dust mites you’re trying to avoid. Dry on low, checking them every 20 to 30 minutes to ensure even drying. For extra fluff, dry with dryer balls or a tennis ball in a sock.

Freshening Between Drying

Put your pillows in the dryer on “air fluff” every few months, to get rid of much of the dust.  If you can handle a little bit of the smell until it dissipates, you can include a vinegar-dampened washcloth, since vinegar is so good at killing mold and mildew.

Pillow Protectors

Removable pillow protectors buy you more time between full-on pillow cleaning.  Simply remove and machine-wash protectors in hot water once a month.

Read More 6 Ways to Cut Down Energy Costs In The Summer

The Importance of Sorting Clothes

Interestingly enough, you’ll find several different opinions when it comes to sorting your laundry.  Our method is certainly not the only way.  If you have a method that works for you, then by all means keep doing it!  But if you’re getting worn out, torn or discolored clothes, then this article is for you.

What’s the reason to sort clothes in the first place? Do you really need to sort clothes at all?  In our opinion, you do.  Sorting clothes allows you to use different wash cycles (delicate, normal, permanent press) and also allows for washing in different temperatures.

Most importantly, sorting clothes decreases the chances that a garment is going to bleed onto another when you control the cycle type and water temperature.

Sorting Clothes by Color

There are several distinct piles in which to sort clothes: whites, darks, lights, jeans, and delicates.

∙Whites:  T-shirts, underwear, socks and other similar items fall into this category.  This pile is for white sturdy cottons that can withstand normal agitation in the washer on a warm or hot wash cycle.

∙Darks: Grays, blacks, navies, reds, dark purples and similar colors are sorted into this load.

∙Lights: More pastel-type colors such as pinks, lavenders, light blues, lights greens and yellows are placed in this pile of laundry.

∙Jeans: All items with denim material are washed together in this load.

∙Delicates: This category includes several types of clothing – lingerie, washable silks, and any clothing you’d like to keep from the harsh agitation of the washer.

Sorting Clothes by Fabric Weight

Please note that color is not the only consideration when sorting clothes. The weight of the garment should be considered as well.

For example, if you have several pairs of heavy cotton pants, or denim, then you don’t want to wash those with thin t-shirts.  Washing light- weight clothes with heavy material can possibly tear or rip those garments.

If they are placed in the dryer together, they obviously won’t dry at the same rate since one fabric is much heavier than the other.

It’s best just to separate these types of garments from the start and wash them in two separate loads.

Read More 6 Ways to Cut Down Energy Costs In The Summer

Clever Ways To Use Mismatched Socks


Why is it when a perfectly good pair of socks goes into the laundry basket…only one of them make it out of the dryer?  This is a mystery we’d all like to know the answer to.  Instead of throwing them away, try some of these ideas.

1)  Dusting Mitts

Put one or both hands inside a sock and start dusting hard to reach places like blinds, the back of the tv, the baseboards, ceiling fan blades and more!

2)  Shoe Protectors

Keep your shoes protected in the closet and while traveling by placing them inside of a sock.

3)  Pet Toy

Put tennis balls in the toe portion of each sock then tie or sew ends together.

4)  Car Washing Mitt

Use to clean rims and other tiny, hard-to-reach places on your car’s interior and exterior.

5)  Glasses holder

If you misplace the holder for your glasses or sunglasses, place them in a sock to keep them from getting scratched.

6)  Potpourri Sachet

“Clever Ways To Use Mismatched Socks”

Read More 6 Ways to Cut Down Energy Costs In The Summer

Removing Red Wine Stains from Silk

With Valentines Day quickly approaching, we thought it would be good to talk about removing wine stains. Red wine spilled on silk is one of the hardest stains to remove. If you act quickly, you should be able to effectively remove the stain before it sets.

Note: Silk is a delicate fabric, always do a test patch in a discreet area on the fabric before using it on the stain.

Step 1 – Be Quick

If you spill red wine on your silk blouse, tie, or upholstery, the faster you work on it, the more successful you’ll be at removing it. Allowing it to dry will make it almost impossible to get out. If you’re in a restaurant, or otherwise away from home, and unable to work on the stain, blot it with a napkin or paper towel to get as much of the wine out as you can. Do not rub – it will only grind the stain into the fabric and make it harder to remove.

Step 2 – Try Homemade Remedies First

Homemade remedies don’t contain a lot of harsh chemicals that can damage delicate fabrics like silk, so it’s always best to give them a try before moving on to something stronger.

Try mixing a solution of one half hydrogen peroxide and one half cold water and letting the stained area soak in it overnight. If it doesn’t come out the first time, pour out the mixture, mix up a fresh batch, and soak just the stained area again. This may take several attempts and you’ll need to blot the area in between each application. If it’s a bad stain, use full strength peroxide. Don’t allow the stained garments to dry until the red wine is completely gone.

Again….do a test patch in a discreet area on the fabric before using it on the stain.

Another effective solution is mixing Dawn dishwashing liquid and warm water. Soak the affected silk, and then rinse just the stained area with cold water. You may need to soak it a few times. I’ve read some have tried vinegar or rubbing alcohol mixed with Dawn and been successful.

If a slight stain remains, dab rubbing alcohol onto it; then, put a cloth soaked in alcohol on top of the stain to keep it wet and let it sit. Blot the moisture away to remove the wine. Repeat if necessary.

Step 3 – Try Commercial Cleaners

There are several good commercial cleaners on the market for removing red wine as well.

Spray and Wash works well on red wine stains, while remaining gentle enough for silk. Spray it on, keep the area wet and blot away as much of the wine as possible.

Gonzo “Wine Away” is a very popular one that is available at most hardware stores. Follow the directions on the package and use in a well-ventilated area.

Again….I can’t stress enough….do a test patch in a discreet area on the fabric before using it on the stain.

Erado-Sol, a commercial cleaner, is the best over the counter cleaner and will remove 100 percent of the stain. It may be difficult to find, so I recommend looking online.

Read More 6 Ways to Cut Down Energy Costs In The Summer

How to Wash/Dry Microfiber Towels

Washing and drying microfiber towels properly ensures towels will last longer, stay softer, and produce better results when trying to clean your windows, appliances, drying off your vehicle after washing, or using them for waxing your vehicle.

Step 1: Separate Your Towels

Before washing your microfiber, separate your towels into specific groups such as windows, appliances, vehicles, wheels, etc. Washing your towels in separate groups reduces the chance of cross-contamination during the washing process. If you wash your waxing towels and your window cleaning towels in the same load, wax residue can become embedded in the window towels and can cause streaks when cleaning glass, or appliances such as stainless steel.

Step 2: Use Proper Microfiber Wash

Choosing the correct microfiber wash solution is important to maintaining the condition of your microfiber. Using generic laundry detergent can reduce the life and performance of microfiber towels. We recommend only using a microfiber specific washing solution, such as Chemical Guys Microfiber Wash, to achieve the best results when washing your towels and microfiber goods. Microfiber Wash is designed to safely remove dirt and contamination from your microfiber without harming the material. Using generic laundry detergent can make microfiber feel stiff and rough. DO NOT USE FABRIC SOFTENER! Fabric softener clogs the fiber material and reduces microfiber performance. Fabric softener blocks liquids from being absorbed by the microfiber material.

Step 3: Use the Correct Wash Settings

Place your microfiber towels in the washing machine. Select “Hot” for the water temperature. Washing microfiber with hot water opens the fibers to release dirt and contamination. Add 1 oz. to 4 oz. (depending on load size) of Microfiber Wash to the machine. Press start and allow the machine to do the work.

Step 4: Drying the Microfiber

Now that the towels are washed, it’s time to dry. Machine drying is recommended to ensure the towels are clean, fluffy, and ready to detail. Place all your microfiber goods in the dryer, and set the temperature to “low”. Do not dry microfiber goods on high heat. Using high heat on microfiber can fry the polyester in the microfiber, causing the towel to feel stiff and hard. Towels that are dried on high heat can lead to scratches and swirls when used on cars, appliances or windows.

Step 5: Fold and Store

Once the towels are dry, properly fold and store them. Microfiber can easily hold dirt and dust. To ensure the towels stay clean, store the them in a clean cabinet, closet or container. Storing the towels properly can ensure that no dirt, dust, or debris lands on your towels.

Read More 6 Ways to Cut Down Energy Costs In The Summer

How To Get Rid Of Smoke Odor On Clothes

We all know that smell. The one that lingers after a night out or maybe dinner around a camp fire. That lingering odor that follows you home. How do you get that annoying smoke odor out of your clothes?

Without Washing:

Air it Out

The first thing a smoky garment needs is some fresh air.  Hang the garments in a well ventilated area…even better hang outside.  It’s amazing what a little sun and fresh air can do.

Odor Eliminating Spray or Essential Oils

If the smoke smell remains, keep the garments hanging and use an odor eliminating such as Febreze all over the front and back.  You can make your own odor eliminating spray by combining equal parts vinegar and water in a spray bottle.  Add 20-30 drops of your favorite essential oil such as lemon or mint oil.

Baking Soda

Place garment in an extra large plastic zipper bag with plenty of room for the garment to move around.  If you don’t have a large enough zipper bag – use a plastic shopping bag or garbage bag. Add ½ cup of baking soda, seal or tie the bag securely, give it a quick shake and let the entire thing sit overnight.  That will give the baking soda time to absorb the odor.  Once it’s done sitting, take the bag outside, open and shake off excess baking soda. Tumble garment in low or no heat drying cycle to help.

In the Washing Machine:

Vinegar Pre-Soak

Before washing, give your garment a nice, long, soak.  Add 1 cup vinegar to a sink or tub, then fill with warm water. Add a few drops of your favorite essential oil for a fresh scent.  Soak garment for 30-60 minutes, then wash as directed.

Scent Booster

I’ve tried  Downy Unstopables and love what they do.  Just add a scoop to a load of smoky-smelling clothes and let them go to work.

Lemon Juice

Fresh lemon juice can do wonders for all kinds of cleaning purposes, especially in the laundry room.  Whiten whites and remove all sorts of odors, such as smoke, just by adding ½ a cup of lemon juice to the wash.

Vodka

Alcohol is a powerful odor remover and safe on most washable fabrics.  Pour ½ cup of cheap vodka (or rubbing alcohol) into the wash to eliminate tough odors.

Read More 6 Ways to Cut Down Energy Costs In The Summer

How To Clean Your Stinky, Mildew Towels

At some point most of us have used a towel, for whatever reason, and tossed it in to the dirty laundry and forgotten it was wet. A few days later and the smell will remind you! That smell is caused by mildew that sets in, and isn’t very easy to get rid of.  Washing your towels a few times on a normal setting may get rid of the odor, but if that isn’t enough to combat the mildew smell, I’ve found a way to get your towels back in shape and get that unpleasant smell out quickly. Here is how:

  • Place your smelly towels in the washing machine and fill with the hottest water possible. Add in 2 cups of white vinegar and let them soak for at least 30 mins. Do not add any other products (detergent, softener etc.). This will allow the vinegar to penetrate the material without interference.
  • Run a full cycle after your towels have soaked in the vinegar water. Leaving the towels in the washer repeat step 1, only this time use baking soda instead of vinegar. Run a full cycle once again.
  • Dry the towels on hottest setting possible until they are fully dry.

Read More 6 Ways to Cut Down Energy Costs In The Summer

Choosing the Correct Water Temperature

Most people think the way to get the job done is to wash everything in a single load with cold water. That way, you get it all done at once, and there’s no color transfer between clothes, but that’s not always the case.  Washing everything together in cold will prevent color transfer, but unfortunately it won’t get everything clean.

When to wash in hot water

Hot wash works well on ground-in and hard-to-remove dirt on sturdy fabrics.

Generally speaking, you should wash white clothes in hot water. Washing colors in hot water is also recommended if the clothes are really dirty or greasy, and they’re made of sturdy, color-fast fabric. (Wash them separately, of course.)

Use it to clean seriously soiled sturdy garments (gardening or children’s clothing), and to regularly disinfect dish towels, washcloths, bath towels, bedding, and pillowcases.

Light and dark fabrics should be separated as hot water may cause these clothes to bleed.

Delicate and coarse or sturdy fabrics should be separated to prevent abrasion and protect clothes from wear and tear.

When to wash in warm water

Warm water (or permanent press wash setting) minimizes color fading and wrinkling. Wash light clothes, as well as regular and sturdy fabrics, towels, jeans, 100 percent man-made fibers, and blends of natural and man-made fibers. It’s also appropriate for moderately dirty clothes that don’t need the extra power of a hot water temperature wash.

When to wash in cold water

Washing clothes with cold water will protect most dark or bright-colored clothing from running and minimizes shrinkage. Use the cold wash cycle for lightly soiled fabrics and clothes with blood, wine or coffee stains, dark or bright colors that may run or fade, delicate fabrics including washable silk, Spandex swimsuits, and active wear; and delicate lingerie. It’s also okay for lightly soiled clothes.

There’s a misconception that washing clothes in cold water won’t get clothes clean. This is because detergent is formulated for, and fully activated in, warm water. Cooler water won’t fully activate detergent, which means you’ll need to use more to make up for the temperature difference to get your cold wash clothes clean. Thankfully there are several brands of detergent that are designed to work in all temperatures. Tide, Arm & Hammer, All, and Wisk are just a few that we recommend.

Read More 6 Ways to Cut Down Energy Costs In The Summer

Laundry Tips & Tricks

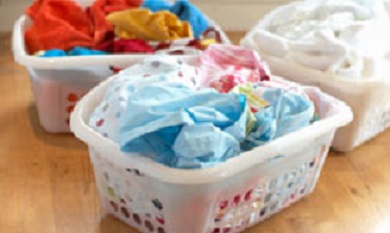
 Sometimes there are just some laundry care tips that don’t fit into any particular category. You’ll be surprised after you read through these when they just might come in handy.

  • Before you wear a new garment, put a little dot of clear nail polish on the front and back threads of each button. Buttons will stay on longer when the threads are sealed.
  • Zippers won’t stick if you rub them with the edge of a bar of soap.
  • To remove a hem crease, sponge the line on the fabric with a clean white cloth dipped in distilled white vinegar and then press with a warm iron from the wrong side of the garment.
  • When washing clothes, add detergent to the washer first. Pouring detergent on clothing can leave streaks and even cause fabrics to fade.
  • Avoid getting perfume, aftershave or hair spray on leather because the alcohol may ruin the finish and color.
  • Wash nylon clothing every time after wearing. Nylon is very hard to clean once it becomes heavily soiled. Treat any oily stains immediately after they happen with warm or hot water to prevent them from becoming permanent..
  • NEVER use an acetone-based nail polish remover on garments to remove stains! The acetone will dissolve the fabric!
  • Knit garments should always be folded to store on a shelf or in a drawer. Hanging knits can cause them to stretch completely out of shape.
  • Turn all clothes inside out before washing to prevent fading and keep the right side looking like new.
  • If you don’t have a mesh laundry bag for washing your delicate fabrics, place them in a pillowcase and fasten the loose end with a plastic bag tie or shoelace before tossing it in the washer.
  • To reduce wrinkles, wet a hand towel with water, wring out the excess water and toss in the dryer with wrinkled items. Dry on high for about five minutes. Remove the clothes while still damp and hang to dry.

Read More 6 Ways to Cut Down Energy Costs In The Summer

Always Wash Before You Wear

With the gift giving season upon us we thought we would share this post again.  Surely some of those gifts will be new clothes.  Keep reading to find out why it’s so important to wash before you wear.

There are three good reasons to wash new clothes, especially those that are worn in direct contact with your skin, before you wear them.

  • One is to wash out extra dye that can be transferred to your skin or other garments. Most fabric made from synthetic fibers (polyester, acrylic) are colored with azo-aniline dyes. These dyes can cause severe skin reactions for those who are allergic to them. If the allergy is severe, the rash will be similar to poison ivy. But even less severe reactions can cause dry, itchy inflamed patches of skin.
  • It is possible to transfer lice, scabies, bacteria and fungus from person to person when clothes are tried on. Dressing rooms can become breeding grounds for everything from viruses to athlete’s foot.
  • And, most importantly, to remove the chemical finishes that manufacturers put on clothes to enhance color or texture. The finishes won’t bother everyone, but if you have sensitive skin you can develop a rash especially in constant contact areas like armpits, collars, cuffs and trouser waists and thighs.

Urea formaldehyde is often the chemical used to prevent mildew on clothes that have to be shipped long distances in hot, humid containers from overseas to the United States. It has a very strong odor that will remain in the fabric until the garment is washed. One washing will not remove formaldehyde completely but you will reduce the build up significantly and it will continue to be removed with each wash.

It is especially important that children’s clothing, especially clothes for babies, be washed before they are worn. Babies are particularly sensitive to chemicals and skin rashes can occur. Select a detergent that is fragrance free and dye free as these can also cause skin reactions. Washing the clothes for children will also make them softer and more comfortable for them to wear.

Washing new sheets/blankets and towels is also important to remove chemicals since these come in direct contact with skin. Washing will also improve the absorbency of the fabric by removing surface fiber coatings.

If you have a tag on the garment that reads “wash separately before wearing”, beware of dye transfer and color bleeding. Washing will help remove the excess dye but check the rinse water. If color remains in the water, it make take several wash cycles to get rid of the excess dye so continue to wash separately or with similar colors.


Read More 6 Ways to Cut Down Energy Costs In The Summer
bottom Gears Mobile bottom Gears