header image

Blog

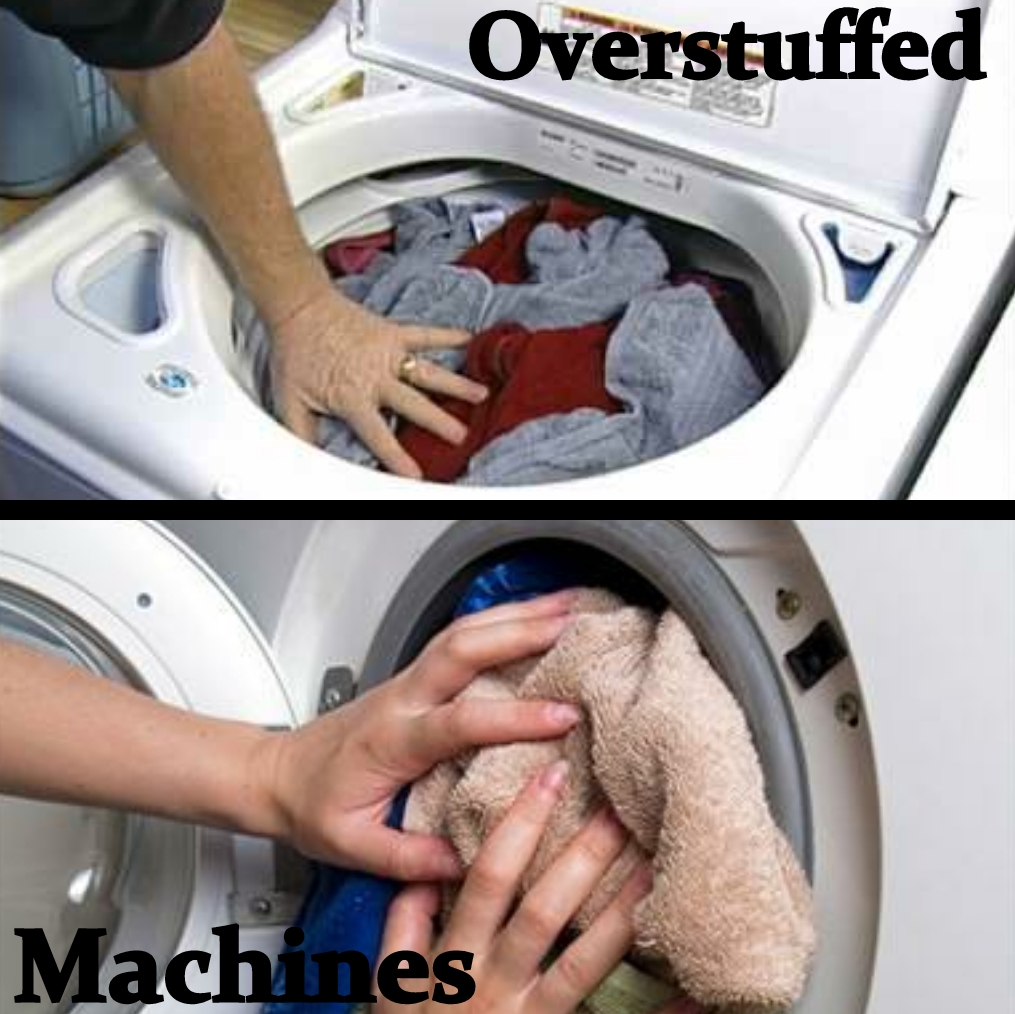
Avoid Overstuffing the Washing Machine

We have been asked from time to time: “How do you know when the washing machine is full enough?” and “Do you stuff it full, or just put a few things in at a time?”. These are good questions, and vary from machine to machine.

Overstuffing is NEVER a good idea.  An overstuffed load will not come clean!

Clothes need a certain amount of room in the washer to move around, and a sufficient amount of water and detergent is needed.  The extra room allows them to move against each other, and that abrasion helps get them clean.  If the clothes aren’t subjected to enough water the dirt, grime, sweat and detergent won’t be rinsed from the fabric. And that means dingy, still dirty clothes. Gross!

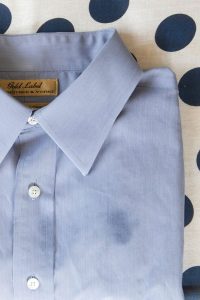
Overstuffing can cause clothes to wrinkle since there is not enough room in the drum of the washer for them to move around.

When you move your clothes from the washer to the dryer and you notice every item is wrinkled, it’s a sure sign you’ve overloaded the machine.

Overloading can cause your clothes to pill more readily.  When overcrowded, the clothes rub against each other too much and this abrasion causes them to look older faster and to pill. Pilling is a surface defect caused by wear, and causes little fiber balls to form.

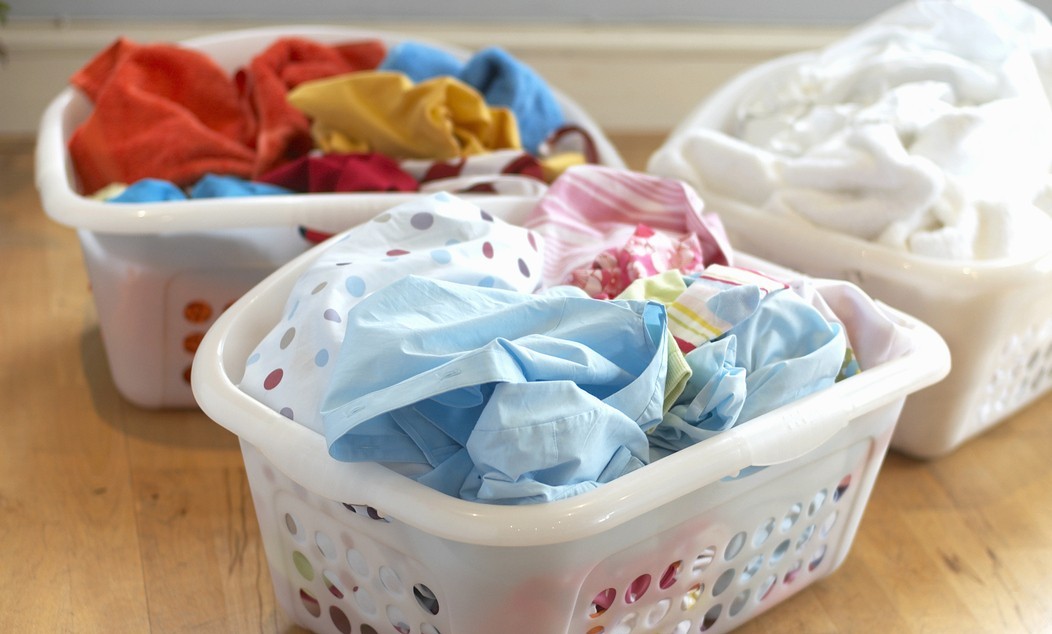
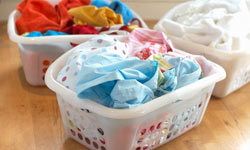
Guide to Load Sizing

Keep in mind that these are loosely loaded clothes in the washer.  If you have to push your clothes down, or in for front load washers, to make room for more in the washer…then you’ve put way too many in there.

Small Load – fills about 1/3 of your machine.

Medium Load – fills about 1/2 of your machine.

Large Load – fills about 3/4 of your machine.

Read More “6 Ways to Cut Down Energy Costs In The Summer”

How to Unshrink a Sweater

Fall is just around the corner, so it’s time to start getting those sweaters out and ready to wear.  And then…..Oops!  You realize the last time you washed it, you accidentally shrunk your favorite sweater in the dryer!  Thankfully, it is possible to unshrink that sweater that is now small enough for a small child to wear.

  1. Soak the item in warm water and a few squirts of baby shampoo.

Start the resizing process by soaking the shrunken item in a sink or bucket full of warm water and about two tablespoons of baby shampoo.

Gently work the shampoo into the fibers by hand, taking care not to stretch any of the fibers during the softening-up process.

About 15 minutes should allow enough time for the shampoo to relax the garment’s fibers enough so that you may begin the letting-out process.

  1. Remove sweater from the soapy water and rinse.

Rinse in cool water to remove the baby shampoo. Gently press or squeeze the garment to remove any remaining moisture. Don’t wring – this can damage and even break the fibers you’re trying to stretch.

  1. Roll the sweater in a towel to remove remaining moisture.

Roll in a clean, dry towel to remove any lingering moisture. It’s important that the clothing’s fibers contain as little moisture as possible when you begin the resizing process.

  1. Gently stretch and pin the sweater to a cork board.

Stretching the neck, arms, and sides as taut as possible without damaging the fibers. Let it be for at least an hour.

  1. Re-stretch and re-pin every couple hours.

Re-stretch and re-pin your garment every few hours. It will take several stretching and re-pinning sessions to unshrink the garment, and ease it back to its original size.

If you adore that sweater, you’ll be glad you took the time!


Read More “6 Ways to Cut Down Energy Costs In The Summer”

How to Remove Chocolate Stains

Have you ever eaten a chocolate sundae and looked down to see the chocolate has dripped on your shirt?  It can almost ruin that yummy experience you just had.  Never fear, there’s ways to get rid of that chocolate stain!

  • Scrape or blot away any excess chocolate from stain. Be gentle when doing this, because you don’t want to grind the chocolate into the fibers.
  • Flush the back of the stained fabric with cold running water or soda water. Ideally, hold the fabric under the tap or saturate the stain with cold water or soda water. This will help loosen the chocolate and flush them out of the clothing fibers.
  • Rub a laundry detergent or liquid dish-washing detergent into the stain. Do this thoroughly (but not too rough) and make sure the detergent saturates the fabric. Persil liquid has a Stain Eraser Ball that you can use for pre-treating stains.

  • Soak the garment in cold water for 15 minutes, and gently rub at the stain every 3-5 minutes or so. Keep on doing this and rinsing, until the stain is gone. You may need to re-apply more detergent for a tough stain.
  • If the stain persists, apply a commercial stain remover.
  • Launder as usual in the washing machine, and the stain should be gone! If not, repeat Steps 2 to 5. Be sure to check the stain is completely gone before you tumble-dry or iron the garment.

Read More “6 Ways to Cut Down Energy Costs In The Summer”

Clever Ways To Use Mismatched Socks

Why is it when a perfectly good pair of socks goes into the laundry basket…only one of them make it out of the dryer?  This is a mystery we’d all like to know the answer to.  Instead of throwing them away, try some of these ideas.

1)  Dusting Mitts

Put one or both hands inside a sock and start dusting hard to reach places like blinds, the back of the tv, the baseboards, ceiling fan blades and more!


2)  Shoe Protectors

Keep your shoes protected in the closet and while traveling by placing them inside of a sock.

3)  Pet Toy

Put tennis balls in the toe portion of each sock then tie or sew ends together.

4)  Car Washing Mitt

Use to clean rims and other tiny, hard-to-reach places on your car’s interior and exterior.

5)  Glasses holder

If you misplace the holder for your glasses or sunglasses, place them in a sock to keep them from getting scratched.

6)  Potpourri Sachet

“Clever Ways To Use Mismatched Socks”

Read More “6 Ways to Cut Down Energy Costs In The Summer”

How To Wash Jeans/Denim

Chances are you bought those new jeans or that denim jacket because you liked the color and texture of the denim, right? Well, those new jeans and denim jackets have been dyed to get that color and rough-and-tumble look to last through multiple washing’s.

To keep jeans looking good, you’ll need to launder your denim carefully to keep the look you love.

1. Always wash new jeans separately.

Dark wash jeans should be washed separately the first time, and in a laundry detergent designed to keep their dark colors safe and intact. The dye in most jeans transfers readily during the laundry cycle, so it’s important to bathe them all by themselves.

2. Turn jeans inside-out before washing.

Washed jeans should be laundered inside-out in warm or cool water to prevent fading (unless you want fading, of course.) Keep both new and washed jeans away from laundry detergents with bleach for the same reason. This is one time you’ll want to use a basic laundry detergent without additives or boosters.

3. Avoid frequent tumble drying and dry cleaning.

Avoid frequent tumble-drying and dry cleaning. Heat may damages fibers, and dry cleaning may cause discoloration. When necessary, tumble dry while the dryer is cool and use the delicate setting.

To extend the lifespan of jeans, lay them flat to dry whenever possible instead of tossing them into the dryer.

4. Don’t spot clean jeans.

Don’t try to spot-clean denim. Instead, wash the entire pants so you don’t create a faded area where the spot or spill was.

5. If needed, iron jeans while damp.

This step is very easy and for those who like the crisp, pressed look. To put it simply – iron the denim while it’s still damp on the highest setting recommended for denim on your iron. Another option is to bring your jean in to us at Sapulpa Laundry. We will get your jeans crisp and pressed with a crease or not, and starched or not – however you prefer.

Read More “6 Ways to Cut Down Energy Costs In The Summer”

5 Effective Grease Stain Removal Tips

You probably already have some of these cleaning agents in your home, and a couple that might be worth bringing home.  Here’s how to take grease stains off clothes, step by step.

Dish Soap and Hot Water

Treat stained clothes the same way you would a sink full of greasy dishes – remove grease from the surface with dish-washing liquid.  Dish detergent is designed to break up surface grease and allow it to rinse away.

  • Place the garment stain-side down on white paper towels. (Printed paper towels could transfer ink color to your clothes.)
  • Squirt a dime-size amount of dishwashing liquid on the backside of the grease stains. Gently rub the dish detergent into the stain center and work your way to the edges. Give it a minute or so to work its breakdown magic.
  • Rinse the treated area under warm to hot running water for a minute or so to remove the dish detergent. The water temperature will depend on what the fabric can handle. For 100 percent cotton, you can usually use hot water.
  • Follow the rinse with a spin in the washing machine, using the hottest water that’s safe for the fabric and your regular laundry detergent.  If you can’t read the clothing label care tab, choose a warm water wash.

Laundry Detergent Pre-treatment

Rub a liquid laundry detergent into the stain, and let sit for 3-5 minutes.

Wash the stained item separately from the rest of your clothes in the hottest recommended water, adding a little bleach or bleach alternative to the wash water. Extend the wash cycle to give the garment some extra time in the spin cycle.

Absorbent Powder

Another good tip that works on grease stains that are fresh is to use absorbent powder (such as cornstarch, salt, baking powder or talcum powder).

  • Apply the absorbent of choice, and let it set until the powder has absorbed as much of the grease stain as possible. Brush away the absorbent remnants with a stiff-bristle brush.

WD-40 and Dish Detergent

Place the garment on paper towels, grease stain side up. Spray the greasy area with WD-40. Let stand 10 minutes.

  • Turn the garment over and spray the underside  as well. Allow to sit another 10 minutes.
  • Using paper towels, blot on some hand dishwashing liquid, replacing the towels as they absorb the grease.
  • Rinse the treated area, and wash separately from the rest of your laundry.

Lestoil Heavy Duty Cleaner

Lestoil Heavy Duty Cleaner is made by Clorox. It safely removes oil spots, grease stains and tar from washable fabrics. It’s effective and easy to use, but it does have a very strong smell.

Simply pour Lestoil onto the greasy stain and let it soak in for about 20 minutes before washing. And if you’re washing a huge greasy load of laundry, add some to the wash water to get the load clean and grease-free.

Lestoil is also good for removing stains from fabric on sofas, chairs, carpets, and concrete driveways.

Last But Not Least

Inspect the treated area before drying to ensure the greasy stains are completely removed. If you can still see any residue, repeat the pre-treating and washing process until clear.

Then, go ahead and dry the garment as usual.


Read More “6 Ways to Cut Down Energy Costs In The Summer”

The Importance of Sorting Clothes


Interestingly enough, you’ll find several different opinions when it comes to sorting your laundry.  Our method is certainly not the only way.  If you have a method that works for you, then by all means keep doing it!  But if you’re getting worn out, torn or discolored clothes, then this article is for you.

What’s the reason to sort clothes in the first place? Do you really need to sort clothes at all?  In our opinion, you do.  Sorting clothes allows you to use different wash cycles (delicate, normal, permanent press) and also allows for washing in different temperatures.

Most importantly, sorting clothes decreases the chances that a garment is going to bleed onto another when you control the cycle type and water temperature.

Sorting Clothes by Color

There are several distinct piles in which to sort clothes: whites, darks, lights, jeans, and delicates.

∙Whites:  T-shirts, underwear, socks and other similar items fall into this category.  This pile is for white sturdy cottons that can withstand normal agitation in the washer on a warm or hot wash cycle.

∙Darks: Grays, blacks, navies, reds, dark purples and similar colors are sorted into this load.

∙Lights: More pastel-type colors such as pinks, lavenders, light blues, lights greens and yellows are placed in this pile of laundry.

∙Jeans: All items with denim material are washed together in this load.

∙Delicates: This category includes several types of clothing – lingerie, washable silks, and any clothing you’d like to keep from the harsh agitation of the washer.

Sorting Clothes by Fabric Weight

Please note that color is not the only consideration when sorting clothes. The weight of the garment should be considered as well.

For example, if you have several pairs of heavy cotton pants, or denim, then you don’t want to wash those with thin t-shirts.  Washing light- weight clothes with heavy material can possibly tear or rip those garments.

If they are placed in the dryer together, they obviously won’t dry at the same rate since one fabric is much heavier than the other.

It’s best just to separate these types of garments from the start and wash them in two separate loads.

Read More “6 Ways to Cut Down Energy Costs In The Summer”

5 Ways To Use Vinegar In Your Laundry


White distilled vinegar can be used in the laundry to whiten, brighten, reduce odor and soften clothes without harsh chemicals. It’s safe to use in both standard and high efficiency washers and is beneficial to septic tanks. In the grocery store, you will usually find distilled white vinegar next to apple cider vinegar used most often in cooking.

When buying vinegar to use in the laundry, choose white distilled vinegar. It contains no tannins (natural plant dyes that can stain clothes) and it’s less expensive

Brighten & Whiten Clothes

The acetic acid in distilled white vinegar is so mild that it will not harm washable fabrics; yet is strong enough to dissolve residues left by soaps and detergents. Adding just 1/2 cup vinegar to the final rinse will result in brighter, clearer colors. If using an automatic dispenser, add the distilled white vinegar to the fabric softener dispenser or add the vinegar manually at the beginning of the rinse cycle.

The mild acetic acid in vinegar also acts as a whitener and brightener for gray, dingy clothes in the laundry. To get stained white socks and dingy dishcloths white again, add 1 cup of white distilled vinegar to a large pot of water. Heat to boiling and add the articles. Let soak overnight and then launder as usual. This should only be used on 100 percent cotton clothing.

Banish Mildew Odor

Leaving wet towels in a hamper or a load of wet clothing in the washer can create mildew growth and a moldy smell. To get everything smelling fresh, fill the washer with hot water, add two cups of white distilled vinegar and run through the wash cycle. Then, run a normal cycle with detergent. This works well for small amounts of mold and sour smells.

Naturally Soften Clothes

If you don’t like the idea of using heavily scented commercial fabric softeners, but want softer clothes, white distilled vinegar acts as a natural fabric softener and leaves no residue on laundry. Just add 1/2 cup to the final rinse cycle.

If you do like a light scent, add a couple of drops of essential oil like lavender to the bottle of vinegar.

Commercial fabric softeners interfere with the fire retardant qualities of children’s clothing—especially pajamas—and should never be used with their laundry. White distilled vinegar is safe and hypoallergenic for all children’s clothes.

Reduce Lint and Pet Hair

Just 1/2 cup of white distilled vinegar in the rinse cycle, will help prevent lint and pet hair from clinging to clothes.

Fight Under Arm Odors

Fill a spray bottle with undiluted distilled white vinegar and keep it on hand in the laundry room to remove perspiration odor and stains on washable clothing. Spray the vinegar directly on the inside of the underarm areas before tossing them into the washing machine. Allow it to work for at least ten minutes before washing. The vinegar will help to cut through residual deodorant left on clothing and prevent underarm yellowing.


Read More “6 Ways to Cut Down Energy Costs In The Summer”

Choosing the Correct Water Temperature


Most people think the way to get the job done is to wash everything in a single load with cold water. That way, you get it all done at once, and there’s no color transfer between clothes, but that’s not always the case.  Washing everything together in cold will prevent color transfer, but unfortunately it won’t get everything clean.


When to wash in hot water

Hot wash works well on ground-in and hard-to-remove dirt on sturdy fabrics.

Generally speaking, you should wash white clothes in hot water. Washing colors in hot water is also recommended if the clothes are really dirty or greasy, and they’re made of sturdy, color-fast fabric. (Wash them separately, of course.)

Use it to clean seriously soiled sturdy garments (gardening or children’s clothing), and to regularly disinfect dish towels, washcloths, bath towels, bedding, and pillowcases.

Light and dark fabrics should be separated as hot water may cause these clothes to bleed.

Delicate and coarse or sturdy fabrics should be separated to prevent abrasion and protect clothes from wear and tear.


When to wash in warm water

Warm water (or permanent press wash setting) minimizes color fading and wrinkling. Wash light clothes, as well as regular and sturdy fabrics, towels, jeans, 100 percent manmade fibers, and blends of natural and manmade fibers. It’s also appropriate for moderately dirty clothes that don’t need the extra power of a hot water temperature wash.


When to wash in cold water

Washing clothes with cold water will protect most dark or bright-colored clothing from running and minimizes shrinkage. Use the cold wash cycle for lightly soiled fabrics and clothes with blood, wine or coffee stains, dark or bright colors that may run or fade, delicate fabrics including washable silk, Spandex swimsuits, and active wear; and delicate lingerie. It’s also okay for lightly soiled clothes.

There’s a misconception that washing clothes in cold water won’t get clothes clean. This is because detergent is formulated for, and fully activated in, warm water. Cooler water won’t fully activate detergent, which means you’ll need to use more to make up for the temperature difference to get your cold wash clothes clean. Thankfully there are several brands of detergent that are designed to work in all temperatures. Tide, Arm & Hammer, All, and Wisk are just a few that we recommend.


Read More “6 Ways to Cut Down Energy Costs In The Summer”

Three Simple Steps For Laundry Perfection

We’ve all done our share of laundry, but some of us have figured out a way to perfect it. Here are some of my favorite tips to keeping your clothes looking great and lasting longer.

Step One: Wait Before You Wash

Wear your clothing more than once. I know this might make some of you say “Gross!” but it’s really not.  You know if something needs to be washed.  If it reeks to high heaven – it needs to be washed, but over the course of an average day, clean people don’t get that smelly. Of course it depends on the activity you do during the day as well. Wearing your clothes at least twice before laundering them can save you a bundle on water and electric bills over the course of a year and save your clothes from wearing out before their time.

(Side note….I’m not talking about underwear & socks.  They need to be changed daily.)

Step Two: Divide and Conquer

Admit it, most of you will stuff everything in the washer to make one load. I get it, you want to save time and money, but this is hard on your clothes and they probably aren’t getting as clean as you think they are.  I sort laundry by “lights” and “darks”, which seems to be the traditional way of doing laundry.  Sorting clothes allows you to use different wash cycles (delicate vs. normal) and also allows for washing in different temperatures.

Most importantly, sorting clothes decreases the chances that a garment is going to bleed onto another when you control the cycle type and water temperature.

Step Three: Chose the Correct Wash Cycle & Water Temperature

Take a minute to read the labels on your clothing. You’ll find the information you need to choose both your water temperature and the type of washing cycle. Following the recommendations on the label is especially important if you are new to doing your own laundry or if the garment is new.


Read More “6 Ways to Cut Down Energy Costs In The Summer”
bottom Gears Mobile bottom Gears