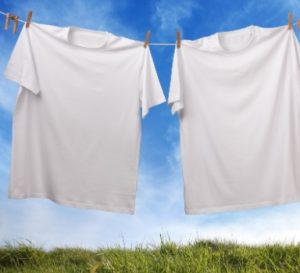
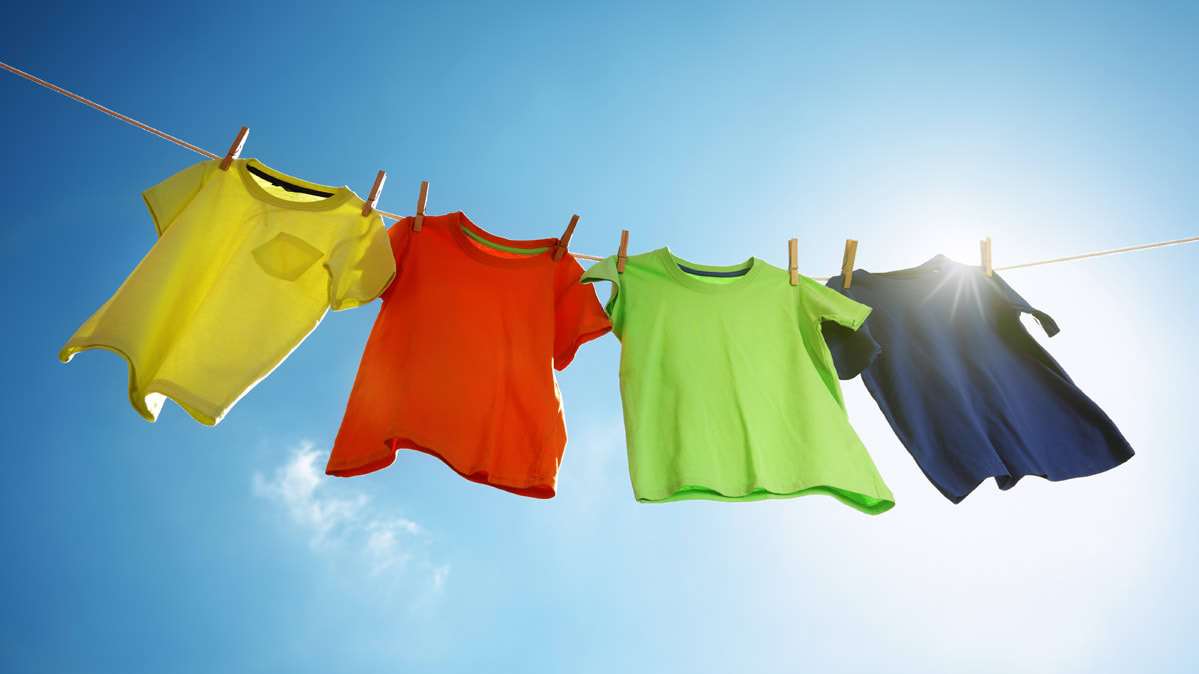
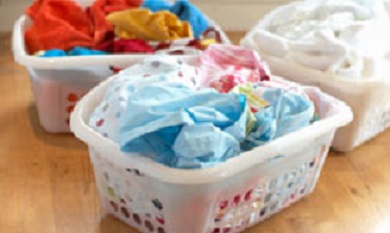
Whiter and Brighter Laundry

Baking Soda

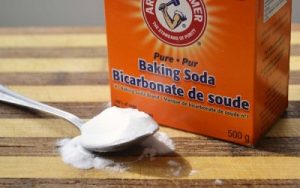
What It Does: Baking soda helps deodorize and soften your clothes. Simply add 1/2 cup of baking soda along with your regular liquid laundry detergent at the start of the wash cycle. If you are using a powder detergent, add the baking soda during the rinse cycle.

Bleach

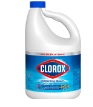
Use chlorine bleach only for whites and bleachable colors. Before using check for “non-chlorine bleach only” labels.

Non-chlorine bleaches, such as oxygen bleach (Oxi Clean) and hydrogen peroxide, are also great at whitening. These products are gentler than chlorine bleach, making them safe for most fabrics and dyes.

Hydrogen peroxide will whiten and brighten clothes, disinfect laundry, and remove stains. Pour it directly on stains such as blood. Add 1 cup of hydrogen peroxide to whites in the washing machine to brighten them

NOTE: Test in an inconspicuous area before using the product on darker colors.

White Distilled Vinegar

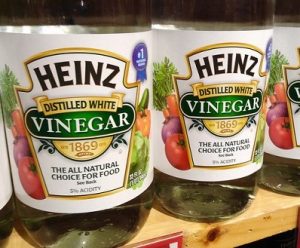
Vinegar is an excellent fabric softener and deodorizer. Pour 1/4 cup into your washing machine during the last rinse cycle. Continue the cycle as usual

Warning: Never combine vinegar with chlorine bleach as this will result in harmful fumes. Do not use vinegar on silk, acetate, or rayon clothing.

Lemon Juice

Lemon juice is a natural laundry whitener and freshener. Add 1 cup to your washing machine water along with your detergent. Only use lemon juice on white laundry.

Borax

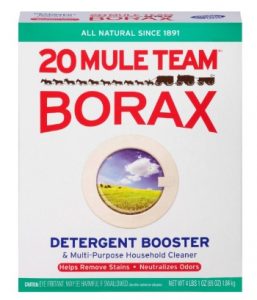
Borax helps remove stains, and it deodorizes and brightens clothes. Borax also breaks down the minerals in the water so detergent can work better. Add 1/2 cup of borax at the beginning of the wash cycle.

Read More 6 Ways to Cut Down Energy Costs In The Summer

How To Remove Make-Up From Clothes

Halloween is fast approaching and we know there will be a lot of make-up stains on clothing. Removing cosmetics from clothing can be a chore. Knowing the most efficient methods for removing makeup stains can save you a lot of time, money, and frustration.

First of all, know the type of  makeup you’re dealing with: non-oily or oily. Non-oily are powder products like eye shadows and blushes. Oily types are lipsticks, cream blushes, and other liquid makeup. Each type requires a specific method of removal. So…..determine if your makeup stain is non-oily or oily.

Second, you should attempt to remove the stain as quickly as possible to avoid letting them set into your garments. Fresh stains come out a lot easier than when they’re left.

Lipstick

Lipstick is oil-based, and should be treated with a pre-wash stain remover before attempting to wash it out. Never rub the stain, as it only causes the lipstick to go deeper into the fabric. We recommend blotting the stain with a clean white cloth, and rinse the stained material in warm water (you want to use a white cloth to avoid any fabric dyes from transferring to the stain).  If the stain persist, apply a good liquid household detergent to the stain, but don’t rub, blot.

Rubbing alcohol will also remove lipstick stains. Again, using a white cloth, dab the stain with a small amount of isopropyl alcohol, then add a small amount of household detergent and wash the garment per the label instructions.

Liquid Makeup

Removing liquid makeup stains can be a battle. Try using Dawn dish soap as a removal agent. Liquid makeup is oil based, and we all know Dawn helps cut through grease.  Then add a small amount of household detergent and wash the garment per the label instructions.

Powder Blush or Eye Shadows

The first thing when you have a powder spill is to try and blow it off the garment. Sometimes that will be enough to get most of it off before laundering per your normal routine. Once you’ve done that, remaining makeup can be wiped off using a damp washcloth and a tiny amount of liquid soap.

Tip:

Be sure to read the care label on any garments before attempting to remove the stain. You may find the garment is “dry clean only” or discover other specifications that will determine your choice of stain removal.

Read More 6 Ways to Cut Down Energy Costs In The Summer

Laundry Guide: Washing

Sort your clothes by checking the care labels. Washing symbols can be difficult to decipher but you can usually find the correct wash temperature (check out our blog The Mystery of Laundry Symbols). The machine wash symbol often looks like a tub of water, if there’s a cross through it, it can’t be machine washed.

Separate whites and dark’s so colors don’t bleed on to the whites.

If you’re using a Tide Pod, or one of the other “pod” detergents, toss it into the drum first. The detergent will properly dissolve during the wash cycle. For small and medium loads use only one pod, for large loads use two pods. When using liquid detergent pour it into the dosing cap. Fill until line 1 for medium loads, line 3 for large loads, and line 5 for HE full loads. For powder detergent, fill the drum until line 1 for medium loads, line 3 for large loads, and line 5 for HE full loads.

Fill the machine with your clothes. Don’t overload the drum – 3/4 full is about right.

Choose a water temperature that’s right for your laundry load. Select a wash cycle.  Start the machine.

Read More 6 Ways to Cut Down Energy Costs In The Summer

Keep Your Clothes Lasting Longer

We’ve all done our share of laundry, but some of us have figured out a way to perfect it. Here are some of my favorite tips to keeping your clothes looking great and lasting longer.

Step One: Wait Before You Wash

Wear your clothing more than once. I know this might make some of you say “Gross!” but it’s really not.  You know if something needs to be washed.  If it reeks to high heaven – it needs to be washed, but over the course of an average day, clean people don’t get that smelly. Of course it depends on the activity you do during the day as well. Wearing your clothes at least twice before laundering them can save you a bundle on water and electric bills over the course of a year and save your clothes from wearing out before their time.

(Side note….I’m not talking about underwear & socks.  They need to be changed daily.)

Step Two: Divide and Conquer

Admit it, most of you will stuff everything in the washer to make one load. I get it, you want to save time and money, but this is hard on your clothes and they probably aren’t getting as clean as you think they are.  I sort laundry by “lights” and “darks”, which seems to be the traditional way of doing laundry.  Sorting clothes allows you to use different wash cycles (delicate vs. normal) and also allows for washing in different temperatures.

Most importantly, sorting clothes decreases the chances that a garment is going to bleed onto another when you control the cycle type and water temperature.

Step Three: Chose the Correct Wash Cycle & Water Temperature

Take a minute to read the labels on your clothing. You’ll find the information you need to choose both your water temperature and the type of washing cycle. Following the recommendations on the label is especially important if you are new to doing your own laundry or if the garment is new.

Read More 6 Ways to Cut Down Energy Costs In The Summer

How to Get Cleaner, Brighter, Clothes


Why buy expensive or dangerous cleaning products, bleaches or de-greasers when all you need is probably already in your cabinet!

Did you know baking soda can work magic — including getting cleaner and brighter  whites at a fraction of the cost.

It’s as easy as 1, 2, 3…..

1) Put one cup of baking soda in your wash.

2) Then add your detergent

3) Run your wash on the normal setting and……Voila!  Brighter, cleaner whites!

Try this DIY homemade laundry detergent recipe. This is a project that will save you money and help you rid your home of toxic chemical cleaners and make your clothes brighter and cleaner in the process.

Ingredients

  • 1 bar (or 4.5 ounces) shaved bar soap (a homemade laundry bar, Ivory, or Zote)
  • 1 cup Borax
  • 1 cup baking soda

Directions

Thoroughly mix all ingredients together. Use 1 Tbsp per small load (or 2-3 Tbsp for large or heavily soiled loads) then add  to your laundry.  Store remaining in a sealed container.

Keeping your colors brighter is a challenge at times. Colors fade when the chemical bonds between the dye and the fabric break down, so the best way to keep your colors bright is to wash clothes in a way that either prevents dyes from dissolving, protects the fibers in the fabric — or both. Follow these tips, and your colors will look as good as new!

  • Turn clothes inside out— According to experts, the tumbling action of the wash cycle and the dryer can cause fabric fibers to break as clothes collide into each other and against the walls of the machine. Turning clothes inside out before you wash them will keep the worst of the fraying on the inside.
  • Soak clothes in salt water— Salt is inexpensive, environmentally friendly and great for keeping your colors bright. Before you wash that colorful new top, soak it overnight in salt water. Simply fill your washer with cold water, add 1/4 to 1/2 cup of salt, and then add your clothes. In the morning, just add detergent and run the washer as you normally would. You can add additional clothes at this point, too — just be sure not to overfill the washer.
  • Wash in cold water— Washing in cold water instead of hot not only helps keep your colors bright, it also conserves energy and saves you money. For best results, use a detergent formulated for bright clothes and cold-water washing.

Read More 6 Ways to Cut Down Energy Costs In The Summer

Removing Wrinkles from Permanent Press Clothing

I do not like to iron! I want to pick out an outfit, put it on, and then be on my way.  I do not want to pick out an outfit, get the iron and ironing board out, and then iron it. It takes more time out of my schedule if I have to iron, and if you’re in a rush, it can be stressful! Here are a few of my ”tried and true” tips to help you out.

Be sure to dry permanent press clothing in a gentle/low heat dryer, not HOT!  Hot will only make a wrinkled mess and can melt the fabric. If you forget your clothes and don’t pull them out of the dryer in time, and they happened to get wrinkled, all you have to do is place a damp bath towel in with your clothes on gentle/low heat and dry for a few more minutes. Be sure to take them out just before or as soon as they are dry and lay flat or hang on a hanger.

After you’ve washed and dried your clothes, remove them immediately from the dryer. Then with a little spray bottle filled with water, spray the collar, button hole placard, and the sleeve edges. Then quickly “Finger Press” those focal points to be smooth and flat so they are no longer folded, curled, or crinkly. This easy finishing touch makes a big difference for permanent press shirts to look so much nicer….and it’s easy! No Iron involved!

If you do end up needing to get the dreaded iron out, then try to iron your clothes with a damp cloth. Place the damp cloth on top of the garment and iron. This will steam the fabric and it won’t be too hot. Try a small spot first to see if this will work on the fabric. Remember, too hot of a dryer or iron on permanent press fabric can melt it.

Read More 6 Ways to Cut Down Energy Costs In The Summer

The Mystery of Laundry Symbols

As if life wasn’t confusing enough with emoji’s and acronyms – now we have to deal with squares, circles, triangles, lines and dots on the labels of our clothing! However, clothing-care symbols are a code worth knowing.

The American Society for Testing and Materials, ASTM International, put out a standardized set of care symbols with the goal of creating a universally understood “laundry language”.

ASTM symbols follow a simple scheme and a set order: wash (tub shape), bleach (triangle), dry (square), iron (iron) and special care (circle). A circle by itself usually means dry cleaning or wet cleaning. A circle (special care) inside a square (drying) changes “dry” to “tumble dry.”

Adding lines, dots and other marks modify these base symbols and adds info. For example, a large X through a symbol offers a warning, where an empty symbol often means that any version of what the symbol represents is OK to use. A crossed-out triangle means do not bleach, where an empty triangle tells you that any bleach will do. Adding two parallel diagonal lines means to use only non-chlorine/oxygen bleach.

Clear as mud?  Don’t worry, I’ve included a chart to help you decipher what seem to be ancient Egyptian hieroglyphics:


Read More 6 Ways to Cut Down Energy Costs In The Summer

The Importance of Sorting Clothes

Interestingly enough, you’ll find several different opinions when it comes to sorting your laundry.  Our method is certainly not the only way.  If you have a method that works for you, then by all means keep doing it!  But if you’re getting worn out, torn or discolored clothes, then this article is for you.

What’s the reason to sort clothes in the first place? Do you really need to sort clothes at all?  In our opinion, you do.  Sorting clothes allows you to use different wash cycles (delicate, normal, permanent press) and also allows for washing in different temperatures.

Most importantly, sorting clothes decreases the chances that a garment is going to bleed onto another when you control the cycle type and water temperature.

Sorting Clothes by Color

There are several distinct piles in which to sort clothes: whites, darks, lights, jeans, and delicates.

∙Whites:  T-shirts, underwear, socks and other similar items fall into this category.  This pile is for white sturdy cottons that can withstand normal agitation in the washer on a warm or hot wash cycle.

∙Darks: Grays, blacks, navies, reds, dark purples and similar colors are sorted into this load.

∙Lights: More pastel-type colors such as pinks, lavenders, light blues, lights greens and yellows are placed in this pile of laundry.

∙Jeans: All items with denim material are washed together in this load.

∙Delicates: This category includes several types of clothing – lingerie, washable silks, and any clothing you’d like to keep from the harsh agitation of the washer.

Sorting Clothes by Fabric Weight

Please note that color is not the only consideration when sorting clothes. The weight of the garment should be considered as well.

For example, if you have several pairs of heavy cotton pants, or denim, then you don’t want to wash those with thin t-shirts.  Washing light- weight clothes with heavy material can possibly tear or rip those garments.

If they are placed in the dryer together, they obviously won’t dry at the same rate since one fabric is much heavier than the other.

It’s best just to separate these types of garments from the start and wash them in two separate loads.

Read More 6 Ways to Cut Down Energy Costs In The Summer

Laundry Tips & Tricks

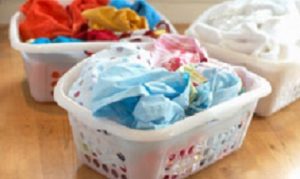
 Sometimes there are just some laundry care tips that don’t fit into any particular category. You’ll be surprised after you read through these when they just might come in handy.

  • Before you wear a new garment, put a little dot of clear nail polish on the front and back threads of each button. Buttons will stay on longer when the threads are sealed.
  • Zippers won’t stick if you rub them with the edge of a bar of soap.
  • To remove a hem crease, sponge the line on the fabric with a clean white cloth dipped in distilled white vinegar and then press with a warm iron from the wrong side of the garment.
  • When washing clothes, add detergent to the washer first. Pouring detergent on clothing can leave streaks and even cause fabrics to fade.
  • Avoid getting perfume, aftershave or hair spray on leather because the alcohol may ruin the finish and color.
  • Wash nylon clothing every time after wearing. Nylon is very hard to clean once it becomes heavily soiled. Treat any oily stains immediately after they happen with warm or hot water to prevent them from becoming permanent..
  • NEVER use an acetone-based nail polish remover on garments to remove stains! The acetone will dissolve the fabric!
  • Knit garments should always be folded to store on a shelf or in a drawer. Hanging knits can cause them to stretch completely out of shape.
  • Turn all clothes inside out before washing to prevent fading and keep the right side looking like new.
  • If you don’t have a mesh laundry bag for washing your delicate fabrics, place them in a pillowcase and fasten the loose end with a plastic bag tie or shoelace before tossing it in the washer.
  • To reduce wrinkles, wet a hand towel with water, wring out the excess water and toss in the dryer with wrinkled items. Dry on high for about five minutes. Remove the clothes while still damp and hang to dry.

Read More 6 Ways to Cut Down Energy Costs In The Summer

Always Wash Before You Wear

With the gift giving season upon us we thought we would share this post again.  Surely some of those gifts will be new clothes.  Keep reading to find out why it’s so important to wash before you wear.

There are three good reasons to wash new clothes, especially those that are worn in direct contact with your skin, before you wear them.

  • One is to wash out extra dye that can be transferred to your skin or other garments. Most fabric made from synthetic fibers (polyester, acrylic) are colored with azo-aniline dyes. These dyes can cause severe skin reactions for those who are allergic to them. If the allergy is severe, the rash will be similar to poison ivy. But even less severe reactions can cause dry, itchy inflamed patches of skin.
  • It is possible to transfer lice, scabies, bacteria and fungus from person to person when clothes are tried on. Dressing rooms can become breeding grounds for everything from viruses to athlete’s foot.
  • And, most importantly, to remove the chemical finishes that manufacturers put on clothes to enhance color or texture. The finishes won’t bother everyone, but if you have sensitive skin you can develop a rash especially in constant contact areas like armpits, collars, cuffs and trouser waists and thighs.

Urea formaldehyde is often the chemical used to prevent mildew on clothes that have to be shipped long distances in hot, humid containers from overseas to the United States. It has a very strong odor that will remain in the fabric until the garment is washed. One washing will not remove formaldehyde completely but you will reduce the build up significantly and it will continue to be removed with each wash.

It is especially important that children’s clothing, especially clothes for babies, be washed before they are worn. Babies are particularly sensitive to chemicals and skin rashes can occur. Select a detergent that is fragrance free and dye free as these can also cause skin reactions. Washing the clothes for children will also make them softer and more comfortable for them to wear.

Washing new sheets/blankets and towels is also important to remove chemicals since these come in direct contact with skin. Washing will also improve the absorbency of the fabric by removing surface fiber coatings.

If you have a tag on the garment that reads “wash separately before wearing”, beware of dye transfer and color bleeding. Washing will help remove the excess dye but check the rinse water. If color remains in the water, it make take several wash cycles to get rid of the excess dye so continue to wash separately or with similar colors.


Read More 6 Ways to Cut Down Energy Costs In The Summer
bottom Gears Mobile bottom Gears