header image

Blog

Removing Smoke Odor

Smoke

Smoke

We all know that smell. The one that lingers after a night out, dinner around a camp fire or an evening spent at a concert. That lingering odor that follows you home. How do you get that annoying smoke odor out of your clothes?

Without Washing:

Air it Out

The first thing a smoky garment needs is some fresh air.  Hang the garments in a well ventilated area…even better hang outside.  It’s amazing what a little sun and fresh air can do.

Odor Eliminating Spray or Essential Oils

If the smoke smell remains, keep the garments hanging and use an odor eliminating such as Febreze all over the front and back.  You can make your own odor eliminating spray by combining equal parts vinegar and water in a spray bottle.  Add 20-30 drops of your favorite essential oil such as lemon or mint oil.

Baking Soda

Place garment in an extra large plastic zipper bag with plenty of room for the garment to move around.  If you don’t have a large enough zipper bag – use a plastic shopping bag or garbage bag. Add ½ cup of baking soda, seal or tie the bag securely, give it a quick shake and let the entire thing sit overnight.  That will give the baking soda time to absorb the odor.  Once it’s done sitting, take the bag outside, open and shake off excess baking soda. Tumble garment in low or no heat drying cycle to help.

In the Washing Machine:
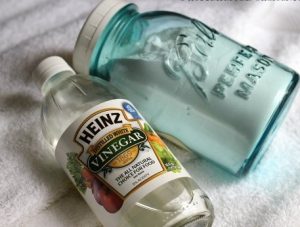
Vinegar Pre-Soak

Before washing, give your garment a nice, long, soak.  Add 1 cup vinegar to a sink or tub, then fill with warm water. Add a few drops of your favorite essential oil for a fresh scent.  Soak garment for 30-60 minutes, then wash as directed.
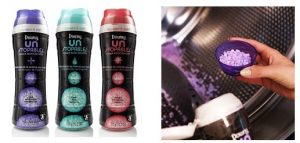
Scent Booster

I’ve tried  Downy Unstopables and love what they do.  Just add a scoop to a load of smoky-smelling clothes and let them go to work.

Lemon Juice

Fresh lemon juice can do wonders for all kinds of cleaning purposes, especially in the laundry room.  Whiten whites and remove all sorts of odors, such as smoke, just by adding ½ a cup of lemon juice to the wash.

Vodka

Alcohol is a powerful odor remover and safe on most washable fabrics.  Pour ½ cup of cheap vodka (or rubbing alcohol) into the wash to eliminate tough odors.


Read More 6 Ways to Cut Down Energy Costs In The Summer

Make Your Laundry Easier


Sort As You Go

Instead of wasting time sorting clothes into loads on laundry day, sort as you go with multiple hampers. This will take away that extra step on laundry day. It also allows you to customize your loads of laundry however you prefer.

If you like to wash each family member’s laundry separately, set your hampers up and label them with each person’s name. If you prefer to wash loads by color or texture, label each hamper that way. On laundry day, take each hamper one at a time to the laundry room and simply transfer all the clothes from the hamper to the washer. No sorting necessary!

Stain Treat As You Go

Just like sorting laundry, stain treatment on laundry day can take a ton of time (especially if you have kids). The time and energy it takes to look at each piece of clothing from the hamper, one-by-one, is time consuming.

Instead, treat them as you go by keeping some of your favorite stain treatment near the hamper. Examining one outfit before it goes into the hamper is much more manageable.

Use Zippered Mesh Bags

How does this help move things along? Separate items that need to be air-dried into their own zippered bag, so you don’t have to waste time sorting them out between the washer and dryer. This also eliminates time spent hand washing certain items or separating them into an additional “delicate” cycle load simply by washing them right along with a normal load of clothes. The mesh bag will protect most items from everything else and cushion them during the spin cycle.

To make this work best, buy zippered mesh bags with a “hidden” zipper that stays shut firmly during the wash cycle. You can put multiple items inside one mesh bag. Just be sure not to overfill so that soap and water can move freely into the bag and reach each garment.

Separate Into Fewer Loads

Mesh bags can also help you cut down on the number of loads you wash. Obviously, fewer loads = less time and hassle, plus, studies show that a full load is cleaned more effectively and efficiently than a load with just a few items. Just be sure you don’t over stuff the washer or dryer. A good rule of thumb is to fill the machine until it’s ¾ full so that the items can get equal attention from your detergent and rinse thoroughly.


Read More 6 Ways to Cut Down Energy Costs In The Summer

How to Clean Your Mattress


Dust, mold, mildew, body sweat, fungal spores, allergens – all make mattresses the ideal breeding ground for bacteria and dust mites.  If you’re as grossed out as I am by this, keep reading and learn how to clean your mattress for a better, cleaner sleep.

Vacuum It

Vacuum your mattress every month or so or as often as every time you change the sheets, if you or family members have severe allergies. Run the vacuum very slowly over the mattress, so it has time to inhale the dust and dust mites. Break out the crevice tool for the edges and crevices.

Treat Stains

Treat any stain immediately. The longer liquids sit in a mattress, the likelier you are to foster mold and mildew growth.

This may sound crazy, but use foaming shaving cream for mattress cleaning, in part because of its thickness. Liquids will soak right through a mattress, not allowing adequate time to dissolve the stain. Foaming shaving cream contains denatured alcohol, which is a stain remover, and it’s thick, so it sits on the surface to work on the stain. Wait 10 to 15 minutes, wipe with a damp cloth, and rinse with a 50/50 vinegar/water solution. Repeat if necessary.

Other helpful solutions for common mattress stains:

  • Blood: A 50/50 hydrogen peroxide/water solution.
  • Urine, fecal matter, or vomit: An enzyme cleaner, such as Bac-Out by BioClean, or Nature’s Miracle, available at pet stores.

Freshen Fast

Use a mixture of cornstarch and baking soda to remove smells.  Place in a colander and just shake the mixture on to the mattress, let it sit for a few hours or longer, then vacuum. The cornstarch will absorb body oils, while the baking soda will work on smelly odors.

Sheet Strategy
Don’t put new sheets on until evening. This will allow the mattress to air all day discouraging dust mites and bacterial growth.

Pad It
Remember, mattress pads aren’t just for comfort. They keep your mattress cleaner, too.  Wash monthly in hot water, and machine dry thoroughly, unless the tag instructs otherwise.

Read More 6 Ways to Cut Down Energy Costs In The Summer

Caring For Your Down Filled Comforter

Manufacturers usually offer cleaning suggestions for their down items. Most recommend cleaning down items infrequently — typically every three to five years, but life happens and sometimes that’s just not sanitary. Try following these steps to get the best results when washing and drying down comforters and pillows.

Washing

Step 1

Check the comforter or pillow for worn stitching or holes, and repair with small fine stitches to avoid losing any down stuffing during the laundering process.  Most comforters are too big for your home washer. Instead, use the large capacity front-loading washing machines at your local Laundromat…specifically Sapulpa Laundry.

Step 2

Before laundering a down comforter or pillow, check for stains. Color-safe bleach can be used on stains caused by water or food, but blood or urine are best treated with an enzymatic cleaner such as Nature’s Miracle or Pure Green Kleen.  Pull the cover of the comforter or pillow away from the down while spot-treating stains to keep the cleaning product from damaging the down. Then launder.

Step 3

Put a sock stuffed with two tennis balls (secured with a knot) in the machine with the comforter or pillows. This addition will help keep the down from bunching and will agitate soil from the items being washed.

Step 4

Use a gentle or delicate-cycle setting and a minimal amount of mild laundry detergent. Choose lukewarm water; hot or cold water can be hard on the down. Use an extra rinse cycle to ensure all soap is rinsed from the down.

NOTE: Down bears a distinctive odor when wet. The odor will dissipate when the down dries.

Drying

Step 1

After the wash is complete, load your comforter or pillows into a dryer large enough to give the items plenty of room to fluff. Add a pair of clean tennis balls to help fluff the down and keep it evenly distributed.

Step 2

Run the dryer on air fluff or the lowest temperature possible. Stop the dryer periodically and break up any lumps that are forming in the comforter or pillow. Also ensure that the down is not getting too warm as extreme heat can scorch the down. Expect the drying process to take three to four hours.

Step 3

Make sure the down item is dry before taking it out of the dryer to avoid the formation of mildew. If the item is still slightly damp, hang it out on a clothesline or lay flat on a table with a fan blowing on it to get the down as dry as possible. Once you bring the comforter or pillow inside, leave the item out for another month to ensure all moisture has evaporated before storing.

Read More 6 Ways to Cut Down Energy Costs In The Summer

How to Care for Your Sheets


If you haven’t noticed, bed sheets are expensive.  If you buy quality, you’d like for them to hold up – not fray, get those pesky little fiber balls that form, also known as “pilling”, or simply to prevent them from fading. This blog may seem pointless to some, but learning how to care for your bed sheets will help you keep them longer and save a little money.

First of all, know your sheets’ fiber content. Look at the care label or packaging to identify the fabric content of your sheets. The most likely fabric choices are cotton, Egyptian cotton, or a cotton-polyester blend, although sheets can also be made of bamboo, linen, or silk. Be sure to review the manufacturer’s care recommendations before washing. Keep in mind that cotton-polyester blends will generally come out of the dryer less wrinkled than all-cotton sheets. Bamboo, linen, and silk sheets need special care.

Wash sheets separately from towels or other clothing. This gives the sheets more room to circulate in the water, which means they’ll get cleaner. Washing sheets alone also prevents damage caused by zippers and other fasteners, and it reduces the amount of pilling that can happen over time.

Always pre-treat stains before laundering sheets. Avoid using bleach on bed linens as it can damage the fabric. If you need to brighten white sheets, add 1/4 cup of lemon juice to the wash water instead of bleach. Use a mild detergent for cotton and cotton-polyester-blend sheets. Special fabrics such as linen and silk may require a special detergent.

Use a gentle wash cycle and cool or lukewarm water. Simple tip – shaking the sheets out before placing them in the dryer can help reduce wrinkles. Use a low heat setting to minimize damage from high temperatures.

Wash your sheets weekly (more often for humid climates) to extend the life of your bed linens. During the time spent on the bed, dirt, dust, skin cells, body oils and fluids accumulate on sheets. The longer these particles accumulate on the sheets, the more stress is put on the sheet fibers. In addition, skin cells and body oils and fluids can attract microscopic mites. A good tip to reduce the washing frequency, is to bathe before bedtime so you’ll take less dirt into bed with you. Keeping sweat, oils, and dirt out of the bed will keep the sheets clean longer.

Read More 6 Ways to Cut Down Energy Costs In The Summer

Sneaker Care 101

Have you ever looked down at your white sneakers and been self-conscious?  If you have, then follow these easy to do steps and feel good about your white, almost new looking, shoes.

First of all, start with preventative care.  Grab a bottle of stain repellent at the shoe store, or anywhere they carry shoe supplies, and spray your shoes. Simply spray the repellent evenly on the surface of your shoes and let them dry overnight. Give your shoes a nice cleaning every few weeks to ensure they stay looking brand new.

Next, clean the soles. When the soles or the rubber part on your favorite pair of shoes needs a good cleaning, give them a good scrub. Try this one spot-cleaning method that’s sure to work – and it’s probably not what you think. Pick up a Magic Eraser next time you’re in the store, because it will soon become your go-to for keeping your sneakers white. Simply wet the Magic Eraser with water, and rub your shoes in a circular motion to watch the eraser work its magic.

Last, but not least – don’t forget the shoelaces. Remove your shoelaces from your sneakers. Fill your sink with hot water and add a few dashes of your favorite laundry detergent. Massage the laces between your thumb and index finger. You can also use the detergent and a toothbrush to get a deep cleaning. Squeeze the laces in a towel or paper towel to get out excess water, then hang them to dry.

Specialty sneakers.  Sometimes sneakers have a different type of material that needs to be cleaned a little bit differently.

How to Clean:

White canvas sneakers: Combine baking soda with an equal amount of a mixture that’s half water and half hydrogen peroxide until it forms a paste. After making sure all excess dirt is brushed off your sneakers, apply the mixture. Let your shoes sit for a few hours until the mixture has hardened. Shake off the hardened mixture and use an old toothbrush or crumpled up paper towel to remove the excess paste. You’ll notice those sneakers are way whiter! If the sneakers are still damp or wet let them dry before wearing them.

White leather sneakers: It might sound too good to be true, but getting your favorite white leather sneakers looking good-as-new, is as easy as taking a toothbrush with your favorite white toothpaste to the surfaces of the shoe. Use warm water with the toothpaste. You can even add sugar to the toothpaste to create an exfoliate effect for any areas where dirt seems to be caked on. Wipe with a clean towel or paper towel. Again, if the sneakers are still damp or wet let them dry before wearing them.


Read More 6 Ways to Cut Down Energy Costs In The Summer

Keeping Pillows Clean

Over-sized, bulky and awkward – sometimes it’s hard to know how to wash your pillows.  Just remember with all of the germs, kids, pets, and guests it’s important to remember to wash them.The best way, plain and simple; machine wash your pillows. Most down and synthetic pillows can be machine washed and dried on low heat, but check the label to be sure.

You’ll want to wash and dry at least two pillows at a time to keep your machine balanced, but take care not to stuff too many in at once. Pillows need plenty of water to get thoroughly clean, and plenty of space to get thoroughly dry. Just follow these simple steps and you’ll have clean, fluffy pillows.

NOTE: Foam pillows should not be washed! Sprinkling them with cornstarch, letting them sit for an hour or longer, then vacuuming thoroughly instead.

Detergent / Water Temperature

Make sure you use something that’s fragrance-free and will rinse clean.  Homemade laundry soap is always a good choice: 2 cups soap flakes and 1 cup each baking soda, washing soda, and borax. Water needs to be 140 degrees or higher to kill dust mites, so make sure your water heater isn’t set too low. It’s good to consider an extra spin cycle to squeeze out as much dampness as possible.

Drying

Make sure you dry pillows completely, even a little dampness could reintroduce the very mildew, bacteria, and dust mites you’re trying to avoid. Dry on low, checking them every 20 to 30 minutes to ensure even drying. For extra fluff, dry with dryer balls or a tennis ball in a sock.

Freshening Between Drying

Put your pillows in the dryer on “air fluff” every few months, to get rid of much of the dust.  If you can handle a little bit of the smell until it dissipates, you can include a vinegar-dampened washcloth, since vinegar is so good at killing mold and mildew.

Pillow Protectors

Removable pillow protectors buy you more time between full-on pillow cleaning.  Simply remove and machine-wash protectors in hot water once a month.

Read More 6 Ways to Cut Down Energy Costs In The Summer

Removing Mildew Odor From Towels


At some point most of us have used a towel, for whatever reason, and tossed it in to the dirty laundry and forgotten it was wet. A few days later and the smell will remind you! That smell is caused by mildew that sets in, and isn’t very easy to get rid of.  Washing your towels a few times on a normal setting may get rid of that stink, but if that isn’t enough to combat the mildew smell, I’ve found a way to get your towels back in shape and get that unpleasant smell out quickly. Here is how:

  1. Place your smelly towels in the washing machine and fill with the hottest water possible. Add in 2 cups of white vinegar and let them soak for at least 30 mins. Do not add any other products (detergent, softener etc.). This will allow the vinegar to penetrate the material without interference.
  2. Run a full cycle after your towels have soaked in the vinegar water. Leaving the towels in the washer repeat step 1, only this time use baking soda instead of vinegar. Run a full cycle once again.
  3. Dry the towels on hottest setting possible until they are fully dry

Your towels will smell like brand new!

Read More 6 Ways to Cut Down Energy Costs In The Summer

How To Remove Ink Stains

Most of us have had an ink stain at some point or another, or a leaking pen ruin a favorite shirt or pants.  Before you toss those clothes in the rag bag, check out some of these simple at-home tips to deal with ink stain removal.

Hair Spray

Squirt the stain with hair spray and the pen marks should come right off.

Rubbing Alcohol

Try soaking the spot in rubbing alcohol for a few minutes to remove the ink, before putting the garment in the wash.

Vinegar

Treat an ink stain on a shirt by first wetting it with some white vinegar, then rub in a paste of 2 parts vinegar to 3 parts cornstarch. Let the paste thoroughly dry before washing the item.

Milk

Believe it or not, a Readers Digest article says to remove ink stains from colored clothes, an overnight milk bath will often do the trick. Just soak the soiled garment in milk overnight and launder as usual the next day.

Salt

Pour salt on an ink stain that’s still wet, gently dab with a wet paper towel, and then remove and brush off the salt. Repeat until the stain has completely lifted.

Sand Paper

Yes, you read that right.  The same Readers Digest article said to use a little fine-grit sandpaper and a gentle touch for removing or at least minimizing an ink stain or small scuff mark on suede clothing or shoes. Afterward, bring up the nap with a toothbrush or nailbrush. You might avoid an expensive trip to the dry cleaner.

Cream of Tartar

Make a paste by mixing 2 tablespoons of cream of tartar with 2 tablespoons of lemon juice. Cover the ink stain with the paste for 3 to 4 hours, then brush off the paste and wash the shirt.

Reminder: be sure that you have gotten all the ink out before you dry the washed garment in a dryer, because the heat of a dryer will set the stain.


Read More 6 Ways to Cut Down Energy Costs In The Summer

Cleaner, Brighter, Clothes

Why buy expensive or dangerous cleaning products, bleaches or de-greasers when all you need is probably already in your cabinet!

Did you know baking soda can work magic — including getting cleaner and brighter  whites at a fraction of the cost.

It’s as easy as 1, 2, 3…..

1) Put one cup of baking soda in your wash.

2) Then add your detergent

3) Run your wash on the normal setting and……Voila!  Brighter, cleaner whites!

Try this DIY homemade laundry detergent recipe. This is a project that will save you money and help you rid your home of toxic chemical cleaners and make your clothes brighter and cleaner in the process.

Ingredients

  • 1 bar (or 4.5 ounces) shaved bar soap (a homemade laundry bar, Ivory, or Zote)
  • 1 cup Borax
  • 1 cup baking soda

Directions

Thoroughly mix all ingredients together. Use 1 Tbsp per small load (or 2-3 Tbsp for large or heavily soiled loads) then add  to your laundry.  Store remaining in a sealed container.

Keeping your colors brighter is a challenge at times. Colors fade when the chemical bonds between the dye and the fabric break down, so the best way to keep your colors bright is to wash clothes in a way that either prevents dyes from dissolving, protects the fibers in the fabric — or both. Follow these tips, and your colors will look as good as new!

  • Turn clothes inside out— According to experts, the tumbling action of the wash cycle and the dryer can cause fabric fibers to break as clothes collide into each other and against the walls of the machine. Turning clothes inside out before you wash them will keep the worst of the fraying on the inside.
  • Soak clothes in salt water— Salt is inexpensive, environmentally friendly and great for keeping your colors bright. Before you wash that colorful new top, soak it overnight in salt water. Simply fill your washer with cold water, add 1/4 to 1/2 cup of salt, and then add your clothes. In the morning, just add detergent and run the washer as you normally would. You can add additional clothes at this point, too — just be sure not to overfill the washer.
  • Wash in cold water— Washing in cold water instead of hot not only helps keep your colors bright, it also conserves energy and saves you money. For best results, use a detergent formulated for bright clothes and cold-water washing.

Read More 6 Ways to Cut Down Energy Costs In The Summer
bottom Gears Mobile bottom Gears