1.  What’s the secret to soft, fluffy towels? Vinegar and baking soda. Add these two ingredients to your load of towels plus half the recommended amount of detergent.
  2.   Running late? Hang your items in the bathroom while you shower to release wrinkles.
  3. You’ve accidentally shrunk your favorite sweater. No worries – soak it in a solution of baby shampoo and warm water, then gently massage it back to its original size. See our blog titled “OH NO! Shrunken Clothes!”
  4.  Vinegar and Baking Soda instead of detergent will revive your old towels.
  5.  Tennis balls in the dryer will decrease wrinkles in your bed linens.
  6.  Add salt to the wash to prevent colors from fading
  7.  Wash colors inside out to prevent fading over time.
  8.  Maintain the shape of your sweaters by laying them flat to dry as opposed to hanging them.
  9.  Squeeze a large lemon in with those workout clothes! It will break down oils trapped in fabrics & leave a clean fresh scent.
  10.  Adding 1/2 cup of white distilled vinegar to your rinse cycle is a natural fabric softener.
  11.  Swimsuit stretched out? Avoid the urge to wring out all of the water. Instead lay flat between towel and roll to remove excess water.
  12.  A little dish soap, a toothbrush, & some hot water do wonders for ring around the collar.
  13.  Trying to get a blood stain out? Use hydrogen peroxide and rinse well
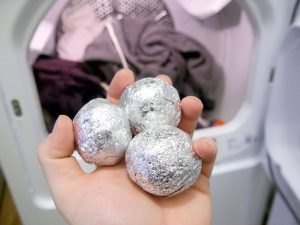
  14.  Make DIY Dryer balls by rolling aluminum foil into a ball and placing in the dryer.
  15.  Wash dark clothes and jeans inside out and air dry them to keep from fading
  16.  Remove stubborn armpit stains with lemon juice and baking soda.
  17. Use hot water for white loads, warm water for the average load, and cold water for bright colors.
  18.  Wash your socks in lingerie bags to ensure they’ll never lose their match.
  19.  Use chalk to eliminate grease or oily stains.
  20.  Add Borax to every wash to keep your whites, bright and your colors, colorful.
  21.  Over drying clothes is the leading culprit of static cling. Always set your dryer to the recommended dry time.
  22.  Always dry towels and bulky items separate from your light weight items.
  23.  Not a fan of bleach? Brighten your whites instead by adding 1 cup of white vinegar oxygen booster lemon juice to the wash. Air-dry your clothes in the sun. You’ll have bright whites with a fresh, clean scent.
  24.  The best defense to any stain is to treat as soon as possible. Keep a Tide-To-Go Stain Remover in your purse or vehicle for those moments.
  25. To loosen a stuck zipper, rub a bar of soap over the teeth.


Read More 6 Ways to Cut Down Energy Costs In The Summer

Laundry Guide: Washing

Sort your clothes by checking the care labels. Washing symbols can be difficult to decipher but you can usually find the correct wash temperature (check out our blog The Mystery of Laundry Symbols). The machine wash symbol often looks like a tub of water, if there’s a cross through it, it can’t be machine washed.

Separate whites and dark’s so colors don’t bleed on to the whites.

If you’re using a Tide Pod, or one of the other “pod” detergents, toss it into the drum first. The detergent will properly dissolve during the wash cycle. For small and medium loads use only one pod, for large loads use two pods. When using liquid detergent pour it into the dosing cap. Fill until line 1 for medium loads, line 3 for large loads, and line 5 for HE full loads. For powder detergent, fill the drum until line 1 for medium loads, line 3 for large loads, and line 5 for HE full loads.

Fill the machine with your clothes. Don’t overload the drum – 3/4 full is about right.

Choose a water temperature that’s right for your laundry load. Select a wash cycle.  Start the machine.

Read More 6 Ways to Cut Down Energy Costs In The Summer

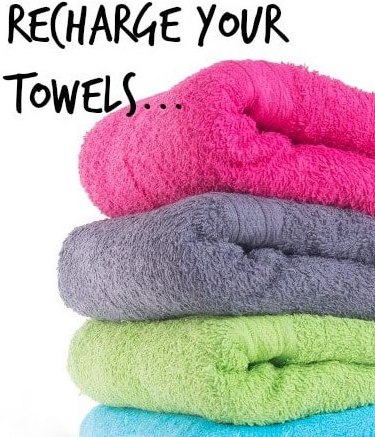
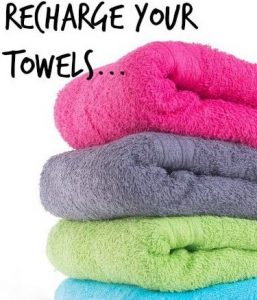
Time To Recharge Your Towels


Every so often you grab a towel out of the linen closet and notice it’s lost its fresh smell and softness.  Let’s face it – no one wants to dry off with a scratchy, musty towel. Here are some steps that will help bring smell good, fluffy towels back.

1) Wash your towels with hot water and 1 cup of white vinegar only.

2) Re-wash a second time with 1/2 a cup of baking soda and hot water only.

3) Dry your towels on the hottest setting until completely dry.

If the odor and scratchiness continues, repeat the steps again only this time use 2 cups of vinegar.  If at all possible let the towels soak in the hot water and vinegar for an hour before continuing.

Vinegar  is known for  removing soap and fabric softener build-up. Fabric softener coats your towels with oils. Vinegar will remove the build-up, while acting as a fabric softener. Baking soda does the same thing as vinegar.

WARNING!

Do not mix vinegar and baking soda together.  Be sure to wash in two separate loads.  They will cause a chemical reaction when mixed together!

Read More 6 Ways to Cut Down Energy Costs In The Summer

How to Avoid Ironing

I DO NOT like to iron! I want to pick out an outfit, put it on, and then be on my way.  I do not want to pick out an outfit, get the iron and ironing board out, and then iron it. It takes more time out of my schedule if I have to iron, and if you’re in a rush, it can be stressful! Here are a few of my ”tried and true” tips to help you out.

Be sure to dry permanent press clothing in a gentle/low heat dryer, not HOT!  Hot will only make a wrinkled mess and can melt the fabric. If you forget your clothes and don’t pull them out of the dryer in time, and they happened to get wrinkled, all you have to do is place a damp bath towel in with your clothes on gentle/low heat and dry for a few more minutes. Be sure to take them out just before or as soon as they are dry and lay flat or hang on a hanger.

After you’ve washed and dried your clothes, remove them immediately from the dryer. Then with a little spray bottle filled with water, spray the collar, button holes, and the sleeve edges. Then quickly “Finger Press” those focal points to be smooth and flat so they are no longer folded, curled, or crinkly. This easy finishing touch makes a big difference for permanent press shirts to look so much nicer….and it’s easy! No Iron involved!

If you do end up needing to get the dreaded iron out, then try to iron your clothes with a damp cloth. Place the damp cloth on top of the garment and iron. This will steam the fabric and it won’t be too hot. Try a small spot first to see if this will work on the fabric. Remember, too hot of a dryer or iron on permanent press fabric can melt it.

Read More 6 Ways to Cut Down Energy Costs In The Summer

Keep Your Clothes Lasting Longer

We’ve all done our share of laundry, but some of us have figured out a way to perfect it. Here are some of my favorite tips to keeping your clothes looking great and lasting longer.

Step One: Wait Before You Wash

Wear your clothing more than once. I know this might make some of you say “Gross!” but it’s really not.  You know if something needs to be washed.  If it reeks to high heaven – it needs to be washed, but over the course of an average day, clean people don’t get that smelly. Of course it depends on the activity you do during the day as well. Wearing your clothes at least twice before laundering them can save you a bundle on water and electric bills over the course of a year and save your clothes from wearing out before their time.

(Side note….I’m not talking about underwear & socks.  They need to be changed daily.)

Step Two: Divide and Conquer

Admit it, most of you will stuff everything in the washer to make one load. I get it, you want to save time and money, but this is hard on your clothes and they probably aren’t getting as clean as you think they are.  I sort laundry by “lights” and “darks”, which seems to be the traditional way of doing laundry.  Sorting clothes allows you to use different wash cycles (delicate vs. normal) and also allows for washing in different temperatures.

Most importantly, sorting clothes decreases the chances that a garment is going to bleed onto another when you control the cycle type and water temperature.

Step Three: Chose the Correct Wash Cycle & Water Temperature

Take a minute to read the labels on your clothing. You’ll find the information you need to choose both your water temperature and the type of washing cycle. Following the recommendations on the label is especially important if you are new to doing your own laundry or if the garment is new.

Read More 6 Ways to Cut Down Energy Costs In The Summer

Removing Wrinkles from Permanent Press Clothing

I do not like to iron! I want to pick out an outfit, put it on, and then be on my way.  I do not want to pick out an outfit, get the iron and ironing board out, and then iron it. It takes more time out of my schedule if I have to iron, and if you’re in a rush, it can be stressful! Here are a few of my ”tried and true” tips to help you out.

Be sure to dry permanent press clothing in a gentle/low heat dryer, not HOT!  Hot will only make a wrinkled mess and can melt the fabric. If you forget your clothes and don’t pull them out of the dryer in time, and they happened to get wrinkled, all you have to do is place a damp bath towel in with your clothes on gentle/low heat and dry for a few more minutes. Be sure to take them out just before or as soon as they are dry and lay flat or hang on a hanger.

After you’ve washed and dried your clothes, remove them immediately from the dryer. Then with a little spray bottle filled with water, spray the collar, button hole placard, and the sleeve edges. Then quickly “Finger Press” those focal points to be smooth and flat so they are no longer folded, curled, or crinkly. This easy finishing touch makes a big difference for permanent press shirts to look so much nicer….and it’s easy! No Iron involved!

If you do end up needing to get the dreaded iron out, then try to iron your clothes with a damp cloth. Place the damp cloth on top of the garment and iron. This will steam the fabric and it won’t be too hot. Try a small spot first to see if this will work on the fabric. Remember, too hot of a dryer or iron on permanent press fabric can melt it.

Read More 6 Ways to Cut Down Energy Costs In The Summer

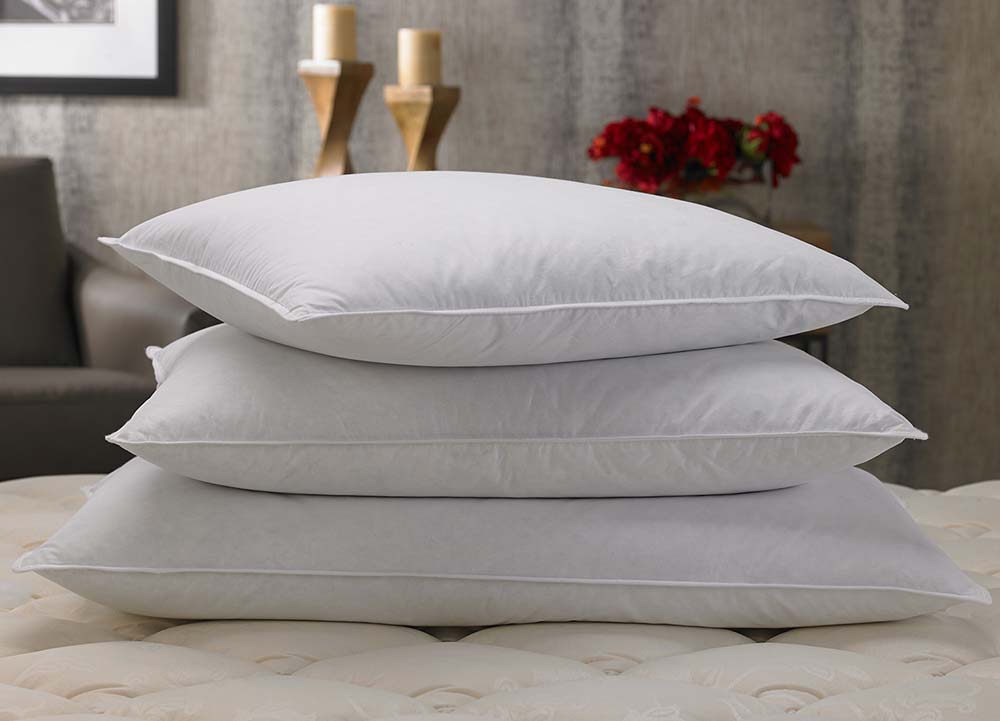
Keeping Pillows Clean


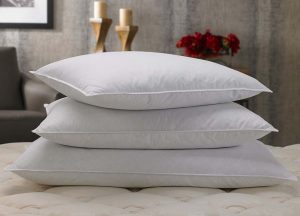
Over-sized, bulky and awkward – sometimes it’s hard to know how to wash your pillows.  Just remember with all of the germs, kids, pets, and guests it’s important to remember to wash them.The best way, plain and simple; machine wash your pillows. Most down and synthetic pillows can be machine washed and dried on low heat, but check the label to be sure.

You’ll want to wash and dry at least two pillows at a time to keep your machine balanced, but take care not to stuff too many in at once. Pillows need plenty of water to get thoroughly clean, and plenty of space to get thoroughly dry. Just follow these simple steps and you’ll have clean, fluffy pillows.

NOTE: Foam pillows should not be washed! Sprinkling them with cornstarch, letting them sit for an hour or longer, then vacuuming thoroughly instead.

Detergent / Water Temperature

Make sure you use something that’s fragrance-free and will rinse clean.  Homemade laundry soap is always a good choice: 2 cups soap flakes and 1 cup each baking soda, washing soda, and borax. Water needs to be 140 degrees or higher to kill dust mites, so make sure your water heater isn’t set too low. It’s good to consider an extra spin cycle to squeeze out as much dampness as possible.

Drying

Make sure you dry pillows completely, even a little dampness could reintroduce the very mildew, bacteria, and dust mites you’re trying to avoid. Dry on low, checking them every 20 to 30 minutes to ensure even drying. For extra fluff, dry with dryer balls or a tennis ball in a sock.

Freshening Between Drying

Put your pillows in the dryer on “air fluff” every few months, to get rid of much of the dust.  If you can handle a little bit of the smell until it dissipates, you can include a vinegar-dampened washcloth, since vinegar is so good at killing mold and mildew.

Pillow Protectors

Removable pillow protectors buy you more time between full-on pillow cleaning.  Simply remove and machine-wash protectors in hot water once a month.

Read More 6 Ways to Cut Down Energy Costs In The Summer

When To Skip The Fabric Softener

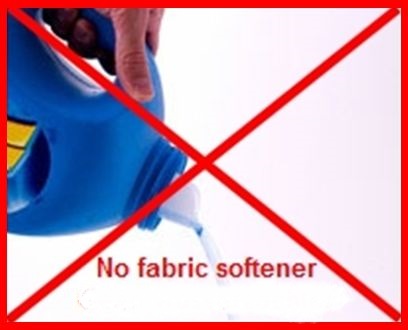
Fabric softeners and dryer sheets make our clothes and linens feel soft and fluffy, smell great and remove static, but did you know there are certain types of fabric that should NEVER have fabric softeners? Before you wash, please read. I’ll list some effective alternatives below as well.

Athletic Wear

Most workout clothes are designed to wick moisture away from your body and dry quickly. Fabric softeners and dryers sheets leave a coating behind, that cause moisture to become locked into the fabric and keep it from drying. This leads to permanent odor from the bacteria locked in the fabric. Wash these garments in a cold, gentle cycle and air dry.

Microfiber Cloths

Microfiber is relatively durable, but it becomes pretty useless when the fibers absorb the waxy residue that fabric softeners and dryer sheets leave behind. It’s tempting to use because microfiber is notorious for static cling when it comes out of the dryer. Instead, try tossing a ball of aluminum foil in the dryer with microfiber items to release the static charge.

Children’s Sleepwear

 Most infant and child sleepwear is designed to be fire resistant for safety reasons. Wax from fabric softener residue can cause the fabric to lose its fire-resistance quality and can make it highly flammable. Instead of using fabric softener or a dryer sheet, add vinegar to the rinse cycle in the washer. It will soften the fabric and reduce static cling. For those extra static clingy PJs, do the vinegar rinse in the washer AND add a foil ball in the dryer.

Alternatives

Soften and reduce static cling with these gentle, fabric-friendly options:

Vinegar Rinse

Add ½ cup distilled white vinegar into your washer’s softener dispenser (or use a Downy ball). The smell will disappear in the dryer.

Wool Dryer Balls

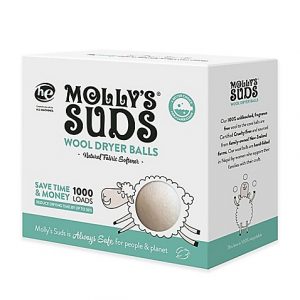
You can find wool dryer balls on Amazon for about the same price as a couple of bottles of fabric softener except these will last A LOT longer. Toss 5-6 into the dryer to soften a load of clothes. They’ll also help larger loads dry more quickly and evenly.

Aluminum Foil

Grab the Aluminum foil from the cabinet, pull a 12”-18” sheet and crush it into a ball. Toss one into the dryer to reduce static. The ball will shrink and tighten as it’s used. Replace once the edges begin to crack or pull apart.

Read More 6 Ways to Cut Down Energy Costs In The Summer

The Best Way To Clean Pillows

Over sized, bulky and awkward – sometimes it’s hard to know how to wash your pillows.  Just remember with all of the germs, kids, pets, and guests it’s important to remember to wash them.The best way, plain and simple; machine wash your pillows. Most down and synthetic pillows can be machine washed and dried on low heat, but check the label to be sure.

You’ll want to wash and dry at least two pillows at a time to keep your machine balanced, but take care not to stuff too many in at once. Pillows need plenty of water to get thoroughly clean, and plenty of space to get thoroughly dry. Just follow these simple steps and you’ll have clean, fluffy pillows.

NOTE: Foam pillows should not be washed! Instead, sprinkling them with cornstarch, letting them sit for an hour or longer, then vacuuming thoroughly instead.

Detergent / Water Temperature

Make sure you use something that’s fragrance-free and will rinse clean.  Homemade laundry soap is always a good choice: 2 cups soap flakes and 1 cup each baking soda, washing soda, and borax. Water needs to be 140 degrees or higher to kill dust mites, so make sure your water heater isn’t set too low. It’s good to consider an extra spin cycle to squeeze out as much dampness as possible.

Drying

Make sure you dry pillows completely, even a little dampness could reintroduce the very mildew, bacteria, and dust mites you’re trying to avoid. Dry on low, checking them every 20 to 30 minutes to ensure even drying. For extra fluff, dry with dryer balls or a tennis ball in a sock.

Freshening Between Drying

Put your pillows in the dryer on “air fluff” every few months, to get rid of much of the dust.  If you can handle a little bit of the smell until it dissipates, you can include a vinegar-dampened washcloth, since vinegar is so good at killing mold and mildew.

Pillow Protectors

Removable pillow protectors buy you more time between full-on pillow cleaning.  Simply remove and machine-wash protectors in hot water once a month.

Read More 6 Ways to Cut Down Energy Costs In The Summer

The Importance of Sorting Clothes

Interestingly enough, you’ll find several different opinions when it comes to sorting your laundry.  Our method is certainly not the only way.  If you have a method that works for you, then by all means keep doing it!  But if you’re getting worn out, torn or discolored clothes, then this article is for you.

What’s the reason to sort clothes in the first place? Do you really need to sort clothes at all?  In our opinion, you do.  Sorting clothes allows you to use different wash cycles (delicate, normal, permanent press) and also allows for washing in different temperatures.

Most importantly, sorting clothes decreases the chances that a garment is going to bleed onto another when you control the cycle type and water temperature.

Sorting Clothes by Color

There are several distinct piles in which to sort clothes: whites, darks, lights, jeans, and delicates.

∙Whites:  T-shirts, underwear, socks and other similar items fall into this category.  This pile is for white sturdy cottons that can withstand normal agitation in the washer on a warm or hot wash cycle.

∙Darks: Grays, blacks, navies, reds, dark purples and similar colors are sorted into this load.

∙Lights: More pastel-type colors such as pinks, lavenders, light blues, lights greens and yellows are placed in this pile of laundry.

∙Jeans: All items with denim material are washed together in this load.

∙Delicates: This category includes several types of clothing – lingerie, washable silks, and any clothing you’d like to keep from the harsh agitation of the washer.

Sorting Clothes by Fabric Weight

Please note that color is not the only consideration when sorting clothes. The weight of the garment should be considered as well.

For example, if you have several pairs of heavy cotton pants, or denim, then you don’t want to wash those with thin t-shirts.  Washing light- weight clothes with heavy material can possibly tear or rip those garments.

If they are placed in the dryer together, they obviously won’t dry at the same rate since one fabric is much heavier than the other.

It’s best just to separate these types of garments from the start and wash them in two separate loads.

Read More 6 Ways to Cut Down Energy Costs In The Summer
bottom Gears Mobile bottom Gears