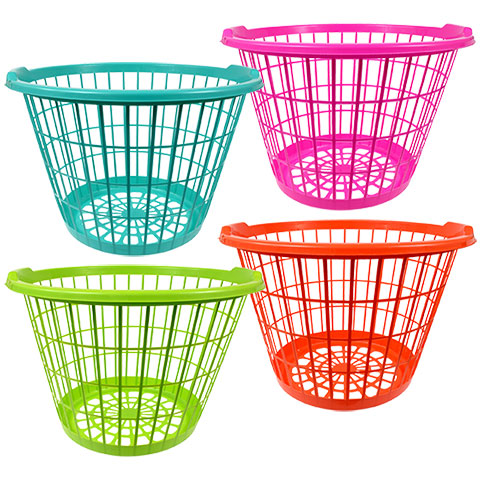
The Importance of Washing Your Laundry Basket

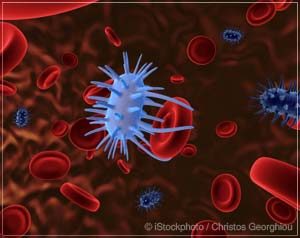
We see it all the time here at Sapulpa Laundry.  You spend your hard earned money washing and drying  your clothes, towels, sheets etc.. Then, without thinking, you place all of your clean belongings back in a dirty laundry basket.  Dead skin cells, grime from your sweaty workout clothes, and whatever else hitches a ride on your clothes throughout the day, are all lurking in that laundry basket!  Lets don’t forget to mention bacteria, including the dreaded staph bacteria also known as MRSA!

*Methicillin-resistant Staphylococcus aureus (MRSA) is a bacterium that causes infections in different parts of the body. It’s tougher to treat than most strains of staphylococcus aureus – or staph – because it’s resistant to some commonly used antibiotics.

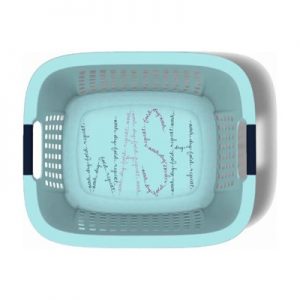
What To Do: Wash it. Give that basket a good washing with soap and hot water, or simply use an antibacterial wipe and wipe the basket down thoroughly before putting your clean laundry back in it. You can also use any hard surface disinfectant, but be watchful of anything with the potential to discolor (i.e. bleach).  Make sure to dry the basket completely before putting your belongings back in it.

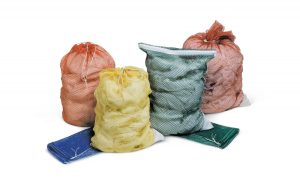
Bag it. Try using washable laundry bags. Wash the dirty bag along with the clothes. Once the bag is dried, place the clean clothes inside the bag to transport back home.

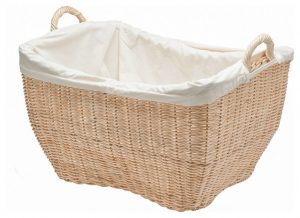
Line it. You can also use a disposable plastic laundry bag, clean trash bag, or a reusable cloth liner to line your laundry basket.  Set your clothes inside the bag that lines the basket.  Dispose of the plastic bag once you’ve put your belonging away and wash the cloth liner the next time you do laundry.


Read More 6 Ways to Cut Down Energy Costs In The Summer

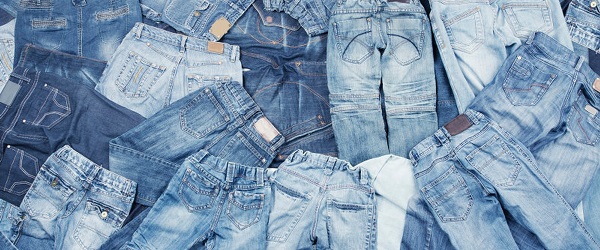
Caring for Denim

Chances are you bought those new jeans or that denim jacket because you liked the color and texture of the denim, right? Well, those new jeans and denim jackets have been dyed to get that color and rough-and-tumble look to last through multiple washing’s.

To keep jeans looking good, you’ll need to launder your denim carefully to keep the look you love.

1. Always wash new jeans separately.

Dark wash jeans should be washed separately the first time, and in a laundry detergent designed to keep their dark colors safe and intact. The dye in most jeans transfers readily during the laundry cycle, so it’s important to bathe them all by themselves.

2. Turn jeans inside-out before washing.

Washed jeans should be laundered inside-out in warm or cool water to prevent fading (unless you want fading, of course.) Keep both new and washed jeans away from laundry detergents with bleach for the same reason. This is one time you’ll want to use a basic laundry detergent without additives or boosters.

3. Avoid frequent tumble drying and dry cleaning.

Avoid frequent tumble-drying and dry cleaning. Heat may damages fibers, and dry cleaning may cause discoloration. When necessary, tumble dry while the dryer is cool and use the delicate setting.

To extend the lifespan of jeans, lay them flat to dry whenever possible instead of tossing them into the dryer.

4. Don’t spot clean jeans.

Don’t try to spot-clean denim. Instead, wash the entire pants so you don’t create a faded area where the spot or spill was.

5. If needed, iron jeans while damp.

This step is very easy and for those who like the crisp, pressed look. To put it simply – iron the denim while it’s still damp on the highest setting recommended for denim on your iron. Another option is to bring your jean in to us at Sapulpa Laundry. We will get your jeans crisp and pressed with a crease or not, and starched or not – however you prefer.

Read More 6 Ways to Cut Down Energy Costs In The Summer

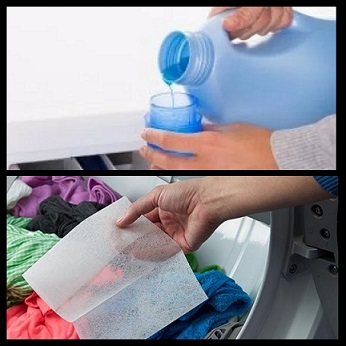
Liquid Softener vs. Sheets – Pros and Cons

Are you perplexed as to which fabric softener you should use? Both fabric softeners and dryer sheets indeed make your clothes feel softer and smell better, and they do reduce wrinkles too — especially if you line dry your clothes. However, there are a number of misconceptions about these 2 popular laundry aids.  Below are a few of the more popular myths.

Myth #1:  fabric softeners and dryer sheets shouldn’t be used with microfiber towels. This is true.

Liquid fabric softeners as well as dryer sheets will significantly damage the fibers in microfiber. Microfiber towels should not be subjected to heat at all. Not only are dryer sheets a problem, but the heat itself can wreak havoc on your microfiber towels. If you must dry them quickly, then choose a low or no-heat option.

Myth #2:  Fabric softener and dryer sheets shouldn’t be used with athletic sportswear, spandex & nylon garments. This is true.

Fabric softener can reduce the ability of certain fabrics to manage moisture and breathe — including sportswear, swimsuits, undergarments, and athletic gear with wicking properties intended to keep you dry and cool.The waxy softening agents in fabric softeners interfere with the garment’s ability to wick away moisture to keep you cool & dry, so you should avoid using softeners with most sportswear.

Myth #3: Fabric softeners won’t stain your clothes. This is false.

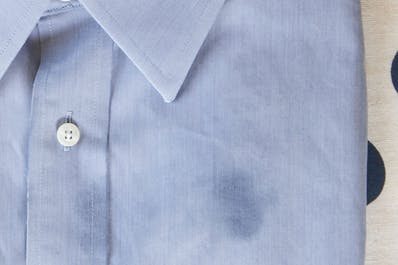
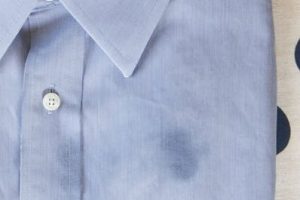
Most fabric softeners state right on the bottle that you shouldn’t pour fabric softener directly on your clothes.When liquid fabric softener is used on certain fabrics (or fabric blends), oily looking spots or discoloration can result. A fabric softener stain looks blue-gray and greasy.

Both fabric softeners and dryer sheets help eliminate static and wrinkles while making clothes feel softer and smell better. Keep in mind that if you are not using a dispenser or a softener ball, make sure to add liquid softener during the final rinse when the tub is full of water to avoid staining.


Read More 6 Ways to Cut Down Energy Costs In The Summer

Effective Grease Stain Removal

You probably already have some of these cleaning agents in your home, and a couple that might be worth bringing home.  Here’s how to take grease stains off clothes, step by step.

Dish Soap and Hot Water

Treat stained clothes the same way you would a sink full of greasy dishes – remove grease from the surface with dish-washing liquid.  Dish detergent is designed to break up surface grease and allow it to rinse away.

  • Place the garment stain-side down on white paper towels. (Printed paper towels could transfer ink color to your clothes.)
  • Squirt a dime-size amount of dishwashing liquid on the backside of the grease stains. Gently rub the dish detergent into the stain center and work your way to the edges. Give it a minute or so to work its breakdown magic.
  • Rinse the treated area under warm to hot running water for a minute or so to remove the dish detergent. The water temperature will depend on what the fabric can handle. For 100 percent cotton, you can usually use hot water.
  • Follow the rinse with a spin in the washing machine, using the hottest water that’s safe for the fabric and your regular laundry detergent.  If you can’t read the clothing label care tab, choose a warm water wash.

Laundry Detergent Pre-treatment

Rub a liquid laundry detergent into the stain, and let sit for 3-5 minutes.

Wash the stained item separately from the rest of your clothes in the hottest recommended water, adding a little bleach or bleach alternative to the wash water. Extend the wash cycle to give the garment some extra time in the spin cycle.

Absorbent Powder

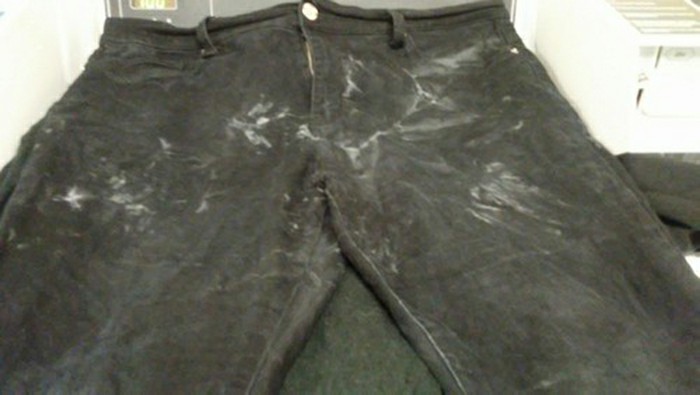
Another good tip that works on grease stains that are fresh is to use absorbent powder (such as cornstarch, salt, baking powder or talcum powder).

  • Apply the absorbent of choice, and let it set until the powder has absorbed as much of the grease stain as possible. Brush away the absorbent remnants with a stiff-bristle brush.

WD-40 and Dish Detergent

Place the garment on paper towels, grease stain side up. Spray the greasy area with WD-40. Let stand 10 minutes.

  • Turn the garment over and spray the underside  as well. Allow to sit another 10 minutes.
  • Using paper towels, blot on some hand dishwashing liquid, replacing the towels as they absorb the grease.
  • Rinse the treated area, and wash separately from the rest of your laundry.

Lestoil Heavy Duty Cleaner

Lestoil Heavy Duty Cleaner is made by Clorox. It safely removes oil spots, grease stains and tar from washable fabrics. It’s effective and easy to use, but it does have a very strong smell.

Simply pour Lestoil onto the greasy stain and let it soak in for about 20 minutes before washing. And if you’re washing a huge greasy load of laundry, add some to the wash water to get the load clean and grease-free.

Lestoil is also good for removing stains from fabric on sofas, chairs, carpets, and concrete driveways.

Last But Not Least

Inspect the treated area before drying to ensure the greasy stains are completely removed. If you can still see any residue, repeat the pre-treating and washing process until clear. 


You probably already have some of these cleaning agents in your home, and a couple that might be worth bringing home.  Here’s how to take grease stains off clothes, step by step.

Dish Soap and Hot Water

Treat stained clothes the same way you would a sink full of greasy dishes – remove grease from the surface with dish-washing liquid.  Dish detergent is designed to break up surface grease and allow it to rinse away.

  • Place the garment stain-side down on white paper towels. (Printed paper towels could transfer ink color to your clothes.)
  • Squirt a dime-size amount of dishwashing liquid on the backside of the grease stains. Gently rub the dish detergent into the stain center and work your way to the edges. Give it a minute or so to work its breakdown magic.
  • Rinse the treated area under warm to hot running water for a minute or so to remove the dish detergent. The water temperature will depend on what the fabric can handle. For 100 percent cotton, you can usually use hot water.
  • Follow the rinse with a spin in the washing machine, using the hottest water that’s safe for the fabric and your regular laundry detergent.  If you can’t read the clothing label care tab, choose a warm water wash.

Laundry Detergent Pre-treatment

Rub a liquid laundry detergent into the stain, and let sit for 3-5 minutes.

Wash the stained item separately from the rest of your clothes in the hottest recommended water, adding a little bleach or bleach alternative to the wash water. Extend the wash cycle to give the garment some extra time in the spin cycle.

Absorbent Powder

Another good tip that works on grease stains that are fresh is to use absorbent powder (such as cornstarch, salt, baking powder or talcum powder).

  • Apply the absorbent of choice, and let it set until the powder has absorbed as much of the grease stain as possible. Brush away the absorbent remnants with a stiff-bristle brush.

WD-40 and Dish Detergent

Place the garment on paper towels, grease stain side up. Spray the greasy area with WD-40. Let stand 10 minutes.

  • Turn the garment over and spray the underside  as well. Allow to sit another 10 minutes.
  • Using paper towels, blot on some hand dishwashing liquid, replacing the towels as they absorb the grease.
  • Rinse the treated area, and wash separately from the rest of your laundry.

Lestoil Heavy Duty Cleaner

Lestoil Heavy Duty Cleaner is made by Clorox. It safely removes oil spots, grease stains and tar from washable fabrics. It’s effective and easy to use, but it does have a very strong smell.

Simply pour Lestoil onto the greasy stain and let it soak in for about 20 minutes before washing. And if you’re washing a huge greasy load of laundry, add some to the wash water to get the load clean and grease-free.

Lestoil is also good for removing stains from fabric on sofas, chairs, carpets, and concrete driveways.

Last But Not Least

Inspect the treated area before drying to ensure the greasy stains are completely removed. If you can still see any residue, repeat the pre-treating and washing process until clear.

Then, go ahead and dry the garment as usual.

Read More 6 Ways to Cut Down Energy Costs In The Summer

Battling White Residue Left On Clothes

Residue left on freshly laundered clothes is frustrating and expensive because most of the time you need to rewash the items to get rid of it.

There are several culprits that contribute to this. Through process of elimination, hopefully you’ll be able to solve your residue problem.

Undissolved Detergent

When you are using a top loading machine always pour powdered detergent into the empty washer first before loading clothes. This will give it time to dissolve as the machine fills with water.

If you are washing in cold water the powdered detergent may not dissolve entirely. For best results with cold water and powdered detergent, dissolve it first in a cup of hot water before adding to the washer.

NEVER pour detergent directly on dry clothes or throw the detergent pack (Pod) on top of the load. Doing so will not let the detergent disperses evenly, causing blue or green streaks to appear on lighter clothing.

If you have a front loading washer, or with a top loader with an automatic detergent dispenser, it may be clogged with lumps of detergent. Even liquid products will clump. Remove all detergent dispensers and clean with hot water mixed with 1/2 cup distilled white vinegar.  Make sure it’s not apple cider vinegar.

If the dispensers are not removable. Fill each dispenser with heated pure distilled white vinegar and allow to sit for at least 30 minutes. Then run a wash cycle with no laundry in the drum to clean out the dispensers.

Too Much Detergent

More is not always better. Using too much detergent can leave residue on clothes.

This is particularly true in high-efficiency washers – both top loading and front loading. These washers use much less water during the wash and rinse cycles. Using more than 3 teaspoons (yes, 3 teaspoons) of detergent will leave residue in and on your clothes.

Too much fabric softener

Never pour fabric softener directly on wet clothes and always use the smallest recommended amount. If you have an automatic dispenser, clean it frequently.

Clogged or Failing Water Pump 

If the water in the wash or rinse cycle is draining too slowly, it could be lint, undissolved detergent and/or soil. This can be redeposit on your clothes.

Many new washers have a small door near the bottom of the washer to access the filter right above the water pump. On older washers, you will have to access from the back of the machine in order to clean the pump area.

Open the area to your drain line filter and be sure that it is not clogged with lint or small items that could slow the flow of rinse water.

If you have cleaned the filter and the washer is still slow to drain, the water pump is probably failing.

Overloading Washer

Stuffing too many items into a washer doesn’t leave room for the clothes to move around freely and for the soil and residue to be washed away.

Dirty Washer

If you have never cleaned your washer, it can have soil, minerals and detergent residue that can build-up and redeposit on clothes. It’s like the soap scum in your shower. This is because of the small amount of water in HE, high efficiency, machines. You need to clean HE washers monthly and a standard machine at least twice per year.

 Washing With Hard Water

Hard water can react with detergents and leave mineral deposits that remain on clothes.

Get Rid of the Residue

Once you have eliminated all of the causes of the problem, the only way to get rid of the residue is to rewash the clothes. Wash the stained items again in the hottest water suitable for the fabric but DO NOT add any detergent or fabric softener. Instead, add one cup of distilled white vinegar to the wash cycle to help fibers relax slightly and release the residue.

Read More 6 Ways to Cut Down Energy Costs In The Summer

Pillow Washing 101

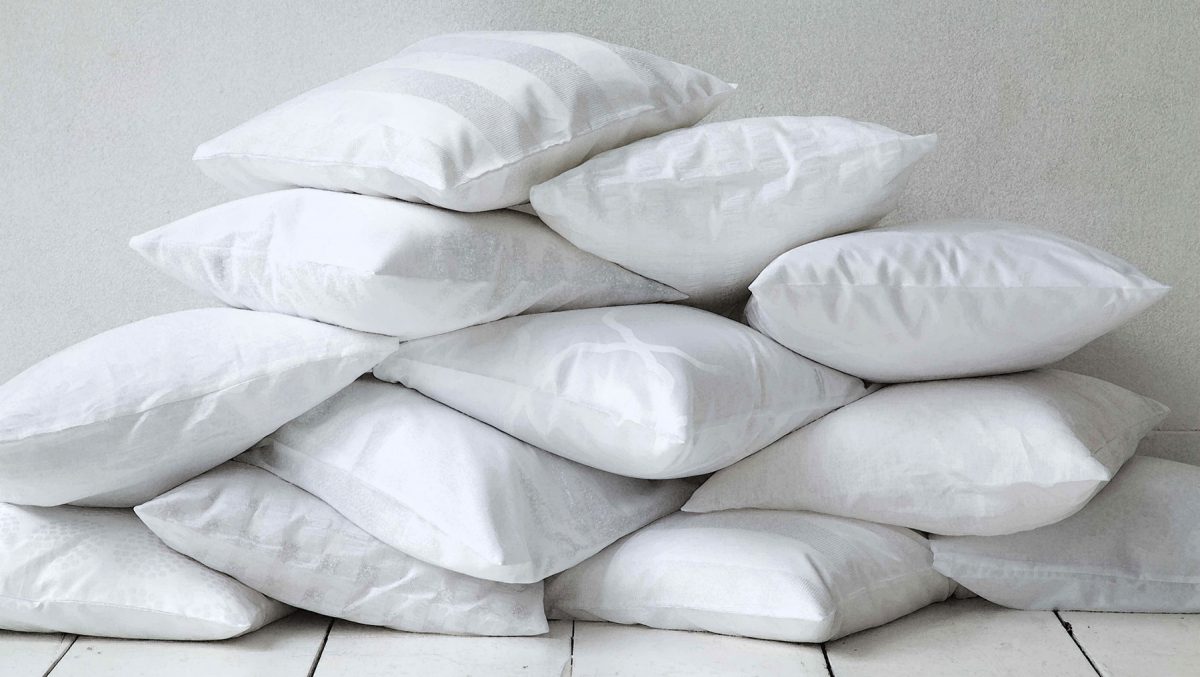
Oversized, bulky and awkward – sometimes it’s hard to know how to wash your pillows.  Just remember with all of the germs, kids, pets, and guests it’s important to remember to wash them. The best way, plain and simple; machine wash your pillows. Most down and synthetic pillows can be machine washed and dried on low heat, but check the label to be sure.

You’ll want to wash and dry at least two pillows at a time to keep your machine balanced, but take care not to stuff too many in at once. Pillows need plenty of water to get thoroughly clean, and plenty of space to get thoroughly dry. Just follow these simple steps and you’ll have clean, fluffy pillows.

NOTE: Foam pillows should not be washed! Sprinkling them with cornstarch, letting them sit for an hour or longer, then vacuuming thoroughly instead.

Detergent / Water Temperature

Make sure you use something that’s fragrance-free and will rinse clean.  Homemade laundry soap is always a good choice: 2 cups soap flakes and 1 cup each baking soda, washing soda, and borax. Water needs to be 140 degrees or higher to kill dust mites, so make sure your water heater isn’t set too low. It’s good to consider an extra spin cycle to squeeze out as much dampness as possible.

Drying

Make sure you dry pillows completely, even a little dampness could reintroduce the very mildew, bacteria, and dust mites you’re trying to avoid. Dry on low, checking them every 20 to 30 minutes to ensure even drying. For extra fluff, dry with dryer balls or a tennis ball in a sock.

Freshening Between Drying

Put your pillows in the dryer on “air fluff” every few months, to get rid of much of the dust.  If you can handle a little bit of the smell until it dissipates, you can include a vinegar-dampened washcloth, since vinegar is so good at killing mold and mildew.

Pillow Protectors

Removable pillow protectors buy you more time between full-on pillow cleaning.  Simply remove and machine-wash protectors in hot water once a month.


Read More 6 Ways to Cut Down Energy Costs In The Summer

How To Avoid the Iron!


I DO NOT like to iron! I want to pick out an outfit, put it on, and then be on my way.  I do not want to pick out an outfit, get the iron and ironing board out, and then iron it. It takes more time out of my schedule if I have to iron, and if you’re in a rush, it can be stressful! Here are a few of my ”tried and true” tips to help you out.

Be sure to dry permanent press clothing in a gentle/low heat dryer, not HOT!  Hot will only make a wrinkled mess and can melt the fabric. If you forget your clothes and don’t pull them out of the dryer in time, and they happened to get wrinkled, all you have to do is place a damp bath towel in with your clothes on gentle/low heat and dry for a few more minutes. Be sure to take them out just before or as soon as they are dry and lay flat or hang on a hanger.

After you’ve washed and dried your clothes, remove them immediately from the dryer. Then with a little spray bottle filled with water, spray the collar, button hole placard, and the sleeve edges. Then quickly “Finger Press” those focal points to be smooth and flat so they are no longer folded, curled, or crinkly. This easy finishing touch makes a big difference for permanent press shirts to look so much nicer….and it’s easy! No Iron involved!

If you do end up needing to get the dreaded iron out, then try to iron your clothes with a damp cloth. Place the damp cloth on top of the garment and iron. This will steam the fabric and it won’t be too hot. Try a small spot first to see if this will work on the fabric. Remember, too hot of a dryer or iron on permanent press fabric can melt it.

Read More 6 Ways to Cut Down Energy Costs In The Summer

Achieve Laundry Perfection in Three Simple Steps


We’ve all done our share of laundry, but some of us have figured out a way to perfect it. Here are some of my favorite tips to keeping your clothes looking great and lasting longer.

Step One: Wait Before You Wash

Wear your clothing more than once. I know this might make some of you say “Gross!” but it’s really not.  You know if something needs to be washed.  If it reeks to high heaven – it needs to be washed, but over the course of an average day, clean people don’t get that smelly. Of course it depends on the activity you do during the day as well. Wearing your clothes at least twice before laundering them can save you a bundle on water and electric bills over the course of a year and save your clothes from wearing out before their time.

(Side note….I’m not talking about underwear & socks.  They need to be changed daily.)

Step Two: Divide and Conquer

Admit it, most of you will stuff everything in the washer to make one load. I get it, you want to save time and money, but this is hard on your clothes and they probably aren’t getting as clean as you think they are.  I sort laundry by “lights” and “darks”, which seems to be the traditional way of doing laundry.  Sorting clothes allows you to use different wash cycles (delicate vs. normal) and also allows for washing in different temperatures.

Most importantly, sorting clothes decreases the chances that a garment is going to bleed onto another when you control the cycle type and water temperature.

Step Three: Chose the Correct Wash Cycle & Water Temperature

Take a minute to read the labels on your clothing. You’ll find the information you need to choose both your water temperature and the type of washing cycle. Following the recommendations on the label is especially important if you are new to doing your own laundry or if the garment is new.

Read More 6 Ways to Cut Down Energy Costs In The Summer

Choosing the Correct Water Temperature

Most people think the way to get the job done is to wash everything in a single load with cold water. That way, you get it all done at once, and there’s no color transfer between clothes, but that’s not always the case.  Washing everything together in cold will prevent color transfer, but unfortunately it won’t get everything clean.

When to wash in hot water

Hot wash works well on ground-in and hard-to-remove dirt on sturdy fabrics.

Generally speaking, you should wash white clothes in hot water. Washing colors in hot water is also recommended if the clothes are really dirty or greasy, and they’re made of sturdy, color-fast fabric. (Wash them separately, of course.)

Use it to clean seriously soiled sturdy garments (gardening or children’s clothing), and to regularly disinfect dish towels, washcloths, bath towels, bedding, and pillowcases.

Light and dark fabrics should be separated as hot water may cause these clothes to bleed.

Delicate and coarse or sturdy fabrics should be separated to prevent abrasion and protect clothes from wear and tear.

 When to wash in warm water

Warm water (or permanent press wash setting) minimizes color fading and wrinkling. Wash light clothes, as well as regular and sturdy fabrics, towels, jeans, 100 percent manmade fibers, and blends of natural and manmade fibers. It’s also appropriate for moderately dirty clothes that don’t need the extra power of a hot water temperature wash.

 When to wash in cold water

Washing clothes with cold water will protect most dark or bright-colored clothing from running and minimizes shrinkage. Use the cold wash cycle for lightly soiled fabrics and clothes with blood, wine or coffee stains, dark or bright colors that may run or fade, delicate fabrics including washable silk, Spandex swimsuits, and active wear; and delicate lingerie. It’s also okay for lightly soiled clothes.

There’s a misconception that washing clothes in cold water won’t get clothes clean. This is because detergent is formulated for, and fully activated in, warm water. Cooler water won’t fully activate detergent, which means you’ll need to use more to make up for the temperature difference to get your cold wash clothes clean. Thankfully there are several brands of detergent that are designed to work in all temperatures. Tide, Arm & Hammer, All, and Wisk are just a few that we recommend.

Read More 6 Ways to Cut Down Energy Costs In The Summer

How to Clean Your Mattress


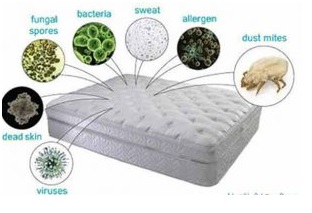
Dust, mold, mildew, body sweat, fungal spores, allergens – all make mattresses the ideal breeding ground for bacteria and dust mites.  If you’re as grossed out as I am by this, keep reading and learn how to clean your mattress for a better, cleaner sleep.

Vacuum It

Vacuum your mattress every month or so or as often as every time you change the sheets, if you or family members have severe allergies. Run the vacuum very slowly over the mattress, so it has time to inhale the dust and dust mites. Break out the crevice tool for the edges and crevices.

Treat Stains

Treat any stain immediately. The longer liquids sit in a mattress, the likelier you are to foster mold and mildew growth.

This may sound crazy, but use foaming shaving cream for mattress cleaning, in part because of its thickness. Liquids will soak right through a mattress, not allowing adequate time to dissolve the stain. Foaming shaving cream contains denatured alcohol, which is a stain remover, and it’s thick, so it sits on the surface to work on the stain. Wait 10 to 15 minutes, wipe with a damp cloth, and rinse with a 50/50 vinegar/water solution. Repeat if necessary.

Other helpful solutions for common mattress stains:

  • Blood: A 50/50 hydrogen peroxide/water solution.
  • Urine, fecal matter, or vomit: An enzyme cleaner, such as Bac-Out by BioClean, or Nature’s Miracle, available at pet stores.

Freshen Fast

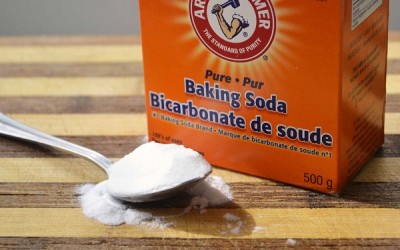
Use a mixture of cornstarch and baking soda to remove smells.  Place in a colander and just shake the mixture on to the mattress, let it sit for a few hours or longer, then vacuum. The cornstarch will absorb body oils, while the baking soda will work on smelly odors.

Sheet Strategy
Don’t put new sheets on until evening. This will allow the mattress to air all day discouraging dust mites and bacterial growth.

Pad It
Remember, mattress pads aren’t just for comfort. They keep your mattress cleaner, too.  Wash monthly in hot water, and machine dry thoroughly, unless the tag instructs otherwise.

Read More 6 Ways to Cut Down Energy Costs In The Summer
bottom Gears Mobile bottom Gears