Laundry Tips & Tricks Your Mom Never Taught You

Ok, so maybe your Mom did tell you about  these tips and tricks, but in case she didn’t, we’re here to help you out.  Sometimes there are just some laundry care tips that don’t fit into any particular category. You’ll be surprised after you read through these when they just might come in handy.

  • Before you wear a new garment, put a little dot of clear nail polish on the front and back threads of each button. Buttons will stay on longer when the threads are sealed.
  • Zippers won’t stick if you rub them with the edge of a bar of soap.
  • To remove a hem crease, sponge the line on the fabric with a clean white cloth dipped in distilled white vinegar and then press with a warm iron from the wrong side of the garment.
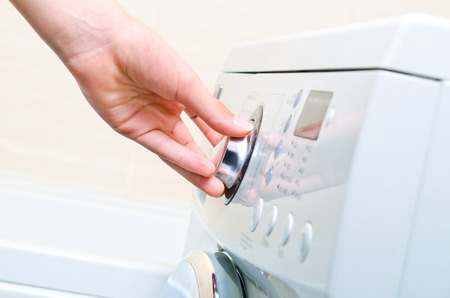
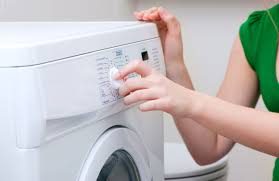
  • When washing clothes, add detergent to the washer first. Pouring detergent on clothing can leave streaks and even cause fabrics to fade.
  • Avoid getting perfume, aftershave or hair spray on leather because the alcohol may ruin the finish and color.
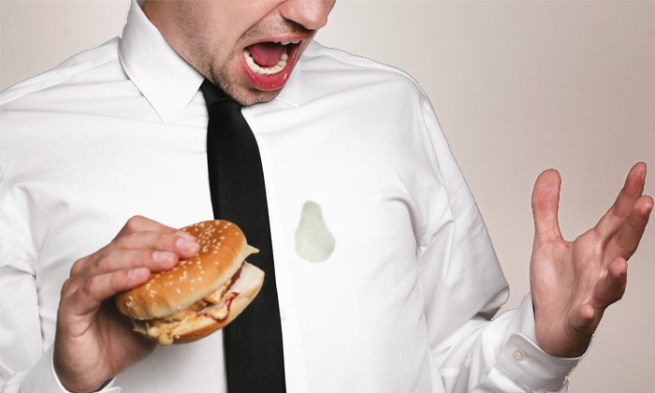
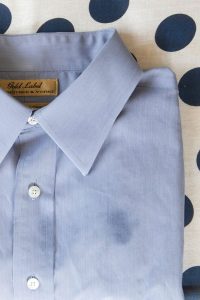
  • Wash nylon clothing every time after wearing. Nylon is very hard to clean once it becomes heavily soiled. Treat any oily stains immediately after they happen with warm or hot water to prevent them from becoming permanent..
  • NEVER use an acetone-based nail polish remover on garments to remove stains! The acetone will dissolve the fabric!
  • Knit garments should always be folded to store on a shelf or in a drawer. Hanging knits can cause them to stretch completely out of shape.
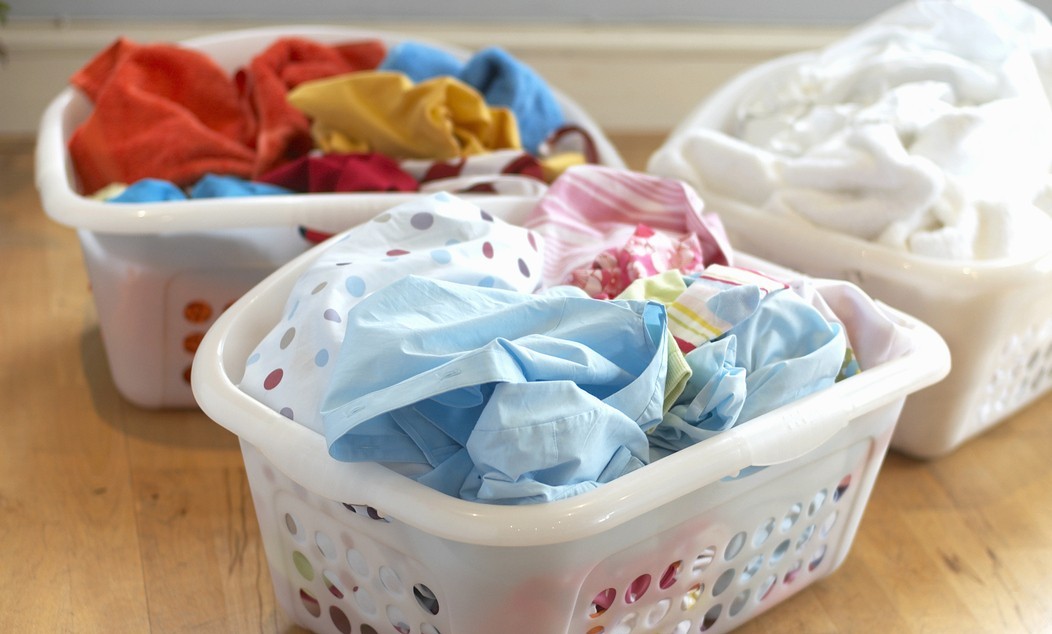
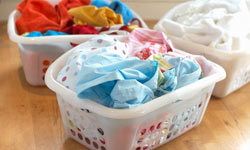
  • Turn all clothes inside out before washing to prevent fading and keep the right side looking like new.
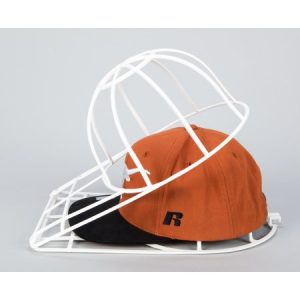
  • If you don’t have a mesh laundry bag for washing your delicate fabrics, place them in a pillowcase and fasten the loose end with a plastic bag tie or shoelace before tossing it in the washer.
  • To reduce wrinkles, wet a hand towel with water, wring out the excess water and toss in the dryer with wrinkled items. Dry on high for about five minutes. Remove the clothes while still damp and hang to dry.
Read More 6 Ways to Cut Down Energy Costs In The Summer

How to Wash Hats Without Ruining the Shape


There comes a time when your favorite hat needs a good cleaning. But before you start, take time to look at the little tag on the inside to get an idea of the fiber content and the manufacturer’s cleaning instructions. Of course, your tag may be gone or unreadable so, we’ll cover instructions for safe cleaning of almost any type of baseball cap.

Newer baseball hats are often made of cotton twill, cotton polyester blends or jersey mesh. These fabrics are strong and durable and usually colorfast. New hats use a plastic form to shape the brim, not cardboard. These plastic forms can withstand a wash without becoming deformed.

To clean, pre-treat exceptionally dirty areas like sweatbands with a solvent-based spray or gel like Shout or Spray ‘n Wash or a bit of heavy duty laundry detergent like Persil or Tide. These detergents have enough enzymes to break apart body soil and oil grime. Wash the hat with the rest of similarly colored clothing on the delicate cycle using cool water. Do not use bleach. If you are very concerned with protecting the shape of the hat, you can use a specially designed hat form and toss it in the washer.

Allow the hat to dry in the form or over a large coffee can or other head-shaped container. Do not put baseball hats in the dryer because excessive heat and tumbling action can distort the hat’s shape.

If the hat has a cardboard or paper filled bill, you will have to do spot-cleaning only. Use a soft-bristled brush and scrub the stained areas with a heavy-duty detergent/water mixture. Do not over wet the area. Blot with a clean white cloth dipped in water. Allow to air dry. You may need to repeat the steps several times.

You’ve probably heard of washing hats in the dishwasher on the top rack. I wouldn’t recommend this because dishwasher detergents are harsh and often contain bleach that can ruin your hat. Also, the high temperatures aren’t good for the fabric and may cause the hat to shrink.

Cleaning Newer Wool Baseball Hats

Wool baseball hats should be hand washed using cool water and a mild detergent designated for wool. Be gentle and don’t scrub or twist the fibers. Rinse well in cool water and roll gently in a thick towel to absorb most of the moisture. Allow to air dry on a head-shaped object. If you dry your wool hat on your own head, it will dry to the precise shape of your head and cause it to be too tight.

Cleaning Older or Commemorative Baseball Hats

Commemorative hats should always be stored in a covered case to prevent dust and grease from accumulating on the hap. These should only need a light dusting or brushing to keep them at their best. Always store away from direct light and intense heat.

If a deeper cleaning is needed, first do a colorfastness test. Using a white cloth with a bit of mild detergent, gently rub an inconspicuous area of the cap.

If there is color transfer, do not proceed. If it is colorfast, continue using the cloth to clean the entire hat. Do not immerse the hat in water. The bill may be shaped using cardboard that will dissolve. Rinse your cloth in clean water to “rinse” the hat. Air dry on a head-shaped container.

If you have an autograph that you want to preserve, keep the hat in a dark, air conditioned space to prevent fading and mold or mildew from forming. If you want to wear the autographed hat, protect the signature by covering the signed area with a white, pressing cloth and iron the area on high heat.  This will help set the ink.


Read More 6 Ways to Cut Down Energy Costs In The Summer

Easy Grease Stain Removal

No matter how hard you try, sometimes you get a greasy, oily stain on your favorite shirt or pair of pants.  Don’t worry, they don’t need to become a permanent memory on your clothes.  With some regular cleaning products you probably already have, and a couple that might be worth purchasing, grease stain removal is a breeze.

Dish Soap & Hot Water

Treat the stained garment by removing grease from the surface with dish-washing liquid. Dish detergent is designed to break up surface grease and allow it to rinse away.

  • Place the garment stain-side down on white paper towels.(Don’t use printed paper towels – it could transfer ink color to your clothes.)
  • Squirt a dime-size amount of dish-washing liquid on the backside of the grease stains.Gently massage the dish detergent into the stain center and work your way to the edges. Give it a minute or so to work.
  • Rinse the treated area under warm to hot running water for a minute to remove the dish detergent. The water temperature will depend on what the fabric can handle. For 100% cotton, you can use hot water.
  • Follow the rinse with a spin in the washing machine, using the hottest water that’s safe for the fabric and your regular laundry detergent. If you can’t read the clothing label care tab, choose a warm water wash just to be safe.

Laundry Detergent Pre-treat

Rub a liquid a laundry detergent into the stain, and let it sit for 3-5 minutes. Wash the stained item separately from the rest of your clothes in the hottest recommended water, adding a little bleach or bleach alternative to the wash water.

Extend the wash cycle to give the garment some extra time in the spin cycle. With a top-loading washer, wait 6-8 minutes into the cycle, stop it, and spin the dial back for another 10 minutes.

For really tough, greasy stains, OxiClean Max Force Foam Laundry Pre-Treater 9  is one of the toughest grease stain busters around.

WD-40 & Dish Soap

Place the garment on paper towels, grease stain side up. Spray the greasy area with WD-40. Let stand 10 minutes. Then turn the garment over and spray the underside  as well.

Allow to sit another 10 minutes.  Using paper towels, blot on some hand dishwashing liquid, replacing the towels as they absorb the grease. Rinse the treated area, and wash separately from the rest of your laundry.

Last, but not least, inspect the treated area before drying to ensure the greasy stains are completely removed.

Before placing the garment in the dryer, inspect the formerly greasy area. If you can still see any residue, repeat the pre-treating and washing process until clear. Then, go ahead and dry the garment as usual.


Read More 6 Ways to Cut Down Energy Costs In The Summer

How to Unshrink a Sweater

Fall is just around the corner, so it’s time to start getting those sweaters out and ready to wear.  And then…..Oops!  You realize the last time you washed it, you accidentally shrunk your favorite sweater in the dryer!  Thankfully, it is possible to unshrink that sweater that is now small enough for a small child to wear.

  1. Soak the item in warm water and a few squirts of baby shampoo.

Start the resizing process by soaking the shrunken item in a sink or bucket full of warm water and about two tablespoons of baby shampoo.

Gently work the shampoo into the fibers by hand, taking care not to stretch any of the fibers during the softening-up process.

About 15 minutes should allow enough time for the shampoo to relax the garment’s fibers enough so that you may begin the letting-out process.

  1. Remove sweater from the soapy water and rinse.

Rinse in cool water to remove the baby shampoo. Gently press or squeeze the garment to remove any remaining moisture. Don’t wring – this can damage and even break the fibers you’re trying to stretch.

  1. Roll the sweater in a towel to remove remaining moisture.

Roll in a clean, dry towel to remove any lingering moisture. It’s important that the clothing’s fibers contain as little moisture as possible when you begin the resizing process.

  1. Gently stretch and pin the sweater to a cork board.

Stretching the neck, arms, and sides as taut as possible without damaging the fibers. Let it be for at least an hour.

  1. Re-stretch and re-pin every couple hours.

Re-stretch and re-pin your garment every few hours. It will take several stretching and re-pinning sessions to unshrink the garment, and ease it back to its original size.

If you adore that sweater, you’ll be glad you took the time!


Read More 6 Ways to Cut Down Energy Costs In The Summer

How To Wash Jeans/Denim

Chances are you bought those new jeans or that denim jacket because you liked the color and texture of the denim, right? Well, those new jeans and denim jackets have been dyed to get that color and rough-and-tumble look to last through multiple washing’s.

To keep jeans looking good, you’ll need to launder your denim carefully to keep the look you love.

1. Always wash new jeans separately.

Dark wash jeans should be washed separately the first time, and in a laundry detergent designed to keep their dark colors safe and intact. The dye in most jeans transfers readily during the laundry cycle, so it’s important to bathe them all by themselves.

2. Turn jeans inside-out before washing.

Washed jeans should be laundered inside-out in warm or cool water to prevent fading (unless you want fading, of course.) Keep both new and washed jeans away from laundry detergents with bleach for the same reason. This is one time you’ll want to use a basic laundry detergent without additives or boosters.

3. Avoid frequent tumble drying and dry cleaning.

Avoid frequent tumble-drying and dry cleaning. Heat may damages fibers, and dry cleaning may cause discoloration. When necessary, tumble dry while the dryer is cool and use the delicate setting.

To extend the lifespan of jeans, lay them flat to dry whenever possible instead of tossing them into the dryer.

4. Don’t spot clean jeans.

Don’t try to spot-clean denim. Instead, wash the entire pants so you don’t create a faded area where the spot or spill was.

5. If needed, iron jeans while damp.

This step is very easy and for those who like the crisp, pressed look. To put it simply – iron the denim while it’s still damp on the highest setting recommended for denim on your iron. Another option is to bring your jean in to us at Sapulpa Laundry. We will get your jeans crisp and pressed with a crease or not, and starched or not – however you prefer.

Read More 6 Ways to Cut Down Energy Costs In The Summer

5 Effective Grease Stain Removal Tips

You probably already have some of these cleaning agents in your home, and a couple that might be worth bringing home.  Here’s how to take grease stains off clothes, step by step.

Dish Soap and Hot Water

Treat stained clothes the same way you would a sink full of greasy dishes – remove grease from the surface with dish-washing liquid.  Dish detergent is designed to break up surface grease and allow it to rinse away.

  • Place the garment stain-side down on white paper towels. (Printed paper towels could transfer ink color to your clothes.)
  • Squirt a dime-size amount of dishwashing liquid on the backside of the grease stains. Gently rub the dish detergent into the stain center and work your way to the edges. Give it a minute or so to work its breakdown magic.
  • Rinse the treated area under warm to hot running water for a minute or so to remove the dish detergent. The water temperature will depend on what the fabric can handle. For 100 percent cotton, you can usually use hot water.
  • Follow the rinse with a spin in the washing machine, using the hottest water that’s safe for the fabric and your regular laundry detergent.  If you can’t read the clothing label care tab, choose a warm water wash.

Laundry Detergent Pre-treatment

Rub a liquid laundry detergent into the stain, and let sit for 3-5 minutes.

Wash the stained item separately from the rest of your clothes in the hottest recommended water, adding a little bleach or bleach alternative to the wash water. Extend the wash cycle to give the garment some extra time in the spin cycle.

Absorbent Powder

Another good tip that works on grease stains that are fresh is to use absorbent powder (such as cornstarch, salt, baking powder or talcum powder).

  • Apply the absorbent of choice, and let it set until the powder has absorbed as much of the grease stain as possible. Brush away the absorbent remnants with a stiff-bristle brush.

WD-40 and Dish Detergent

Place the garment on paper towels, grease stain side up. Spray the greasy area with WD-40. Let stand 10 minutes.

  • Turn the garment over and spray the underside  as well. Allow to sit another 10 minutes.
  • Using paper towels, blot on some hand dishwashing liquid, replacing the towels as they absorb the grease.
  • Rinse the treated area, and wash separately from the rest of your laundry.

Lestoil Heavy Duty Cleaner

Lestoil Heavy Duty Cleaner is made by Clorox. It safely removes oil spots, grease stains and tar from washable fabrics. It’s effective and easy to use, but it does have a very strong smell.

Simply pour Lestoil onto the greasy stain and let it soak in for about 20 minutes before washing. And if you’re washing a huge greasy load of laundry, add some to the wash water to get the load clean and grease-free.

Lestoil is also good for removing stains from fabric on sofas, chairs, carpets, and concrete driveways.

Last But Not Least

Inspect the treated area before drying to ensure the greasy stains are completely removed. If you can still see any residue, repeat the pre-treating and washing process until clear.

Then, go ahead and dry the garment as usual.


Read More 6 Ways to Cut Down Energy Costs In The Summer

The Importance of Sorting Clothes


Interestingly enough, you’ll find several different opinions when it comes to sorting your laundry.  Our method is certainly not the only way.  If you have a method that works for you, then by all means keep doing it!  But if you’re getting worn out, torn or discolored clothes, then this article is for you.

What’s the reason to sort clothes in the first place? Do you really need to sort clothes at all?  In our opinion, you do.  Sorting clothes allows you to use different wash cycles (delicate, normal, permanent press) and also allows for washing in different temperatures.

Most importantly, sorting clothes decreases the chances that a garment is going to bleed onto another when you control the cycle type and water temperature.

Sorting Clothes by Color

There are several distinct piles in which to sort clothes: whites, darks, lights, jeans, and delicates.

∙Whites:  T-shirts, underwear, socks and other similar items fall into this category.  This pile is for white sturdy cottons that can withstand normal agitation in the washer on a warm or hot wash cycle.

∙Darks: Grays, blacks, navies, reds, dark purples and similar colors are sorted into this load.

∙Lights: More pastel-type colors such as pinks, lavenders, light blues, lights greens and yellows are placed in this pile of laundry.

∙Jeans: All items with denim material are washed together in this load.

∙Delicates: This category includes several types of clothing – lingerie, washable silks, and any clothing you’d like to keep from the harsh agitation of the washer.

Sorting Clothes by Fabric Weight

Please note that color is not the only consideration when sorting clothes. The weight of the garment should be considered as well.

For example, if you have several pairs of heavy cotton pants, or denim, then you don’t want to wash those with thin t-shirts.  Washing light- weight clothes with heavy material can possibly tear or rip those garments.

If they are placed in the dryer together, they obviously won’t dry at the same rate since one fabric is much heavier than the other.

It’s best just to separate these types of garments from the start and wash them in two separate loads.

Read More 6 Ways to Cut Down Energy Costs In The Summer

Choosing the Correct Water Temperature


Most people think the way to get the job done is to wash everything in a single load with cold water. That way, you get it all done at once, and there’s no color transfer between clothes, but that’s not always the case.  Washing everything together in cold will prevent color transfer, but unfortunately it won’t get everything clean.


When to wash in hot water

Hot wash works well on ground-in and hard-to-remove dirt on sturdy fabrics.

Generally speaking, you should wash white clothes in hot water. Washing colors in hot water is also recommended if the clothes are really dirty or greasy, and they’re made of sturdy, color-fast fabric. (Wash them separately, of course.)

Use it to clean seriously soiled sturdy garments (gardening or children’s clothing), and to regularly disinfect dish towels, washcloths, bath towels, bedding, and pillowcases.

Light and dark fabrics should be separated as hot water may cause these clothes to bleed.

Delicate and coarse or sturdy fabrics should be separated to prevent abrasion and protect clothes from wear and tear.


When to wash in warm water

Warm water (or permanent press wash setting) minimizes color fading and wrinkling. Wash light clothes, as well as regular and sturdy fabrics, towels, jeans, 100 percent manmade fibers, and blends of natural and manmade fibers. It’s also appropriate for moderately dirty clothes that don’t need the extra power of a hot water temperature wash.


When to wash in cold water

Washing clothes with cold water will protect most dark or bright-colored clothing from running and minimizes shrinkage. Use the cold wash cycle for lightly soiled fabrics and clothes with blood, wine or coffee stains, dark or bright colors that may run or fade, delicate fabrics including washable silk, Spandex swimsuits, and active wear; and delicate lingerie. It’s also okay for lightly soiled clothes.

There’s a misconception that washing clothes in cold water won’t get clothes clean. This is because detergent is formulated for, and fully activated in, warm water. Cooler water won’t fully activate detergent, which means you’ll need to use more to make up for the temperature difference to get your cold wash clothes clean. Thankfully there are several brands of detergent that are designed to work in all temperatures. Tide, Arm & Hammer, All, and Wisk are just a few that we recommend.


Read More 6 Ways to Cut Down Energy Costs In The Summer

Three Simple Steps For Laundry Perfection

We’ve all done our share of laundry, but some of us have figured out a way to perfect it. Here are some of my favorite tips to keeping your clothes looking great and lasting longer.

Step One: Wait Before You Wash

Wear your clothing more than once. I know this might make some of you say “Gross!” but it’s really not.  You know if something needs to be washed.  If it reeks to high heaven – it needs to be washed, but over the course of an average day, clean people don’t get that smelly. Of course it depends on the activity you do during the day as well. Wearing your clothes at least twice before laundering them can save you a bundle on water and electric bills over the course of a year and save your clothes from wearing out before their time.

(Side note….I’m not talking about underwear & socks.  They need to be changed daily.)

Step Two: Divide and Conquer

Admit it, most of you will stuff everything in the washer to make one load. I get it, you want to save time and money, but this is hard on your clothes and they probably aren’t getting as clean as you think they are.  I sort laundry by “lights” and “darks”, which seems to be the traditional way of doing laundry.  Sorting clothes allows you to use different wash cycles (delicate vs. normal) and also allows for washing in different temperatures.

Most importantly, sorting clothes decreases the chances that a garment is going to bleed onto another when you control the cycle type and water temperature.

Step Three: Chose the Correct Wash Cycle & Water Temperature

Take a minute to read the labels on your clothing. You’ll find the information you need to choose both your water temperature and the type of washing cycle. Following the recommendations on the label is especially important if you are new to doing your own laundry or if the garment is new.


Read More 6 Ways to Cut Down Energy Costs In The Summer

How to Use Baking Soda in Your Wash

It may sound like an old wives tale, but adding baking soda to your liquid laundry detergent will make your colored clothes brighter and your whites whiter. Baking soda is a natural deodorizer and cleanser.  It also softens the water, which means you can use less detergent. It also helps keep your machine clean too.

Whites and Brights: Add a 1/2 cup of baking soda to the wash when you add your regular liquid detergent.

Crayons in the Washing Machine: If crayons have accidentally been washed with a load of clothes, there may still be hope. Rewash the clothing in the hottest water allowable for the fabric and add a 1/2 box to a box of baking soda.

Aged Linens: Baking soda can be very effective at removing stains brought on by age. Because it’s a natural cleaner, you can trust that your older linens will be whiter and brighter rather than damaged.

Fabric Softener: Instead of using fabric softener, try adding a 1/2 cup of baking soda to the rinse cycle. It acts as a natural softener and is gentler for family members with sensitive skin.

Odors: Add baking soda to the rinse water. Adding 1/2 cup of baking soda to the rinse cycle helps remove odors from clothes and also softens them naturally.

If your clothes smell like sweat or smoke, it’s best to let them soak in a baking soda solution overnight. This gives the baking soda time to really work as a deodorizer.

  • Mix a cup of baking soda with a gallon of water in a bucket.
  • Add your clothes to the bucket and swirl them around to make sure they are fully soaked.
  • Leave the clothes overnight and launder them the next day.

Increase Bleach Potency: Adding 1/2 a cup of baking soda in top-loading machines, or a 1/4 cup for front loading machines, will increase the potency of the bleach, so you only need to use half the amount to get the same effect.


Read More 6 Ways to Cut Down Energy Costs In The Summer
bottom Gears Mobile bottom Gears