Always Wash New Clothes
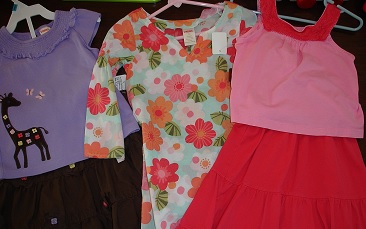
There are three good reasons to wash new clothes, especially those that are worn in direct contact with your skin, before you wear them.

  • One is to wash out extra dye that can be transferred to your skin or other garments. Most fabric made from synthetic fibers (polyester, acrylic) are colored with azo-aniline dyes. These dyes can cause severe skin reactions for those who are allergic to them. If the allergy is severe, the rash will be similar to poison ivy. But even less severe reactions can cause dry, itchy inflamed patches of skin.
  • It is possible to transfer lice, scabies, bacteria and fungus from person to person when clothes are tried on. Dressing rooms can become breeding grounds for everything from viruses to athlete’s foot.
  • And, most importantly, to remove the chemical finishes that manufacturers put on clothes to enhance color or texture. The finishes won’t bother everyone, but if you have sensitive skin you can develop a rash especially in constant contact areas like armpits, collars, cuffs and trouser waists and thighs.

Urea formaldehyde is often the chemical used to prevent mildew on clothes that have to be shipped long distances in hot, humid containers from overseas to the United States. It has a very strong odor that will remain in the fabric until the garment is washed. One washing will not remove formaldehyde completely but you will reduce the build up significantly and it will continue to be removed with each wash.
It is especially important that children’s clothing, especially clothes for babies, be washed before they are worn. Babies are particularly sensitive to chemicals and skin rashes can occur. Select a detergent that is fragrance free and dye free as these can also cause skin reactions. Washing the clothes for children will also make them softer and more comfortable for them to wear.

Washing new sheets/blankets and towels is also important to remove chemicals since these come in direct contact with skin. Washing will also improve the absorbency of the fabric by removing surface fiber coatings.
If you have a tag on the garment that reads “wash separately before wearing”, beware of dye transfer and color bleeding. Washing will help remove the excess dye but check the rinse water. If color remains in the water, it make take several wash cycles to get rid of the excess dye so continue to wash separately or with similar colors.

Read More 6 Ways to Cut Down Energy Costs In The Summer

Prevent Colors from Fading


The best way to keep colors from fading is to wash your clothes as little and as gently as possible. Water, the friction from agitation, detergent, and drying all contribute to pulling out the bright colors from your clothing. Hand-washing and line-drying aren’t practical, so you need to learn how to wash clothes in the machine to minimize color fading.

Wash Dark Colors Together

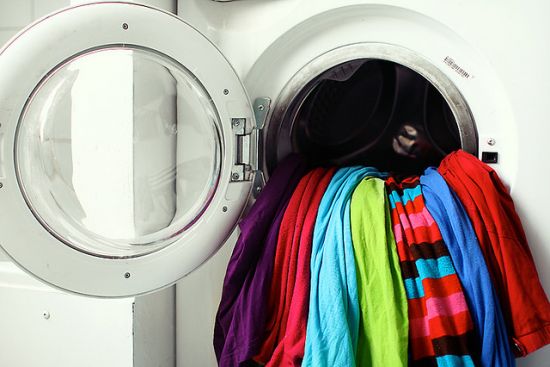
Anyone who has ever washed one red sock with an entire load of whites knows the pain that can happen when colors fade away. To prevent dark colors from fading, keep like colors together.

Turn Clothes Inside Out

Some of the wear and tear that happens on your garments can be prevented by turning them inside out before washing and drying. Washing and drying clothing is rough on the outside of your clothing. Turning garments inside out reduces pilling, which dulls the look of the fabric. It’s even more important to turn clothing inside out when you hang clothes outside to dry. While the sun is an excellent and efficient drying tool, it will take the colors right out of your clothing.

Read the Care Label

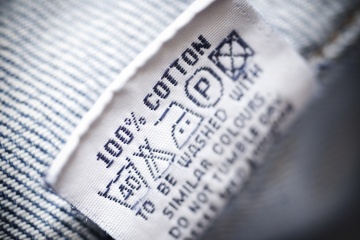
It takes only a few seconds, but reading the care labels may save a lot of heartaches when your clothes come out of the wash. Check for instructions, which might say to wash only in cold water, or with like colors. Don’t forget to check for drying instructions as well. The label may indicate that the clothing needs to be dried on low, or drip-dried.

Don’t Stuff the Washer (and Dryer!)

Stuffing the washer to capacity is tempting, but it comes with several negatives. It makes the machine work harder, and it is tougher on your clothes. The detergent and rinse water aren’t distributed properly, and clothing doesn’t come out as clean when it is packed into a washing machine. Similarly, clothing takes a lot longer to dry when a dryer is stuffed. Let the items move freely by leaving a bit of room.

Wash in Cold

One of the best pieces of laundry advice is to wash colors in cold. Detergents have come a long way in recent years, and most perform just as well in cold water as they do in hot or warm water.

Don’t Over-dry

It’s easy to let clothing over-dry. While this is bad for all laundry, it is particularly bad for bright and dark colors. Over-drying will cause your colors to fade. Clothes should be slightly damp when they are pulled from the dryer. Since drying adds heat and friction to the equation, it’s even better to line-dry clothes to retain colors. Again – just remember to turn colored items inside out to prevent fading from the sun.

Read More 6 Ways to Cut Down Energy Costs In The Summer

Laundry Myths – Debunked

Some laundry tips are nothing more than old wives’ tales and are simply a waste of time and money. Below are a few laundry myths debunked with some real information you can use that will make laundry easier. 

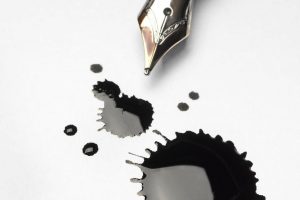
Hair Spray To Remove Ink

The idea of using hair spray to remove ink from laundry began in the 50s and was actually a valid tip back then. It was the alcohol in hair spray that worked on the ink stain. However, today’s hair sprays are different from those aerosols of the 50’s. Today, most hair sprays don’t even contain alcohol and can actually cause stains themselves or set the ink in.

Begin by wetting a cotton swab with isopropyl or rubbing alcohol ( test the fabric to be sure the alcohol does not damage or discolor the material). Start by working from the outside of the stain to the inside, dab the spot with the swab. Change to a new swab as ink is absorbed to keep from redistributing the ink.

If traces of the ink remain, mix a solution of oxygen-based bleach (OxiClean, Clorox 2, Purex 2 Color Safe Bleach) and cool water. Follow the package directions as to how much product per gallon of water. Completely submerge the garment and allow it to soak for at least eight hours, then check the stain.

If it’s gone, wash as usual as directed on the label. If it remains, mix a fresh solution and repeat. It may take several soakings to remove the stain but it should come out.

Use More Detergent To Get Cleaner Clothes

More is not better when it comes to laundry detergent.  Most of us, at some time or another, are guilty of using too much detergent.  This creates excess suds that actually redeposit soil onto our clothing. 

We recommend using half as much detergent as recommended and see if you are pleased with the results. You can always add more but you can’t take it out. Most detergents these days are highly concentrated and don’t require as much as in the past.

Hot Water Kills All Laundry Germs

Unfortunately, using hot water alone for laundry does not kill all germs and bacteria. Washing clothing or linens of someone who is ill can spread the germs throughout the entire washer whether you use hot or cold water. Only a disinfectant like bleach, pine oil or a phenolic disinfectant (Lysol) will sanitize the laundry and the washer.

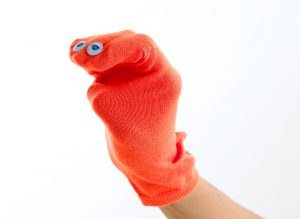
The Sock Monster

Most missing socks are not eaten by a monster in your washer or dryer or even trapped in the machine. (You would know if a sock got into the motor of either one pretty quickly.)

Most socks disappear between leaving the foot and the clothes hamper or the clothes hamper and the machine. Check behind your washer and dryer for a stash of socks that have fallen, or check the inside of pant legs for those secret clingers due to static.

Keep a basket or bin or mesh bag in the laundry room or near your clothes hamper for all those extra socks. Once a month go through and sort and match or just buy one kind of sock so they all match!

Read More 6 Ways to Cut Down Energy Costs In The Summer

Laundry Tips & Tricks Your Mom Never Taught You

Ok, so maybe your Mom did tell you about  these tips and tricks, but in case she didn’t, we’re here to help you out.  Sometimes there are just some laundry care tips that don’t fit into any particular category. You’ll be surprised after you read through these when they just might come in handy.

  • Before you wear a new garment, put a little dot of clear nail polish on the front and back threads of each button. Buttons will stay on longer when the threads are sealed.
  • Zippers won’t stick if you rub them with the edge of a bar of soap.
  • To remove a hem crease, sponge the line on the fabric with a clean white cloth dipped in distilled white vinegar and then press with a warm iron from the wrong side of the garment.
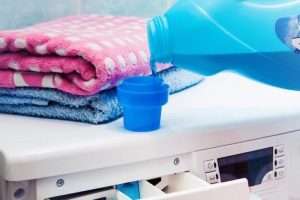
  • When washing clothes, add detergent to the washer first. Pouring detergent on clothing can leave streaks and even cause fabrics to fade.
  • Avoid getting perfume, aftershave or hair spray on leather because the alcohol may ruin the finish and color.
  • Wash nylon clothing every time after wearing. Nylon is very hard to clean once it becomes heavily soiled. Treat any oily stains immediately after they happen with warm or hot water to prevent them from becoming permanent..
  • NEVER use an acetone-based nail polish remover on garments to remove stains! The acetone will dissolve the fabric!
  • Knit garments should always be folded to store on a shelf or in a drawer. Hanging knits can cause them to stretch completely out of shape.
  • Turn all clothes inside out before washing to prevent fading and keep the right side looking like new.
  • If you don’t have a mesh laundry bag for washing your delicate fabrics, place them in a pillowcase and fasten the loose end with a plastic bag tie or shoelace before tossing it in the washer.
  • To reduce wrinkles, wet a hand towel with water, wring out the excess water and toss in the dryer with wrinkled items. Dry on high for about five minutes. Remove the clothes while still damp and hang to dry.
Read More 6 Ways to Cut Down Energy Costs In The Summer

How to Wash Hats Without Ruining the Shape


There comes a time when your favorite hat needs a good cleaning. But before you start, take time to look at the little tag on the inside to get an idea of the fiber content and the manufacturer’s cleaning instructions. Of course, your tag may be gone or unreadable so, we’ll cover instructions for safe cleaning of almost any type of baseball cap.

Newer baseball hats are often made of cotton twill, cotton polyester blends or jersey mesh. These fabrics are strong and durable and usually colorfast. New hats use a plastic form to shape the brim, not cardboard. These plastic forms can withstand a wash without becoming deformed.

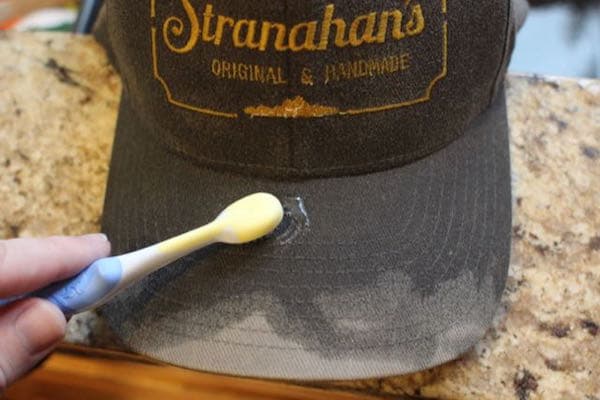
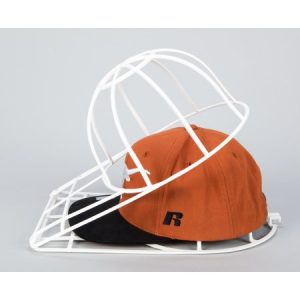
To clean, pre-treat exceptionally dirty areas like sweatbands with a solvent-based spray or gel like Shout or Spray ‘n Wash or a bit of heavy duty laundry detergent like Persil or Tide. These detergents have enough enzymes to break apart body soil and oil grime. Wash the hat with the rest of similarly colored clothing on the delicate cycle using cool water. Do not use bleach. If you are very concerned with protecting the shape of the hat, you can use a specially designed hat form and toss it in the washer.

Allow the hat to dry in the form or over a large coffee can or other head-shaped container. Do not put baseball hats in the dryer because excessive heat and tumbling action can distort the hat’s shape.

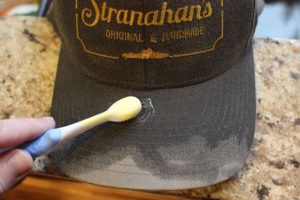
If the hat has a cardboard or paper filled bill, you will have to do spot-cleaning only. Use a soft-bristled brush and scrub the stained areas with a heavy-duty detergent/water mixture. Do not over wet the area. Blot with a clean white cloth dipped in water. Allow to air dry. You may need to repeat the steps several times.

You’ve probably heard of washing hats in the dishwasher on the top rack. I wouldn’t recommend this because dishwasher detergents are harsh and often contain bleach that can ruin your hat. Also, the high temperatures aren’t good for the fabric and may cause the hat to shrink.

Cleaning Newer Wool Baseball Hats

Wool baseball hats should be hand washed using cool water and a mild detergent designated for wool. Be gentle and don’t scrub or twist the fibers. Rinse well in cool water and roll gently in a thick towel to absorb most of the moisture. Allow to air dry on a head-shaped object. If you dry your wool hat on your own head, it will dry to the precise shape of your head and cause it to be too tight.

Cleaning Older or Commemorative Baseball Hats

Commemorative hats should always be stored in a covered case to prevent dust and grease from accumulating on the hap. These should only need a light dusting or brushing to keep them at their best. Always store away from direct light and intense heat.

If a deeper cleaning is needed, first do a colorfastness test. Using a white cloth with a bit of mild detergent, gently rub an inconspicuous area of the cap.

If there is color transfer, do not proceed. If it is colorfast, continue using the cloth to clean the entire hat. Do not immerse the hat in water. The bill may be shaped using cardboard that will dissolve. Rinse your cloth in clean water to “rinse” the hat. Air dry on a head-shaped container.

If you have an autograph that you want to preserve, keep the hat in a dark, air conditioned space to prevent fading and mold or mildew from forming. If you want to wear the autographed hat, protect the signature by covering the signed area with a white, pressing cloth and iron the area on high heat.  This will help set the ink.


Read More 6 Ways to Cut Down Energy Costs In The Summer

Easy Grease Stain Removal

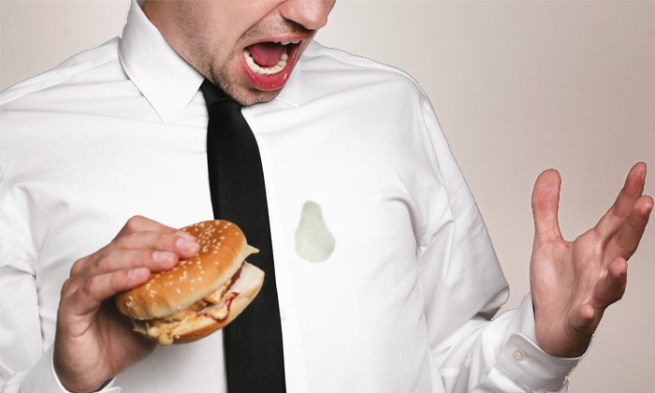
No matter how hard you try, sometimes you get a greasy, oily stain on your favorite shirt or pair of pants.  Don’t worry, they don’t need to become a permanent memory on your clothes.  With some regular cleaning products you probably already have, and a couple that might be worth purchasing, grease stain removal is a breeze.

Dish Soap & Hot Water

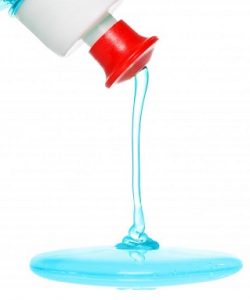
Treat the stained garment by removing grease from the surface with dish-washing liquid. Dish detergent is designed to break up surface grease and allow it to rinse away.

  • Place the garment stain-side down on white paper towels.(Don’t use printed paper towels – it could transfer ink color to your clothes.)
  • Squirt a dime-size amount of dish-washing liquid on the backside of the grease stains.Gently massage the dish detergent into the stain center and work your way to the edges. Give it a minute or so to work.
  • Rinse the treated area under warm to hot running water for a minute to remove the dish detergent. The water temperature will depend on what the fabric can handle. For 100% cotton, you can use hot water.
  • Follow the rinse with a spin in the washing machine, using the hottest water that’s safe for the fabric and your regular laundry detergent. If you can’t read the clothing label care tab, choose a warm water wash just to be safe.

Laundry Detergent Pre-treat

Rub a liquid a laundry detergent into the stain, and let it sit for 3-5 minutes. Wash the stained item separately from the rest of your clothes in the hottest recommended water, adding a little bleach or bleach alternative to the wash water.

Extend the wash cycle to give the garment some extra time in the spin cycle. With a top-loading washer, wait 6-8 minutes into the cycle, stop it, and spin the dial back for another 10 minutes.

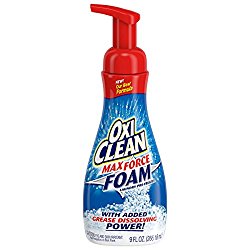
For really tough, greasy stains, OxiClean Max Force Foam Laundry Pre-Treater 9  is one of the toughest grease stain busters around.

WD-40 & Dish Soap

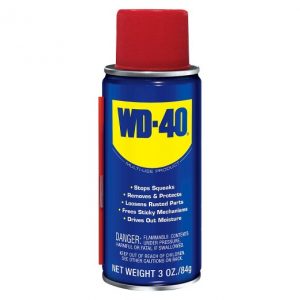
Place the garment on paper towels, grease stain side up. Spray the greasy area with WD-40. Let stand 10 minutes. Then turn the garment over and spray the underside  as well.

Allow to sit another 10 minutes.  Using paper towels, blot on some hand dishwashing liquid, replacing the towels as they absorb the grease. Rinse the treated area, and wash separately from the rest of your laundry.

Last, but not least, inspect the treated area before drying to ensure the greasy stains are completely removed.

Before placing the garment in the dryer, inspect the formerly greasy area. If you can still see any residue, repeat the pre-treating and washing process until clear. Then, go ahead and dry the garment as usual.


Read More 6 Ways to Cut Down Energy Costs In The Summer

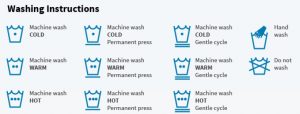
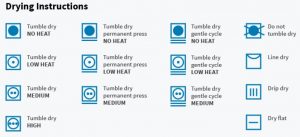
Decoding Laundry Symbols

As if life wasn’t confusing enough with emoji’s and acronyms – now we have to deal with squares, circles, triangles, lines and dots on the labels of our clothing! However, clothing-care symbols are a code worth knowing.

The American Society for Testing and Materials, ASTM International, put out a standardized set of care symbols with the goal of creating a universally understood “laundry language”.

ASTM symbols follow a simple scheme and a set order: wash (tub shape), bleach (triangle), dry (square), iron (iron) and special care (circle). A circle by itself usually means dry cleaning or wet cleaning. A circle (special care) inside a square (drying) changes “dry” to “tumble dry.”

Adding lines, dots and other marks modify these base symbols and adds info. For example, a large X through a symbol offers a warning, where an empty symbol often means that any version of what the symbol represents is OK to use. A crossed-out triangle means do not bleach, where an empty triangle tells you that any bleach will do. Adding two parallel diagonal lines means to use only non-chlorine/oxygen bleach.

Clear as mud?  Don’t worry, I’ve included a chart to help you decipher what seem to be ancient Egyptian hieroglyphics:


Read More 6 Ways to Cut Down Energy Costs In The Summer

When to Skip the Fabric Softener

Fabric softeners and dryer sheets make our clothes and linens feel soft and fluffy, smell great and remove static, but did you know there are certain types of fabric that should NEVER have fabric softeners? Before you wash, please read. I’ll list some effective alternatives below as well.

Athletic Wear

Most workout clothes are designed to wick moisture away from your body and dry quickly. Fabric softeners and dryers sheets leave a coating behind, that cause moisture to become locked into the fabric and keep it from drying. This leads to permanent odor from the bacteria locked in the fabric. Wash these garments in a cold, gentle cycle and air dry.

Microfiber Cloths

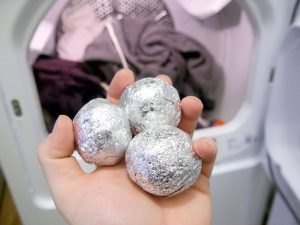
Microfiber is relatively durable, but it becomes pretty useless when the fibers absorb the waxy residue that fabric softeners and dryer sheets leave behind. It’s tempting to use because microfiber is notorious for static cling when it comes out of the dryer. Instead, try tossing a ball of aluminum foil in the dryer with microfiber items to release the static charge.

Children’s Sleepwear

 Most infant and child sleepwear is designed to be fire resistant for safety reasons. Wax from fabric softener residue can cause the fabric to lose its fire-resistance quality and can make it highly flammable. Instead of using fabric softener or a dryer sheet, add vinegar to the rinse cycle in the washer. It will soften the fabric and reduce static cling. For those extra static clingy PJs, do the vinegar rinse in the washer AND add a foil ball in the dryer.

Alternatives

Soften and reduce static cling with these gentle, fabric-friendly options:

Vinegar Rinse

Add ½ cup distilled white vinegar into your washer’s softener dispenser (or use a Downy ball). The smell will disappear in the dryer.

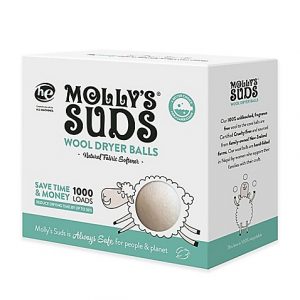
Wool Dryer Balls

You can find wool dryer balls on Amazon for about the same price as a couple of bottles of fabric softener except these will last A LOT longer. Toss 5-6 into the dryer to soften a load of clothes. They’ll also help larger loads dry more quickly and evenly.

Aluminum Foil

Grab the Aluminum foil from the cabinet, pull a 12”-18” sheet and crush it into a ball. Toss one into the dryer to reduce static. The ball will shrink and tighten as it’s used. Replace once the edges begin to crack or pull apart.


Read More 6 Ways to Cut Down Energy Costs In The Summer

Removing Red Wine Stains from Silk

Red wine spilled on silk is one of the hardest stains to remove. If you act quickly, you should be able to effectively remove the stain before it sets.

Note: Silk is a delicate fabric, always do a test patch in a discreet area on the fabric before using it on the stain.

Step 1 – Be Quick

If you spill red wine on your silk blouse, tie, or upholstery, the faster you work on it, the more successful you’ll be at removing it. Allowing it to dry will make it almost impossible to get out. If you’re in a restaurant, or otherwise away from home, and unable to work on the stain, blot it with a napkin or paper towel to get as much of the wine out as you can. Do not rub – it will only grind the stain into the fabric and make it harder to remove.

Step 2 – Try Homemade Remedies First

Homemade remedies don’t contain a lot of harsh chemicals that can damage delicate fabrics like silk, so it’s always best to give them a try before moving on to something stronger.

Try mixing a solution of one half hydrogen peroxide and one half cold water and letting the stained area soak in it overnight. If it doesn’t come out the first time, pour out the mixture, mix up a fresh batch, and soak just the stained area again. This may take several attempts and you’ll need to blot the area in between each application. If it’s a bad stain, use full strength peroxide. Don’t allow the stained garments to dry until the red wine is completely gone.

Again….do a test patch in a discreet area on the fabric before using it on the stain.

Another effective solution is mixing Dawn dishwashing liquid and warm water. Soak the affected silk, and then rinse just the stained area with cold water. You may need to soak it a few times. I’ve read some have tried vinegar or rubbing alcohol mixed with Dawn and been successful.

If a slight stain remains, dab rubbing alcohol onto it; then, put a cloth soaked in alcohol on top of the stain to keep it wet and let it sit. Blot the moisture away to remove the wine. Repeat if necessary.

Step 3 – Try Commercial Cleaners

There are several good commercial cleaners on the market for removing red wine as well.

Spray and Wash works well on red wine stains, while remaining gentle enough for silk. Spray it on, keep the area wet and blot away as much of the wine as possible.

Gonzo “Wine Away” is a very popular one that is available at most hardware stores. Follow the directions on the package and use in a well-ventilated area.

Again….I can’t stress enough….do a test patch in a discreet area on the fabric before using it on the stain.

Erado-Sol, a commercial cleaner, is the best over the counter cleaner and will remove 100 percent of the stain. It may be difficult to find, so I recommend looking online.


Read More 6 Ways to Cut Down Energy Costs In The Summer

Removing Makeup Stains from Clothing

Removing cosmetics from clothing can be a chore. Knowing the most efficient methods for removing makeup stains can save you a lot of time, money, and frustration.

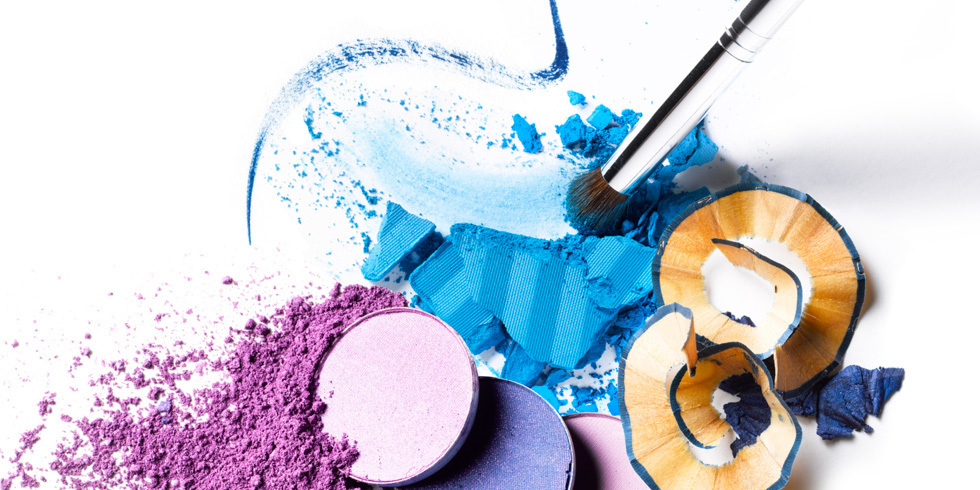
First of all, know the type of  makeup you’re dealing with: non-oily or oily. Non-oily are powder products like eye shadows and blushes. Oily types are lipsticks, cream blushes, and other liquid makeup. Each type requires a specific method of removal. So…..determine if your makeup stain is non-oily or oily.

Second, you should attempt to remove the stain as quickly as possible to avoid letting them set into your garments. Fresh stains come out a lot easier than when they’re left.

Lipstick

Lipstick is oil-based, and should be treated with a pre-wash stain remover before attempting to wash it out. Never rub the stain, as it only causes the lipstick to go deeper into the fabric. We recommend blotting the stain with a clean white cloth, and rinse the stained material in warm water (you want to use a white cloth to avoid any fabric dyes from transferring to the stain).  If the stain persist, apply a good liquid household detergent to the stain, but don’t rub, blot.

Rubbing alcohol will also remove lipstick stains. Again, using a white cloth, dab the stain with a small amount of isopropyl alcohol, then add a small amount of household detergent and wash the garment per the label instructions.

Liquid Makeup

Removing liquid makeup stains can be a battle. Try using Dawn dish soap as a removal agent. Liquid makeup is oil based, and we all know Dawn helps cut through grease.  Then add a small amount of household detergent and wash the garment per the label instructions.

Powder Blush or Eye Shadows

The first thing when you have a powder spill is to try and blow it off the garment. Sometimes that will be enough to get most of it off before laundering per your normal routine. Once you’ve done that, remaining makeup can be wiped off using a damp washcloth and a tiny amount of liquid soap.

Tip:

Be sure to read the care label on any garments before attempting to remove the stain. You may find the garment is “dry clean only” or discover other specifications that will determine your choice of stain removal.

Read More 6 Ways to Cut Down Energy Costs In The Summer
bottom Gears Mobile bottom Gears